Microsoft Edge has been enhancing its offerings to provide users with superior features and an improved browsing experience. One significant addition is the built-in ‘Wallet’ feature, which not only stores personal and confidential data like addresses, passwords, and payment information but also displays offers related to your saved payment methods and can automatically apply available coupons on websites.
If you’re interested in exploring more about the Wallet feature, you can check out our dedicated article on the topic.
While the Wallet isn’t entirely new, Microsoft’s redesign has propelled it ahead of competitors. This guide will show you how to efficiently manage your saved addresses in the Microsoft Edge Wallet, including adding new ones and deleting existing entries.
Manage Addresses in Microsoft Edge Wallet via Settings
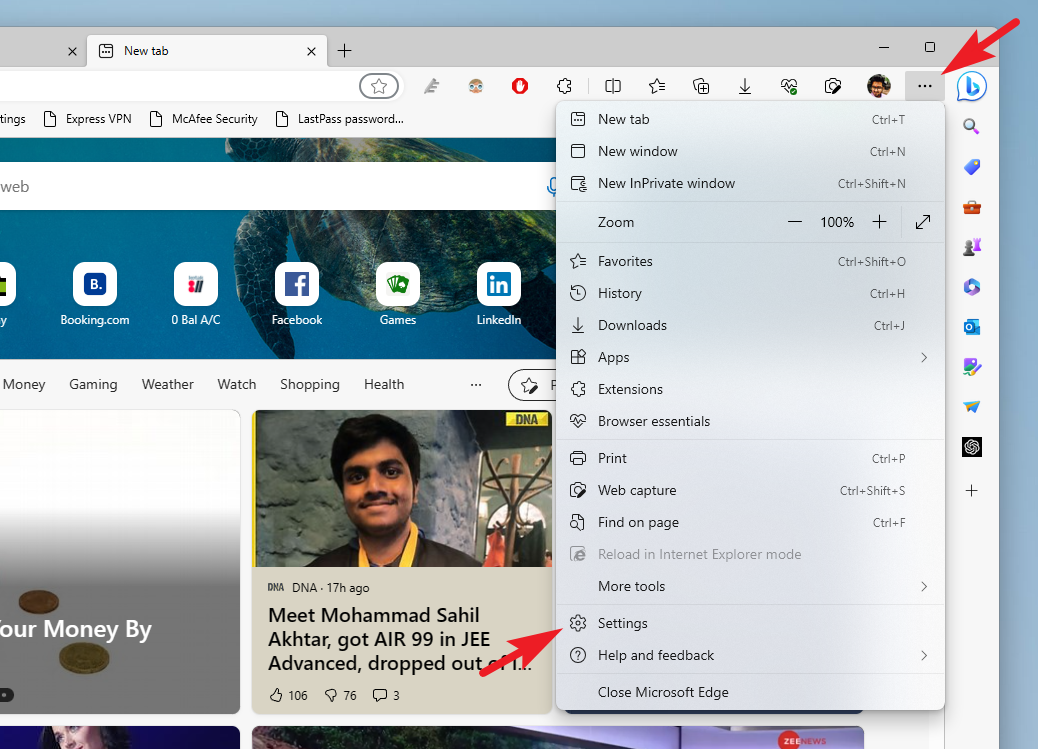
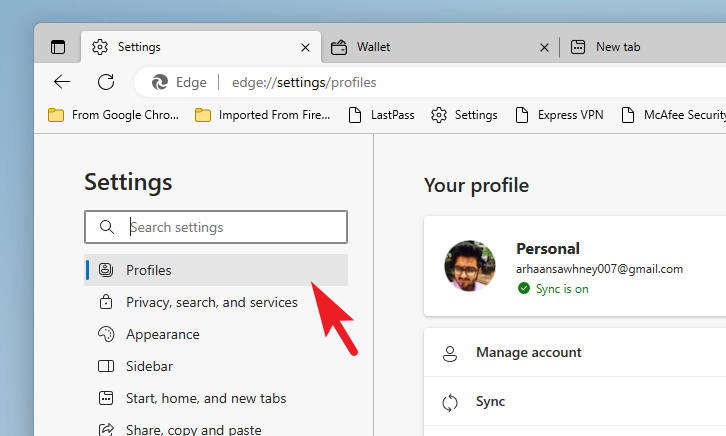

edge://wallet into the address bar and pressing Enter.
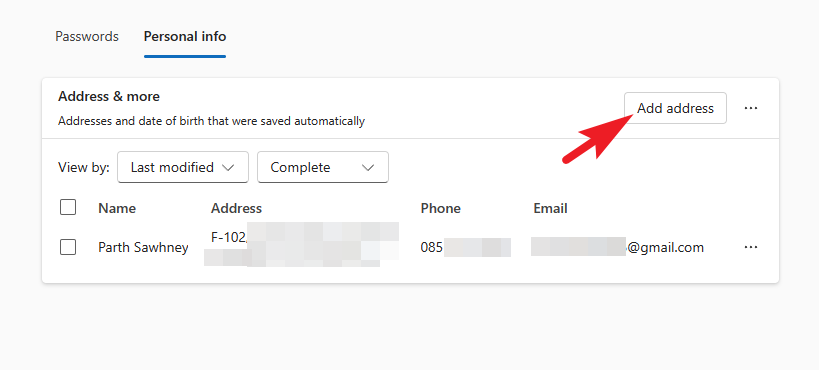
If you have any addresses saved, they will appear on this screen.
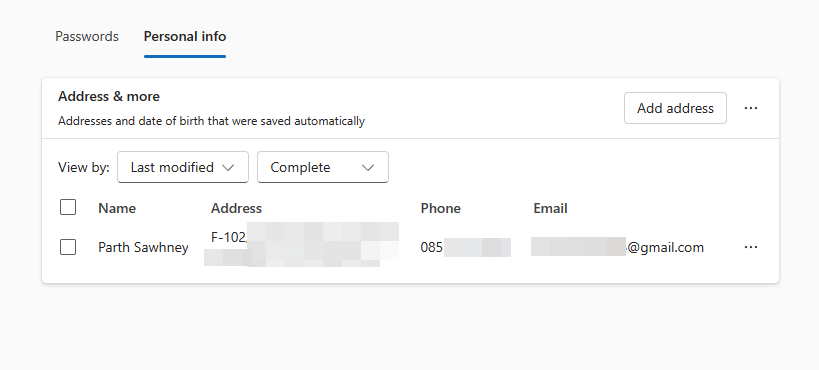
To add a new address, click on the ‘Add address’ button located at the top-right corner. This will open a new overlay window.
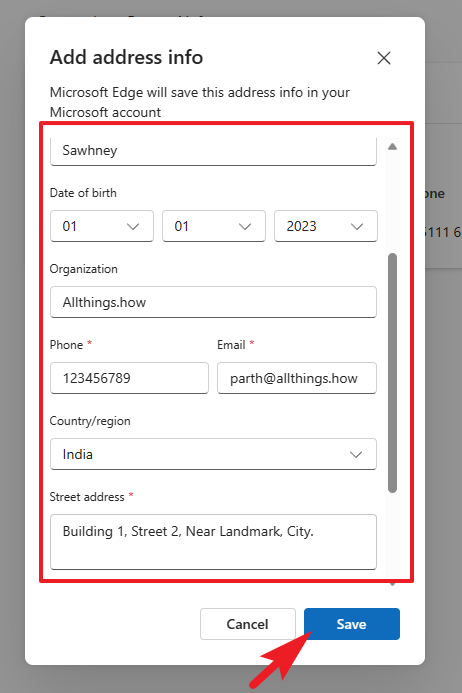
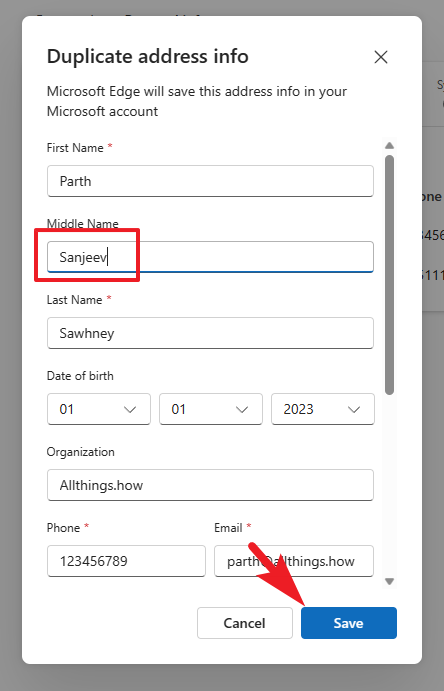
Fill in the required details such as your first and last name, date of birth, organization name, phone number, email address, street address, city, and state. After entering all the information, click on ‘Save’ to add the address to your Wallet.
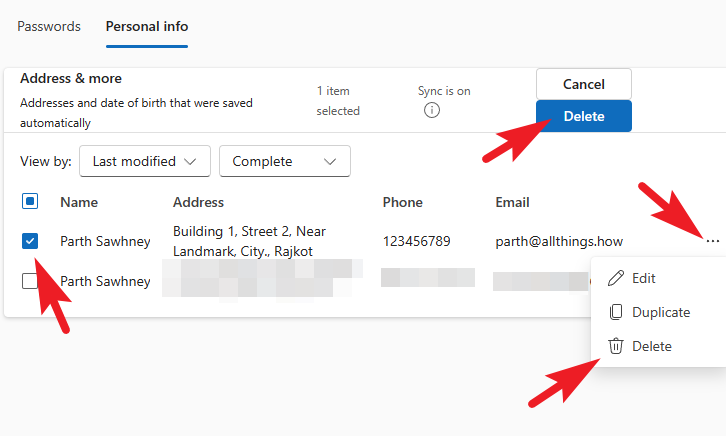
To remove an existing address, check the box next to the address you wish to delete and click the ‘Delete’ button at the top. Alternatively, you can click on the three-dot menu (ellipsis) beside the address and select ‘Delete’ from the dropdown options.
To edit or duplicate an address, click on the three-dot menu (ellipsis) next to the address you want to modify. From the menu, select ‘Edit’ or ‘Duplicate’ as needed. This will open the address details in an overlay window where you can make changes.
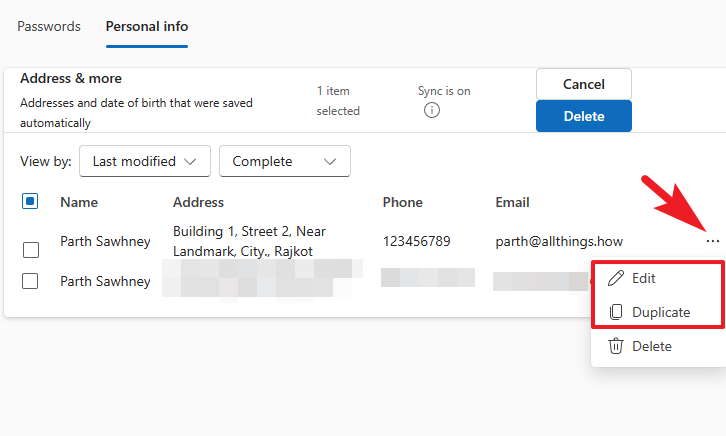
Make any necessary changes to the address details, then click ‘Save’ to update your information.
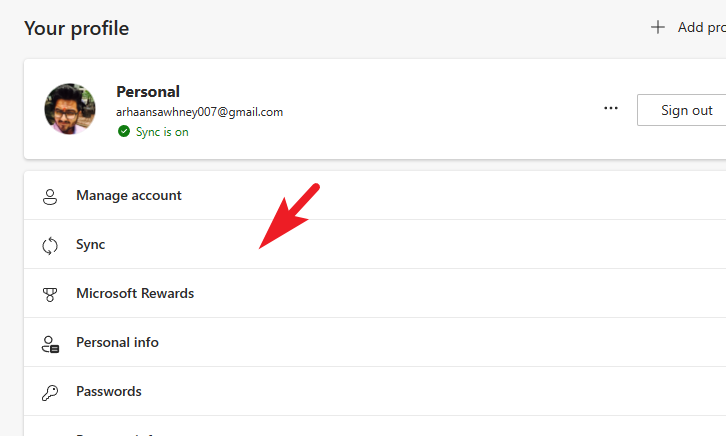
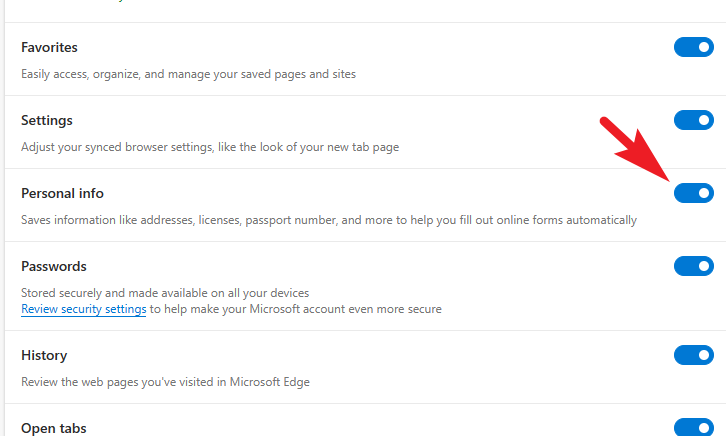
Turn on sync to update addresses on all devices
You can enable synchronization in Microsoft Edge to ensure that any changes to your saved addresses are updated across all your devices where you’re signed in with the same Microsoft account.
By adding your address to Microsoft Edge Wallet, you simplify the process of entering your information when needed. Additionally, enabling sync ensures that any updates to your addresses are consistent across all your devices linked with your Microsoft account.


