
iMessage comes in really handy when you don’t wish to rely on a third-party instant messenger to converse with other Apple users. But one of the best features of using iMessage has to be the continuity you get within the Apple ecosystem.
For instance, you can easily get iMessages you receive on your phone number on your macOS device. It’s far easier to set up than any other IM service and you won’t miss out on important work updates or messages even when your iPhone is not near you or you don’t want the distraction.
It also facilitates a better workflow by making it easier to respond as you no longer need to switch to a different device just to carry on a conversation. Plus, a full-size keyboard to type is a sweet advantage over a small phone keyboard.
It is a two-part process: Firstly, you will need to make sure you have the phone number selected for iMessage from your iPhone, and then you will need to enable it on your Mac.
Add Phone Number to iMessage Using iPhone
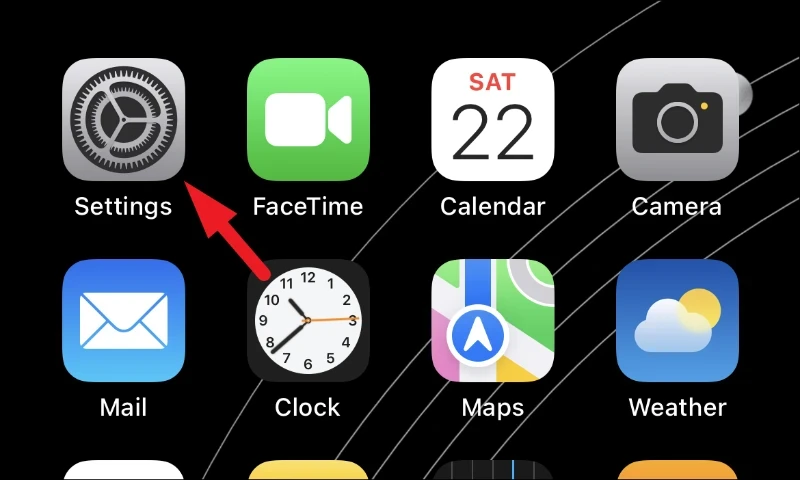
Adding a phone number using iPhone is a straightforward process. All you need to do is head to the Settings app and select your phone number to send and receive iMessage.
First, open the Settings app either from the home screen or the app library.
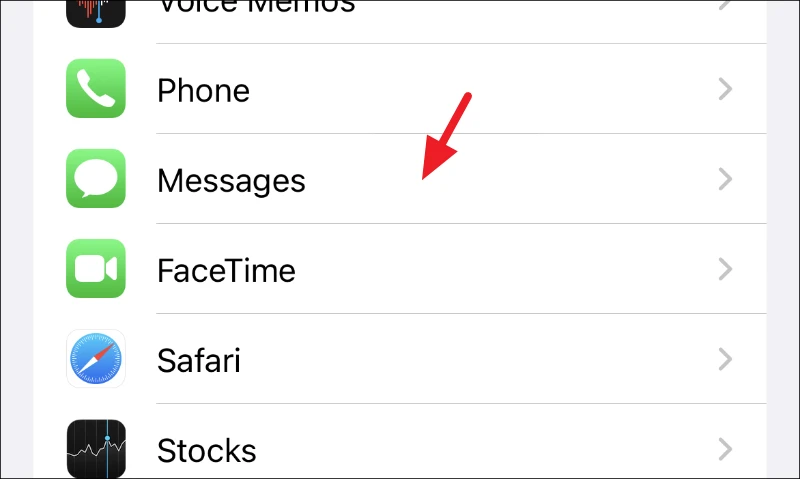
After that, tap on the ‘Messages’ tile from the list to continue.
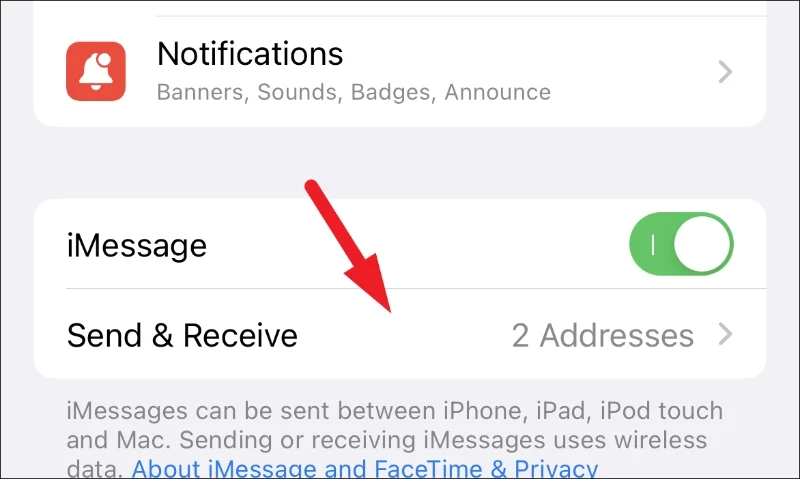
Next, tap on the ‘Send & Receive’ tab to proceed.
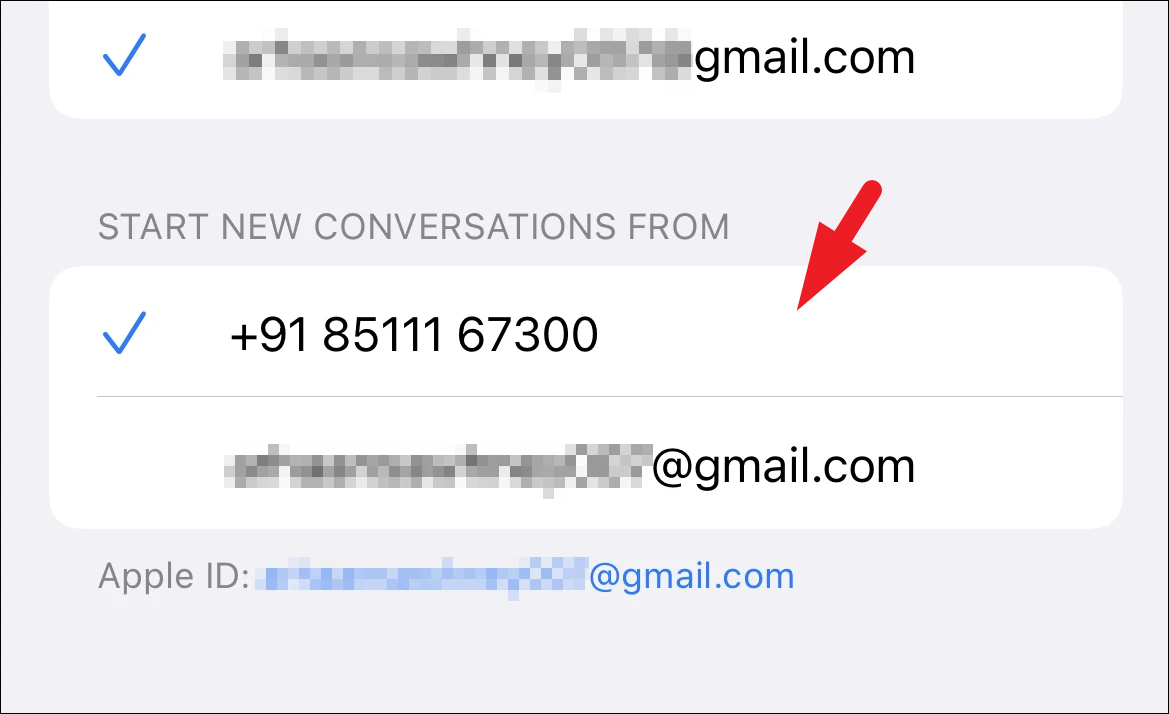
After that, tap on the phone number you wish to receive messages on from the list. You can choose both numbers to receive messages, in case you’re using two plans. Once selected, a ‘Blue Tick Mark’ will appear preceding it.
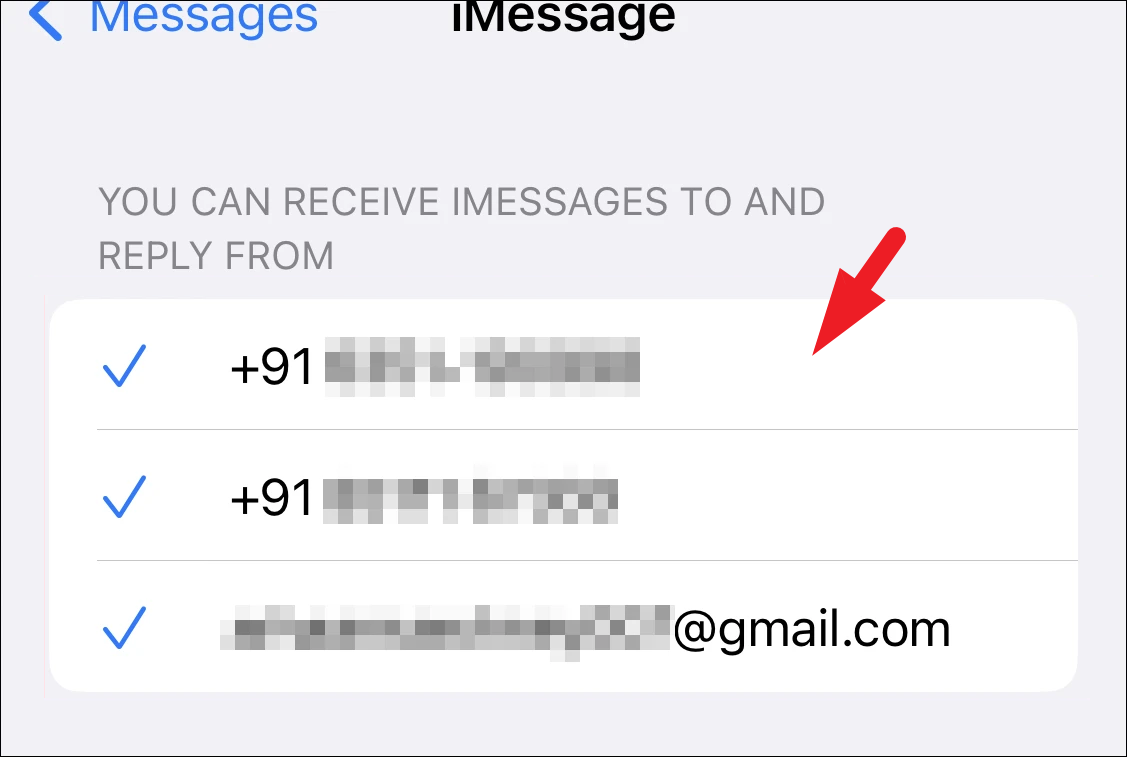
If you have multiple numbers, you’ll have to choose from which you wish to start the conversation by tapping on its tile. While you can receive messages on all your phone numbers/ email addresses, you can only use one to start conversations. It’s up to you whether you want to start them from your phone number or Apple ID.
If you are already signed in with your Apple ID on your Mac, you will receive a notification to add the number you just selected to iMessage. Click on the ‘Yes’ button to start receiving messages on your macOS device.
In case you are not signed in on the Mac with the same Apple ID, head to the next section to do so.
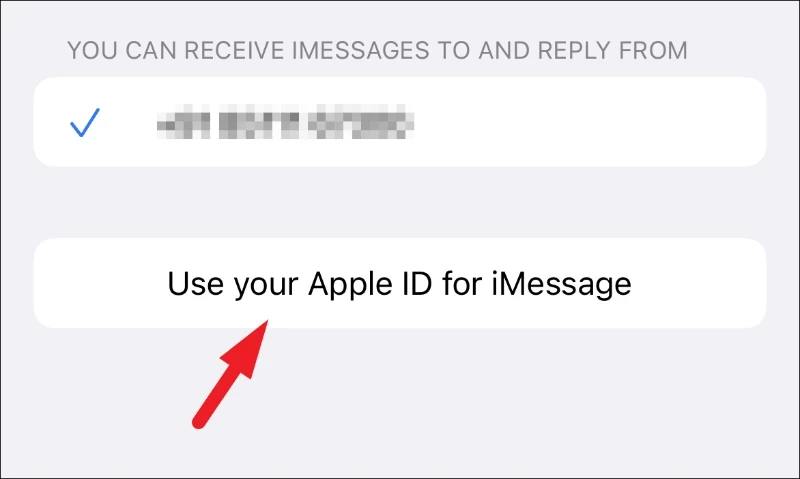
If you are not signed in using your Apple ID for iMessage on the iPhone, from the ‘Messages’ screen, tap on the ‘Use your Apple ID for iMessage’ button to proceed. This will bring an overlay alert to your screen.
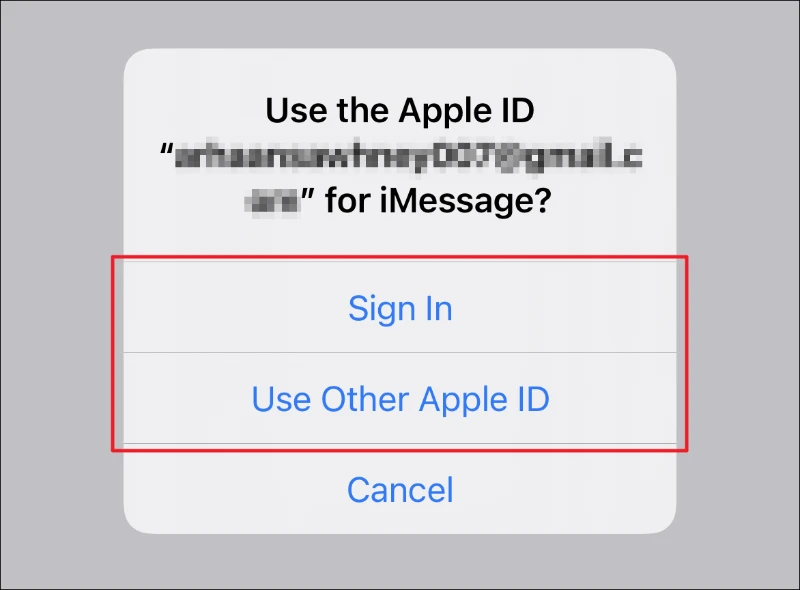
After that, if you wish to sign in using the same Apple ID for iMessages that you are using on your iPhone, tap on the ‘Sign In’ button. Otherwise, tap on the ‘Use Other Apple ID’ to continue.
Once signed in, select the numbers you wish to use as showcased above, and head to the Mac.
Receive iMessage on Mac
It is as simple to add the number using your macOS device as the iPhone, if not more. However, before you proceed, make sure you are signed in using the same Apple ID on your iPhone as well. In case you are not, use the previous section in this guide to do the same.
Now, launch the Messages app from the launchpad or the dock of your Mac.

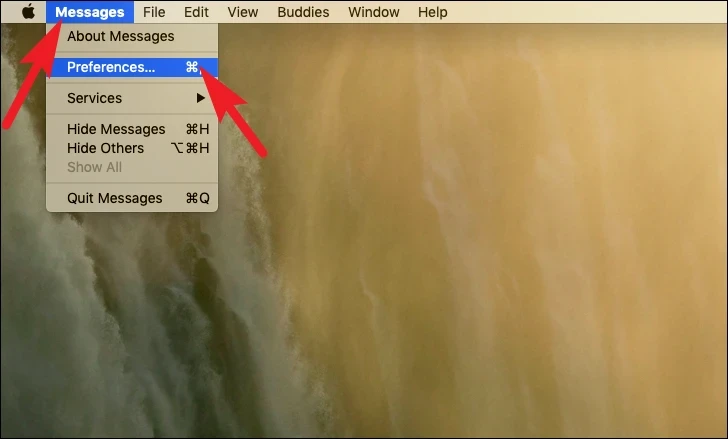
Next, click on the ‘Messages’ tab from the Menu bar. Then, click on the ‘Preferences’ option from the context menu to continue. This will open a separate window on your screen.
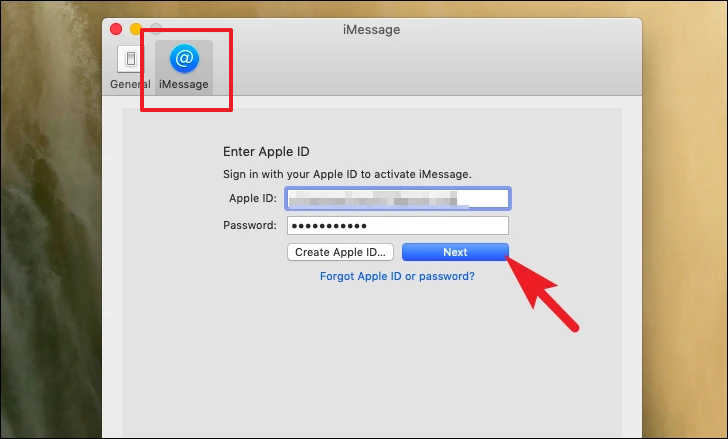
Now, click on the ‘iMessage’ tab to continue. After that, click on the checkbox preceding the phone number you wish to use. Next, make sure you also click on the checkbox preceding the ‘Enable Messages in iCloud’ option.

If you are not signed in with your Apple ID, enter the Apple ID credentials on the ‘iMessage’ tab and then click on the ‘Next’ button to proceed and select the checkboxes as showcased above in this guide.
Once signed in, you will be able to receive the iMessages on your Mac device as well.
Having iMessage turned on your macOS device can enhance convenience and improve your workflow if your routine involves messaging. Luckily, it’s a walk in the park to set it up. If you also want to receive your text messages on Mac, check out this guide.


