How to Fix it When Windows 11 is Stuck on Restarting
Boot your PC in Safe Mode and try these 5 fixes to spiral out of the infinite restart loop on your Windows 11 computer.
Boot your PC in Safe Mode and try these 5 fixes to spiral out of the infinite restart loop on your Windows 11 computer.
by Parth Sawhney
Experiencing an endless restarting loop on your Windows 11 PC can be incredibly frustrating. Instead of reaching the login screen, the system keeps rebooting, leaving you unable to access your files and applications. Fortunately, this issue is often software-based and can be resolved with some troubleshooting steps.
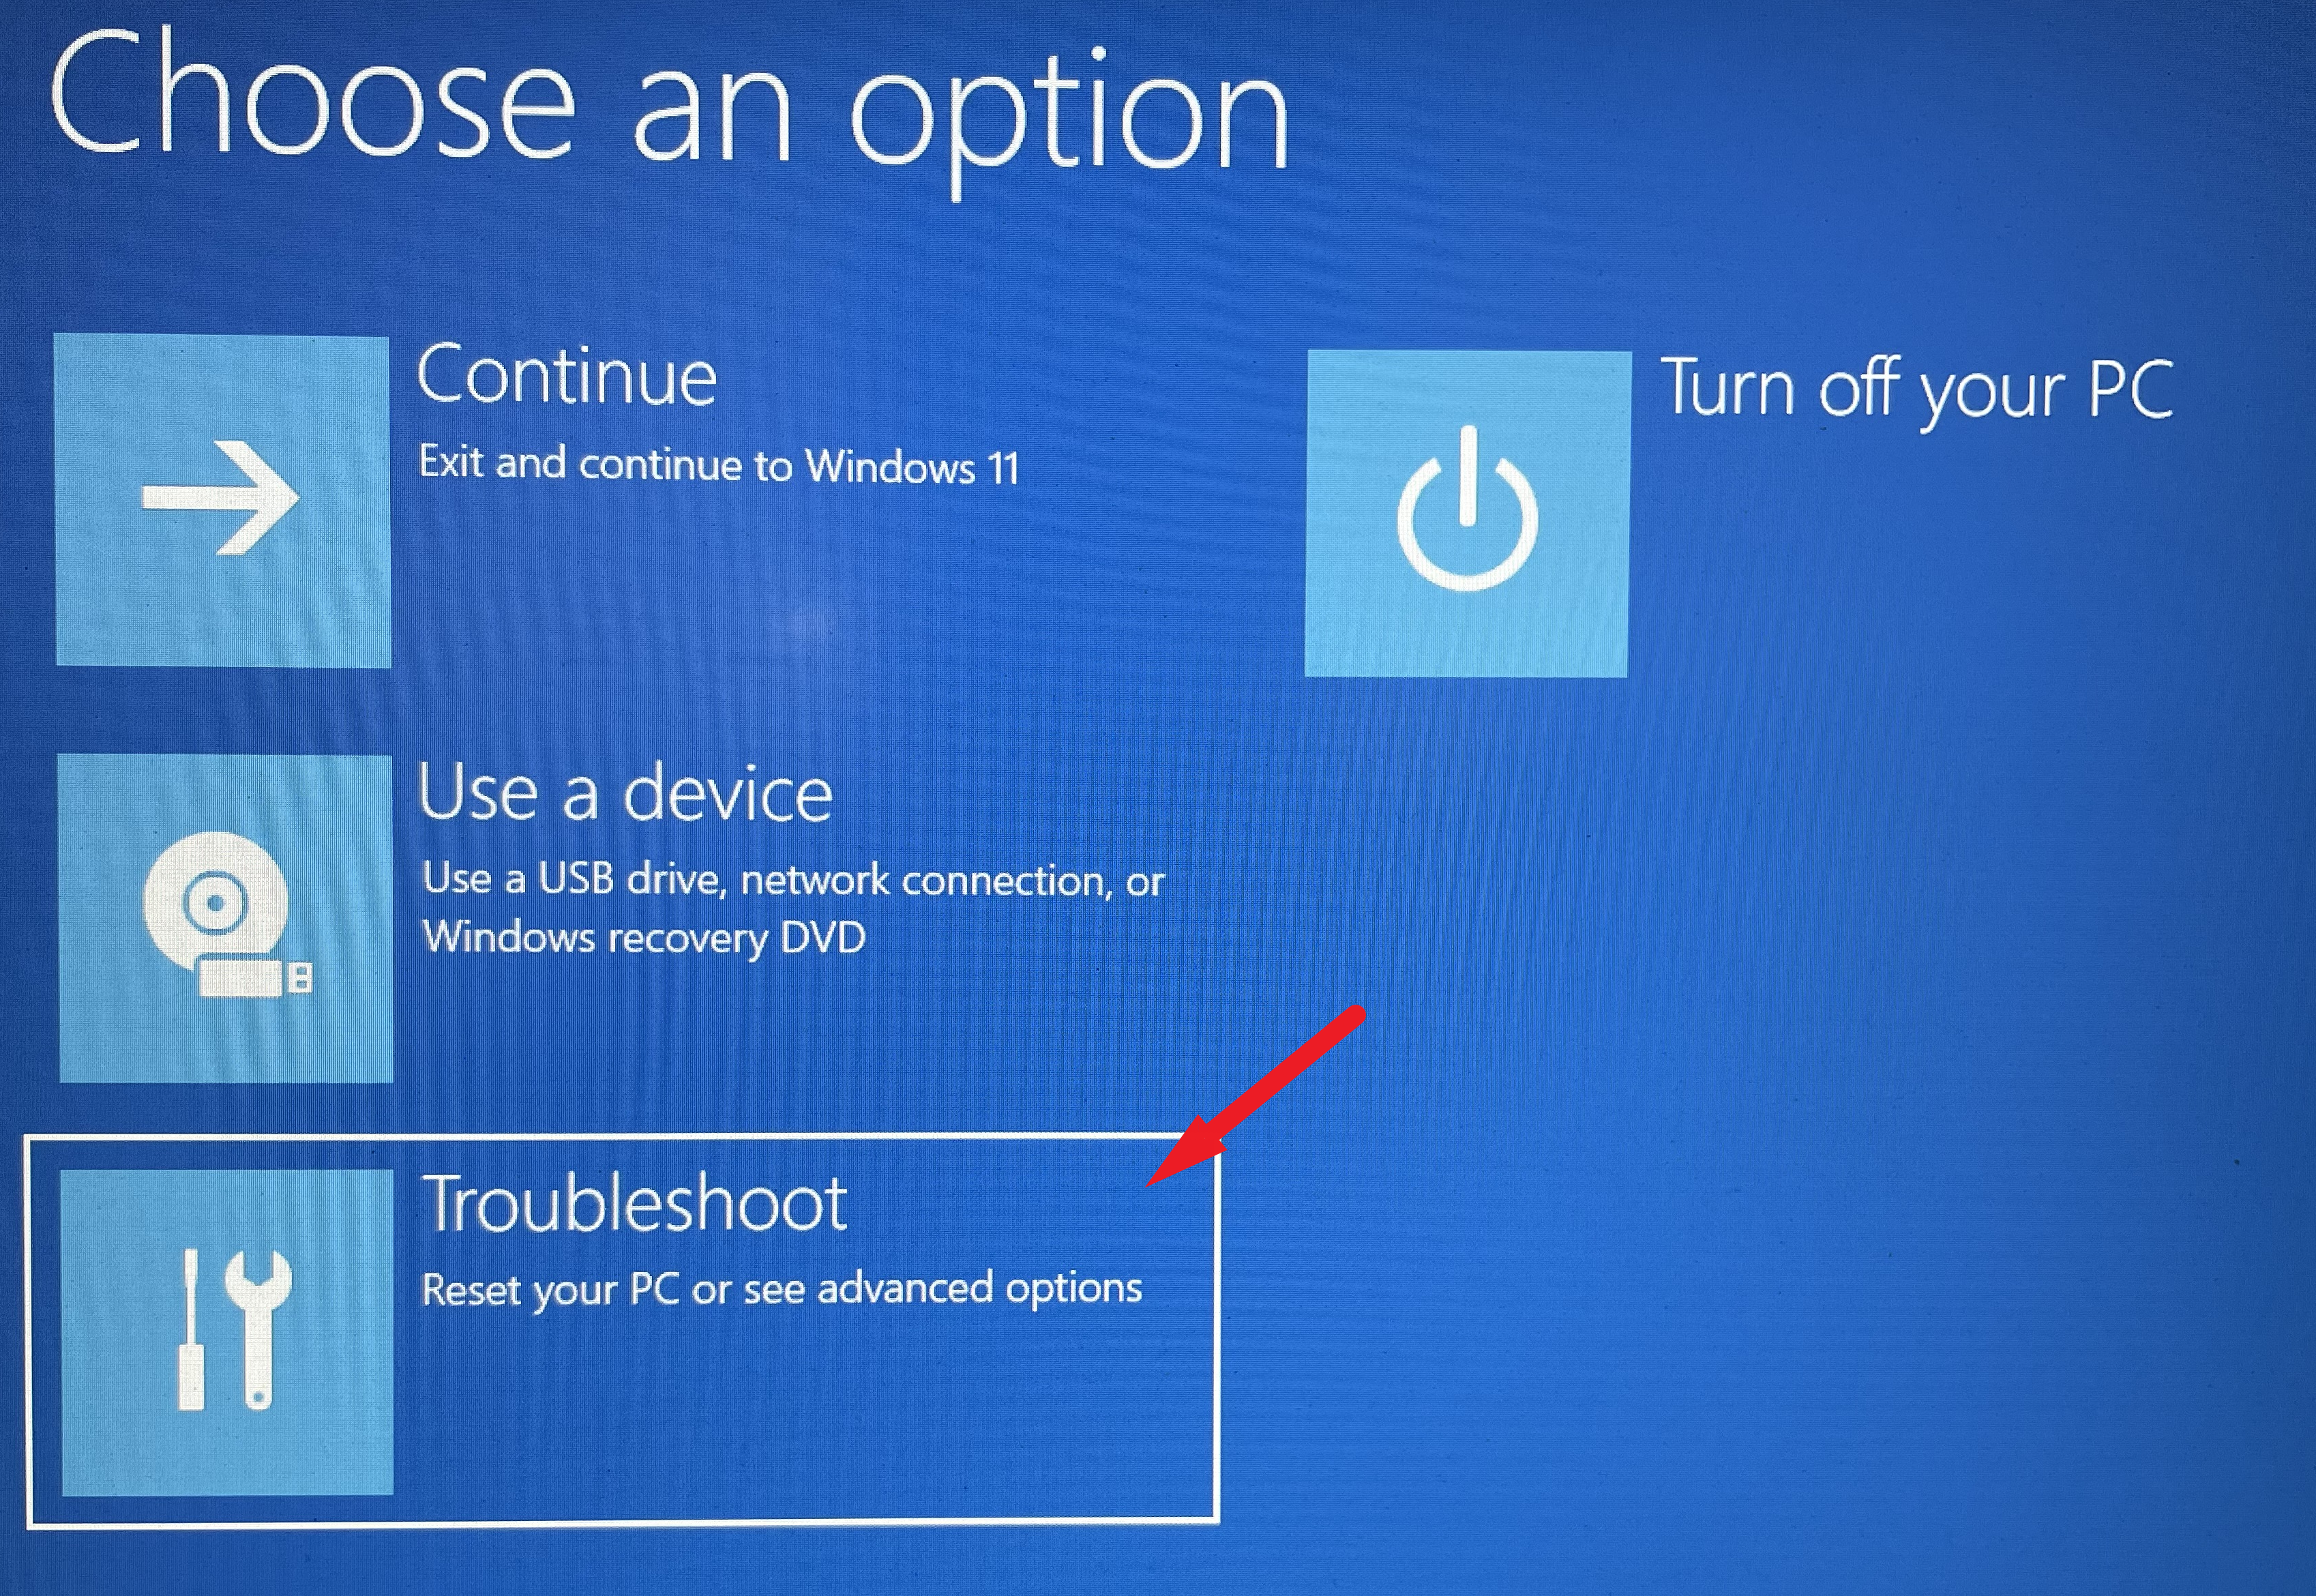
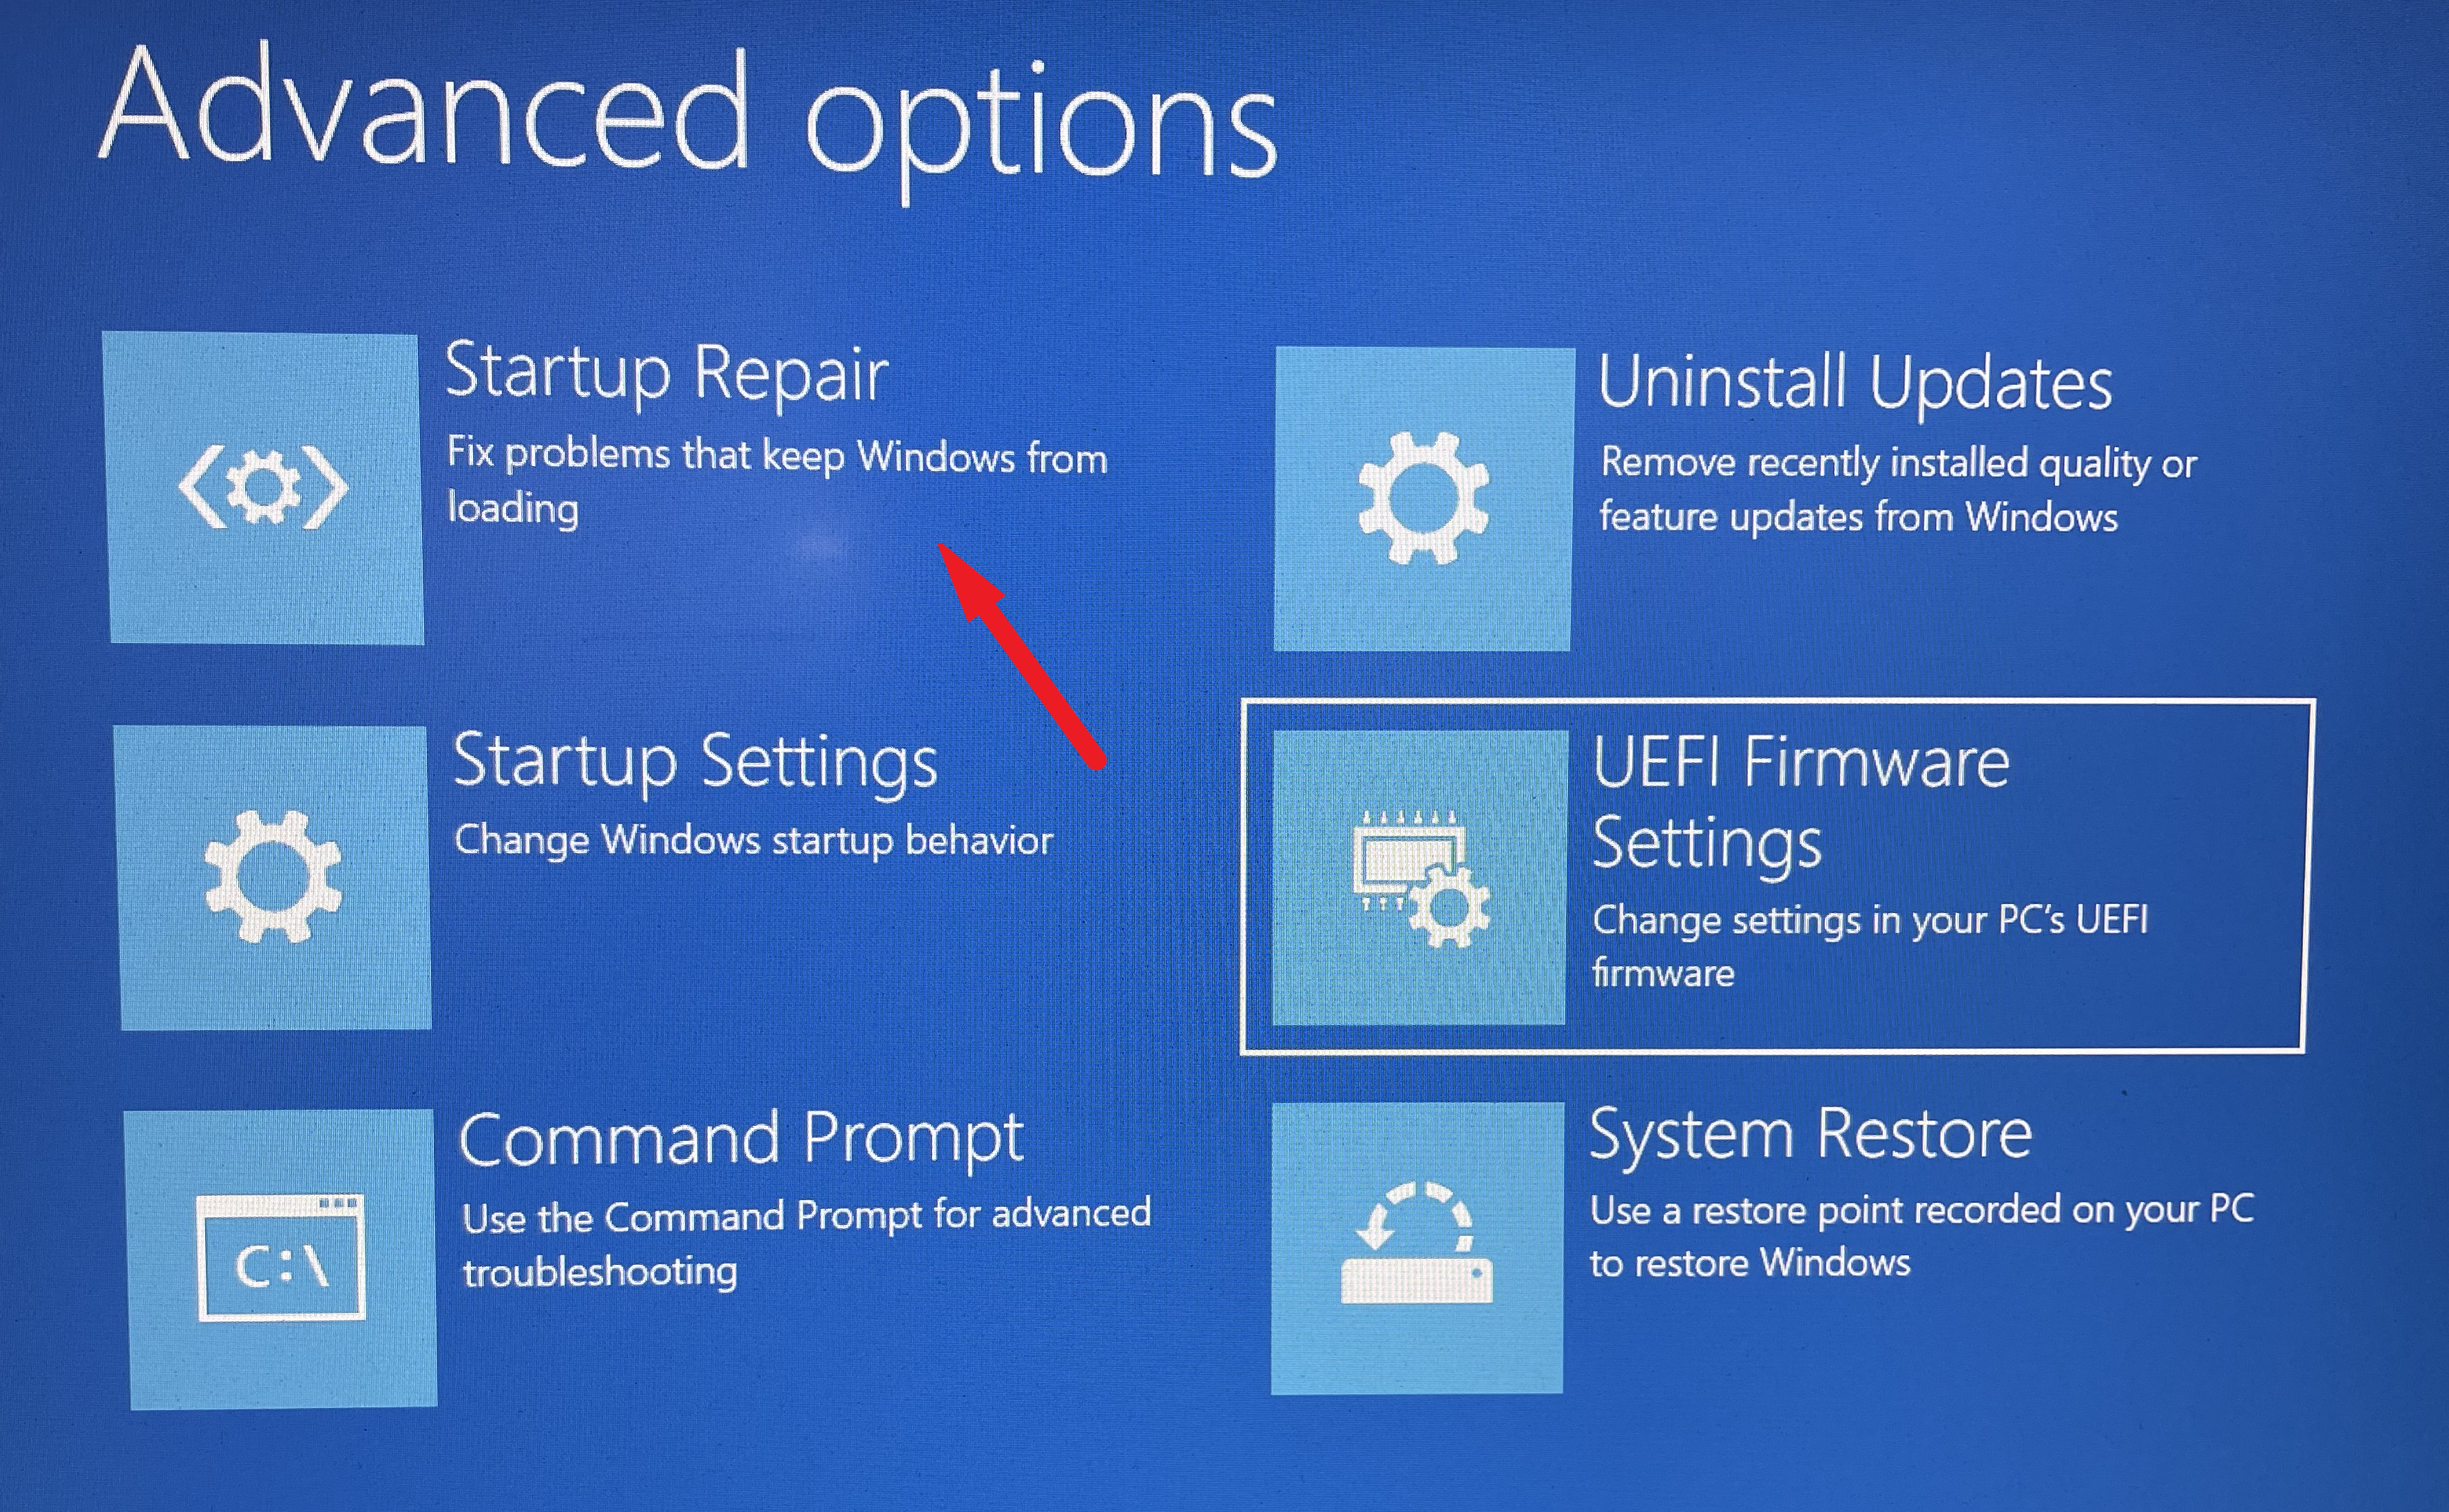
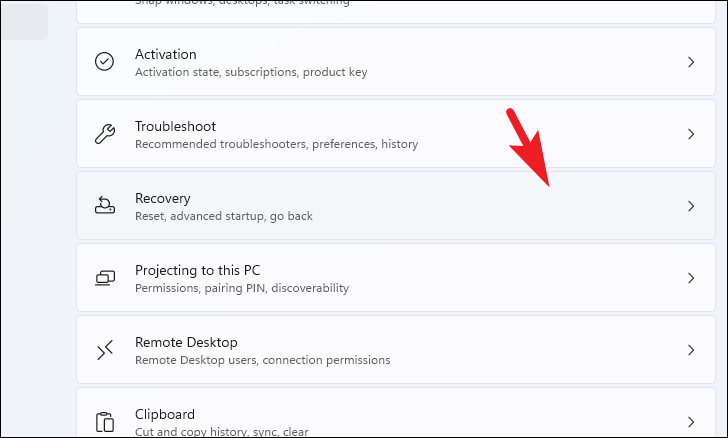
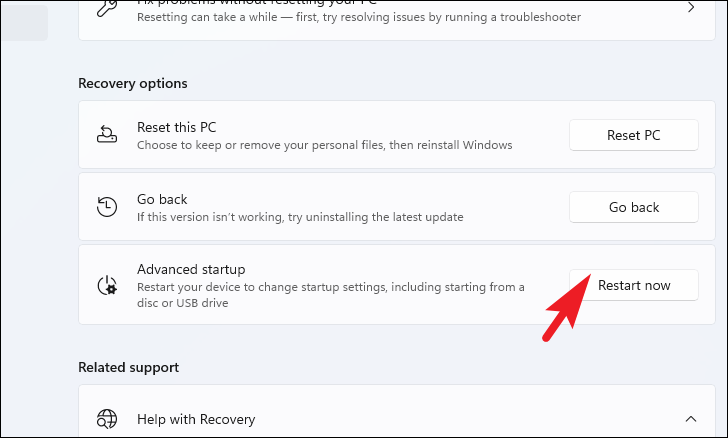
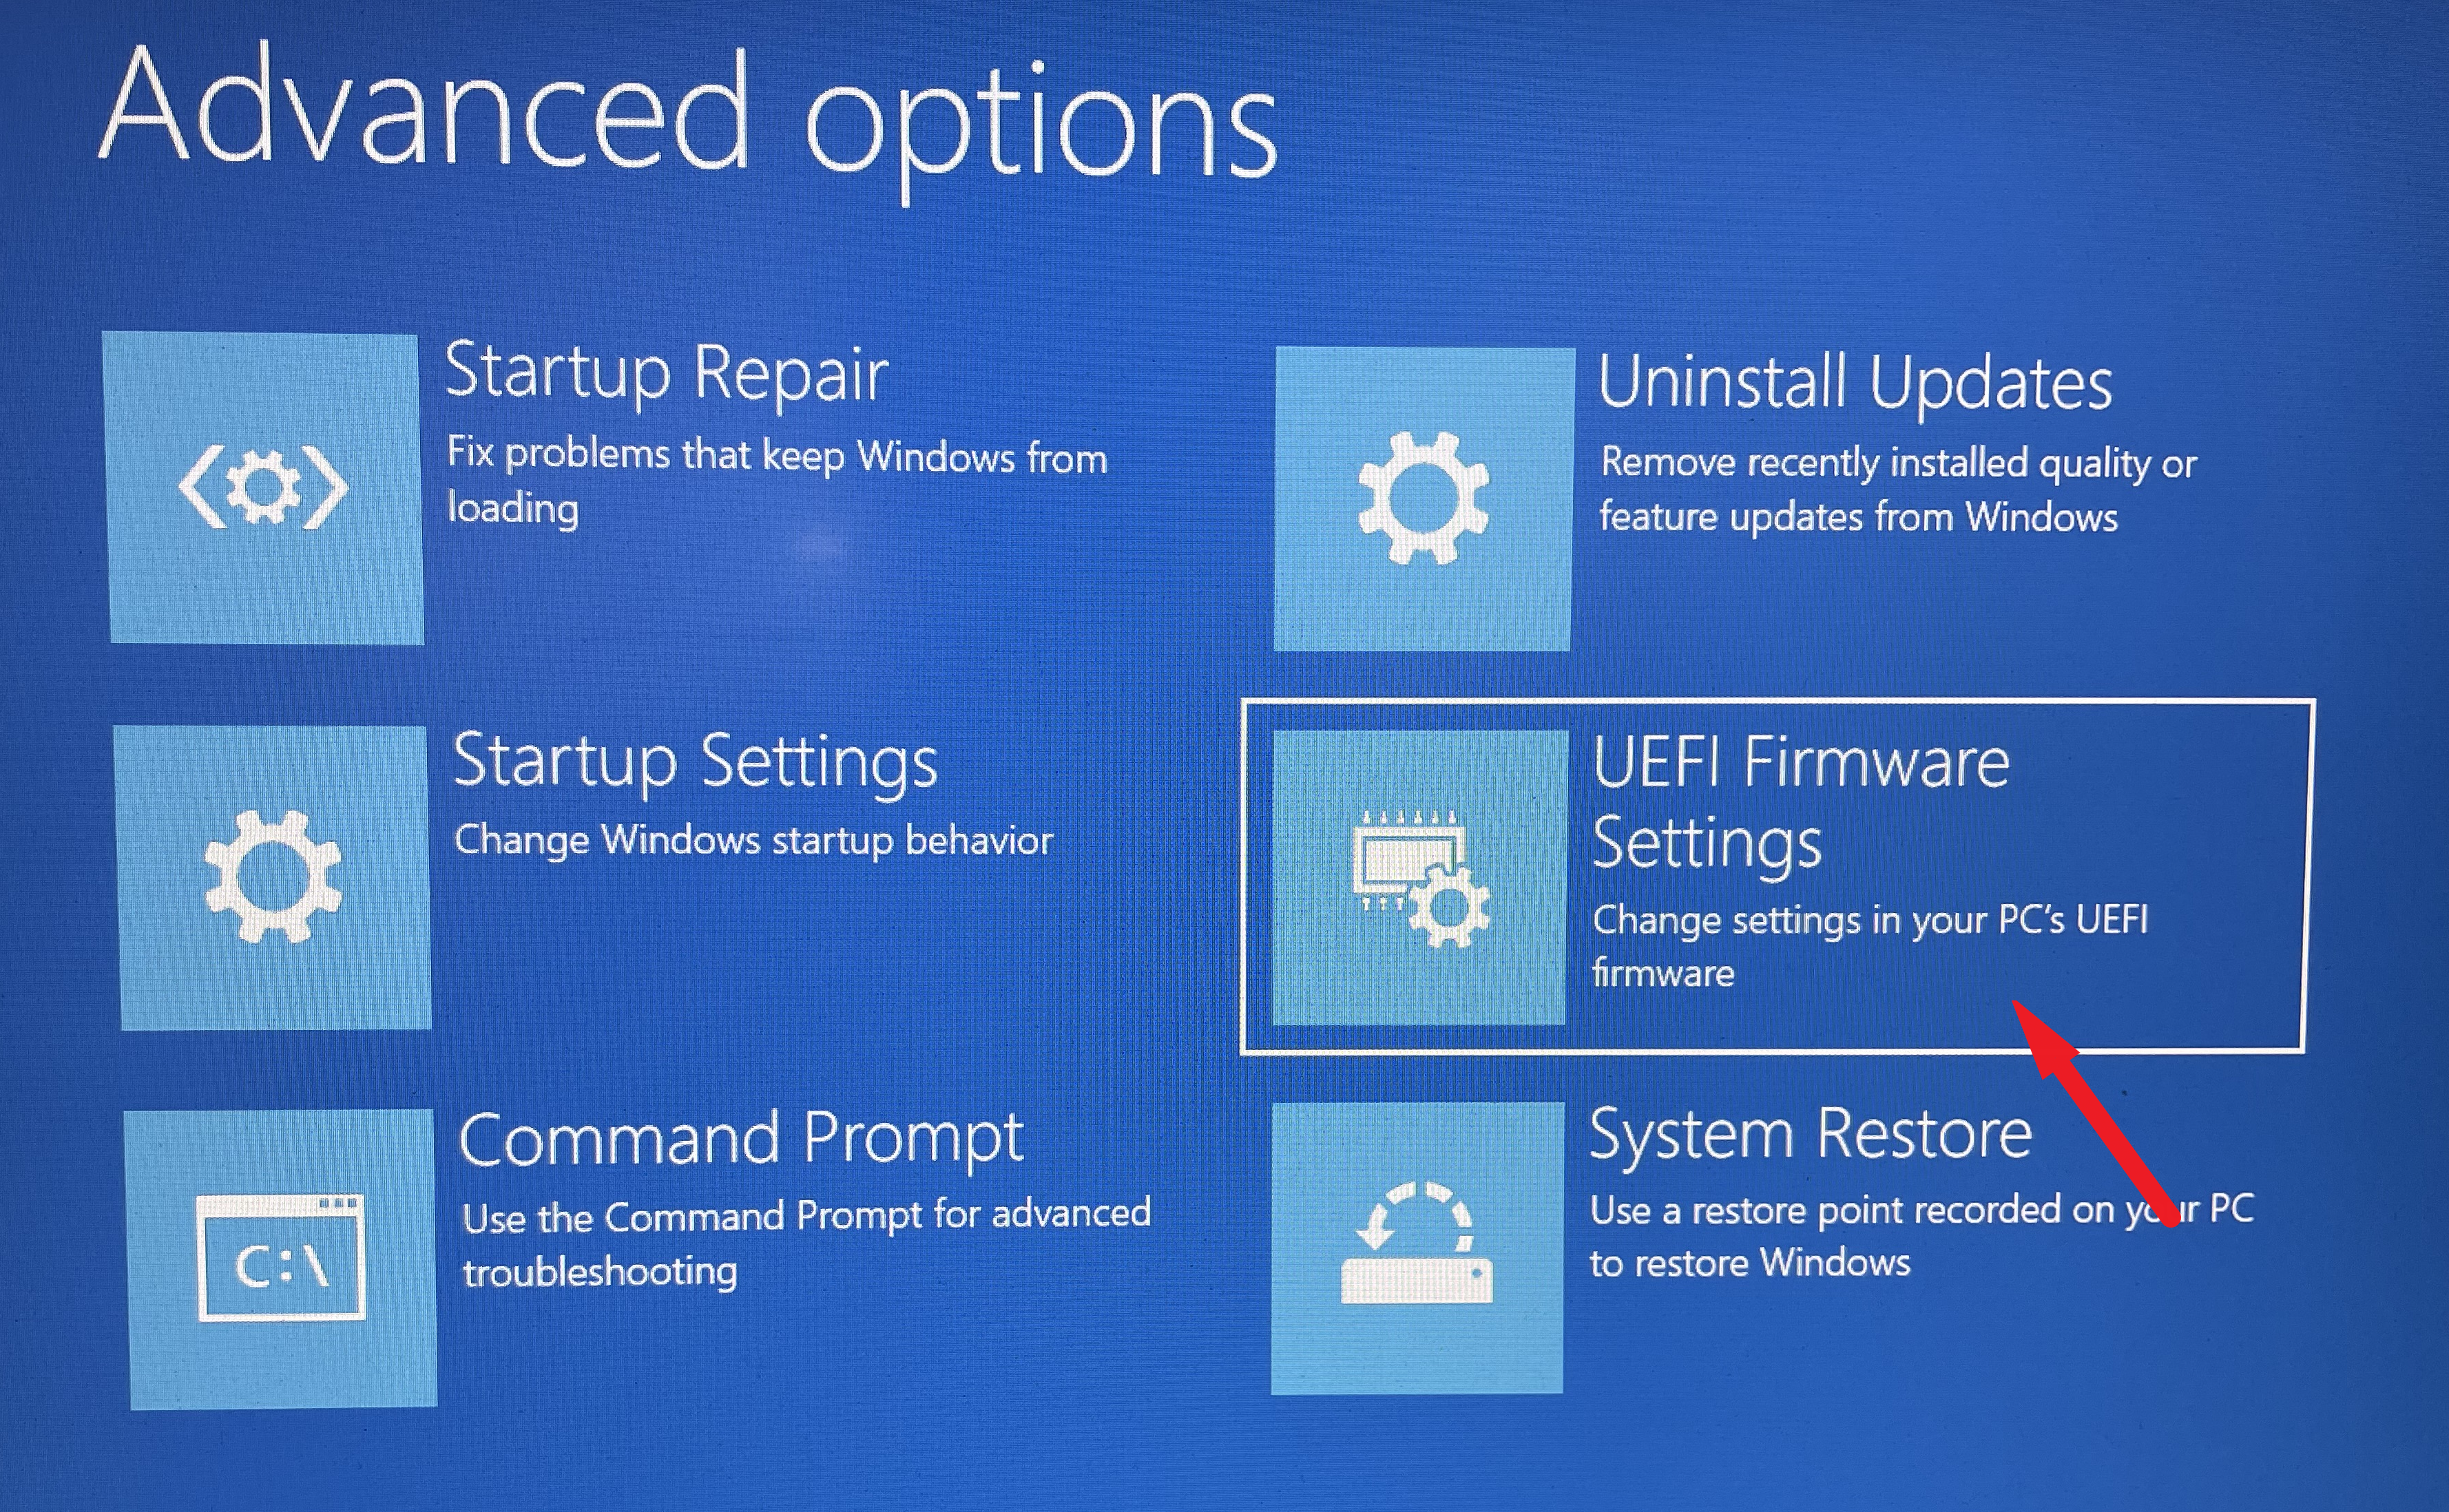
Boot Your PC in Safe Mode
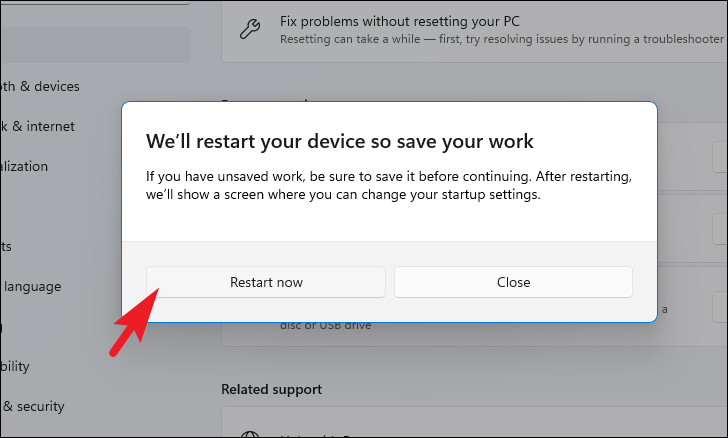
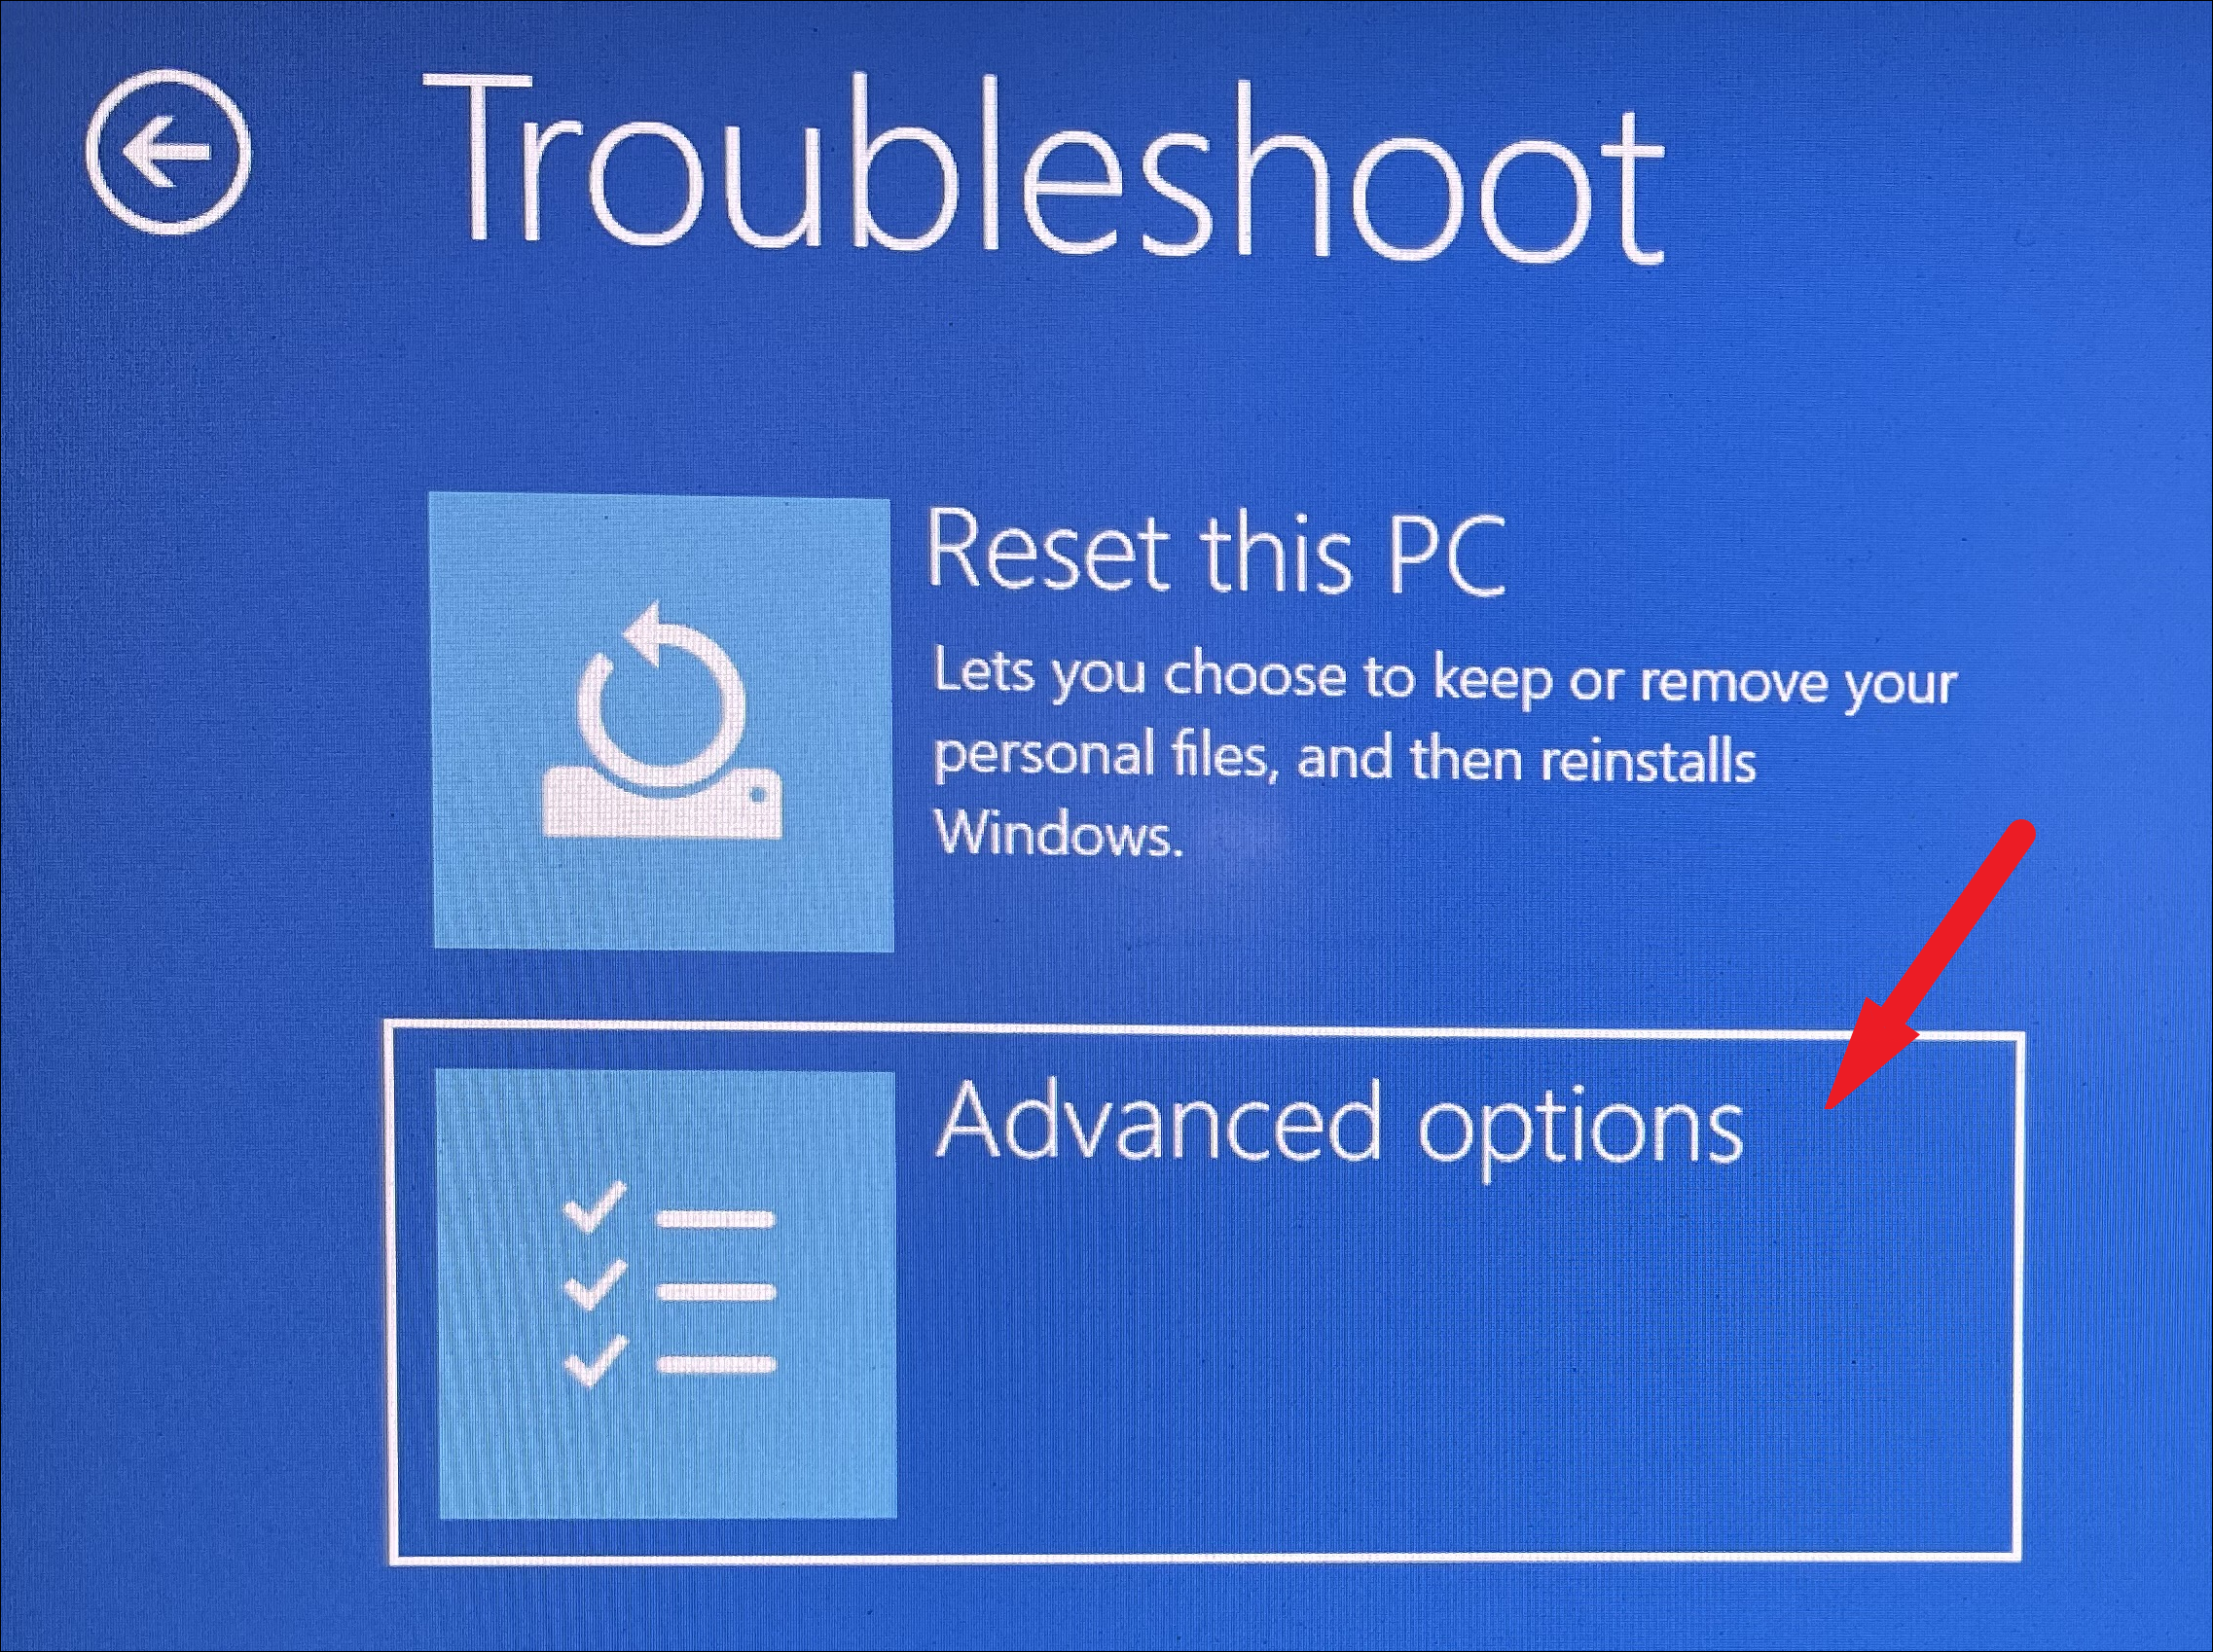
Before attempting any fixes, you need to boot your computer in Safe Mode. This mode starts Windows with a minimal set of drivers and services, helping you identify if default settings and basic drivers are causing the issue.
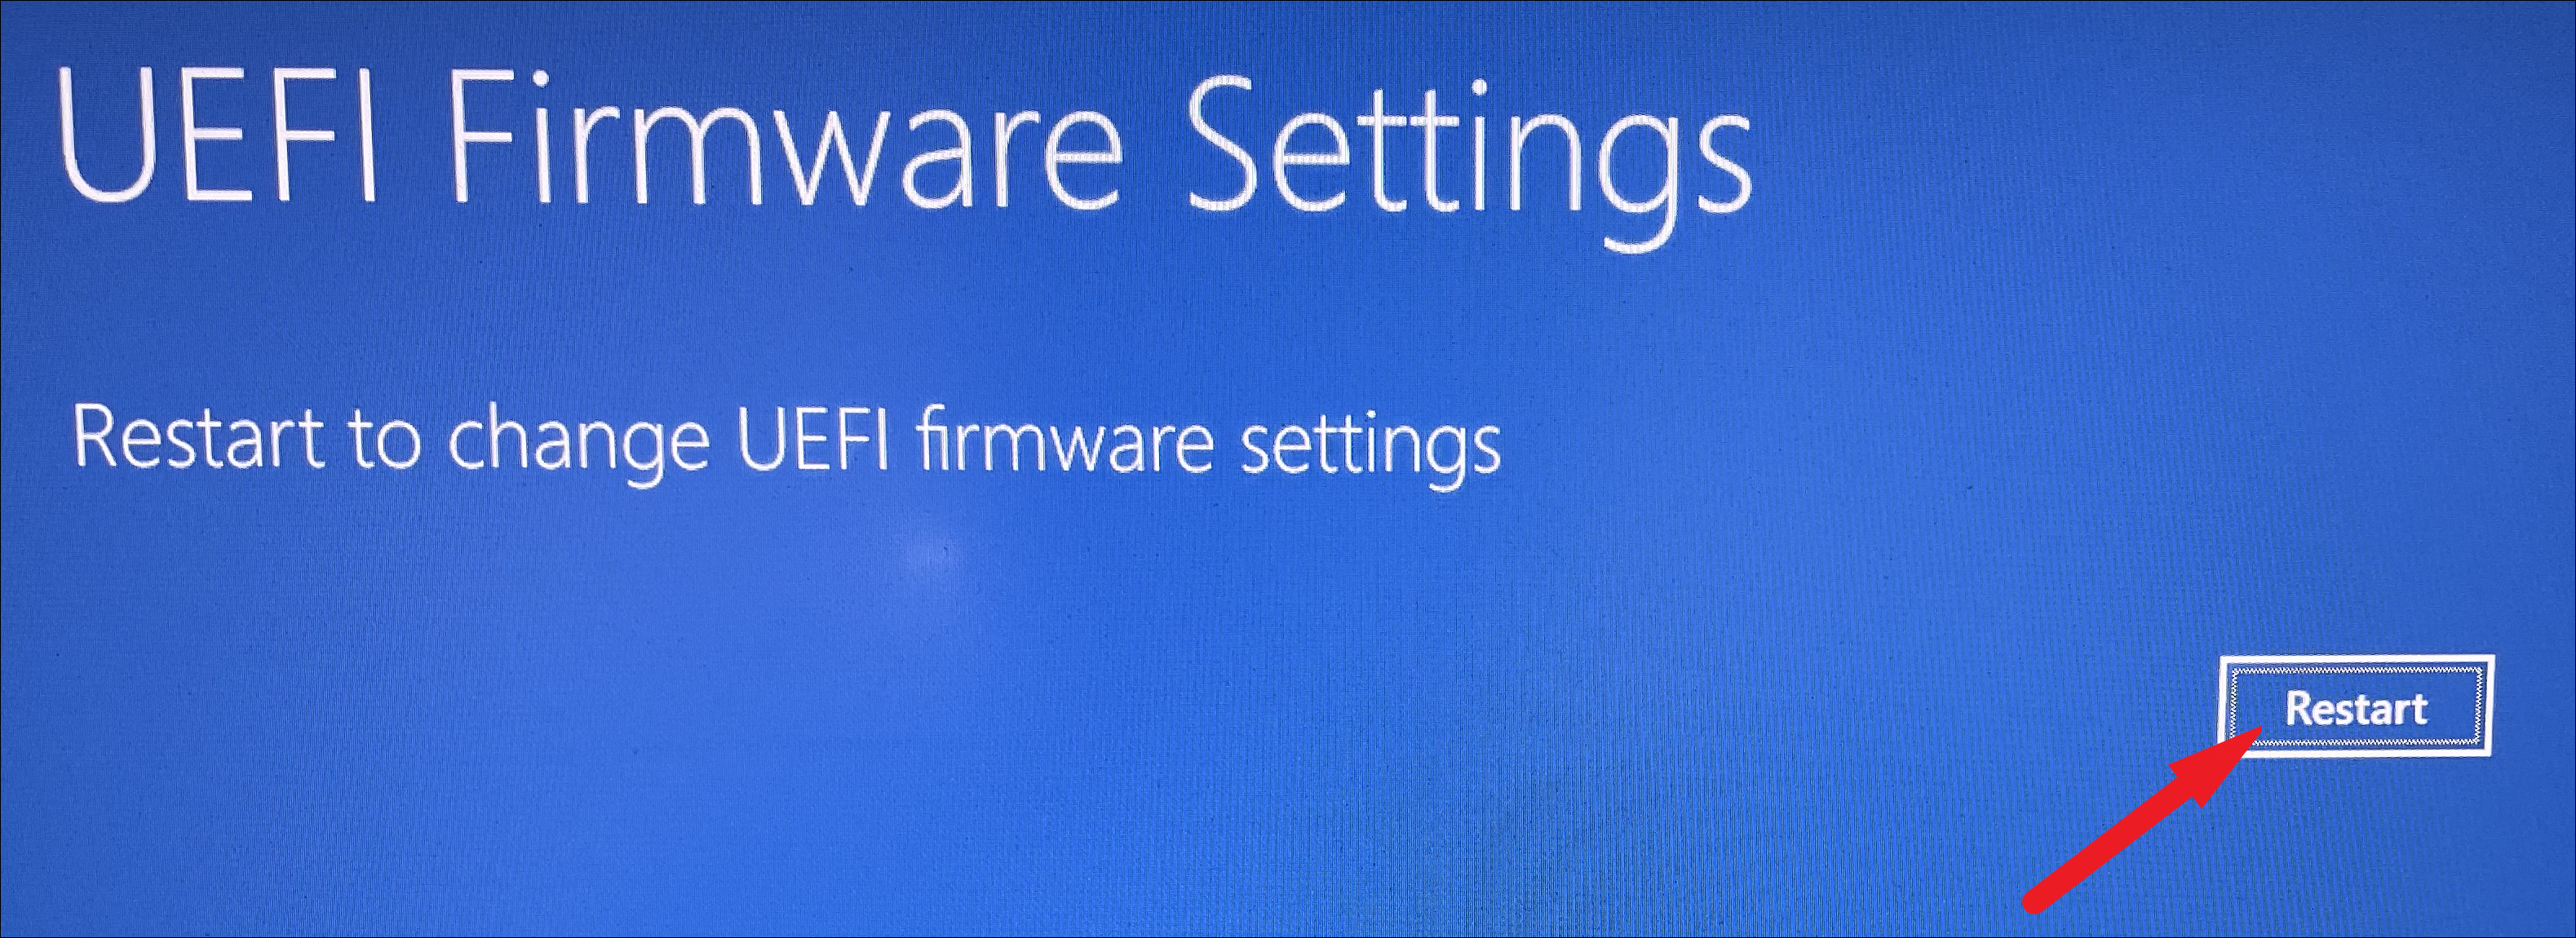
Review the actions listed by Windows and click on the Restart button.
Your PC will now boot into Safe Mode, allowing you to perform the necessary troubleshooting steps.
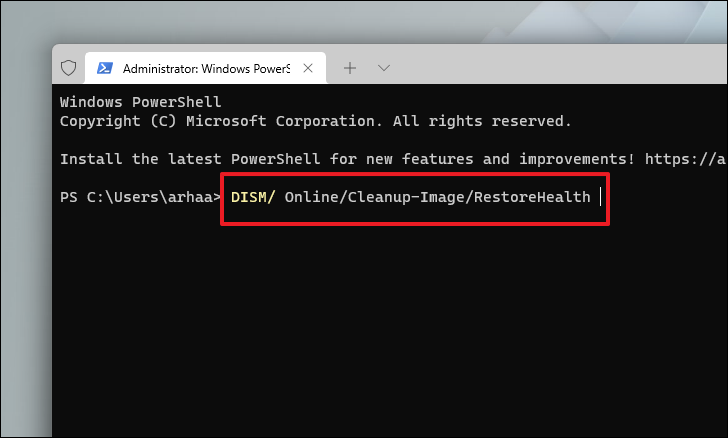
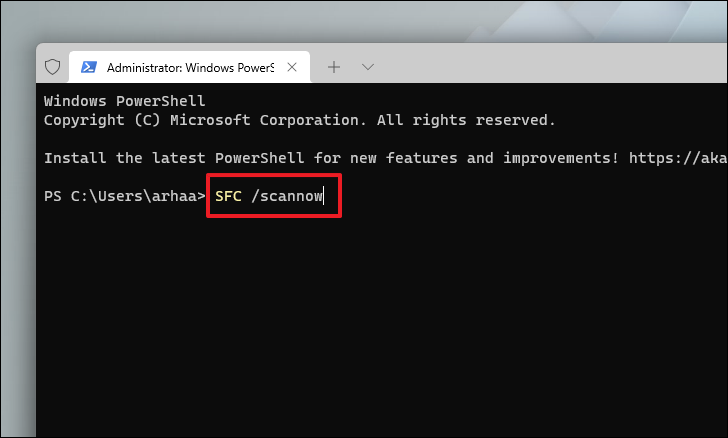
1. Run DISM and SFC Scan
Corrupted or damaged system files can cause Windows 11 to get stuck in a restart loop. Running the Deployment Image Servicing and Management (DISM) and System File Checker (SFC) scans can repair these files.
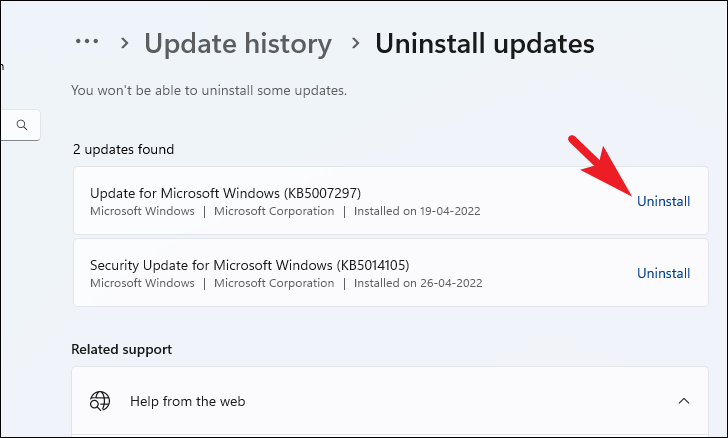
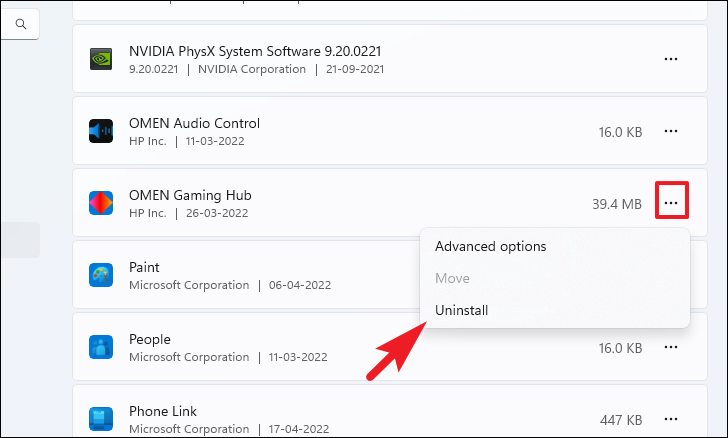
Follow the prompts to complete the uninstallation. Afterward, restart your computer to see if the problem is resolved.
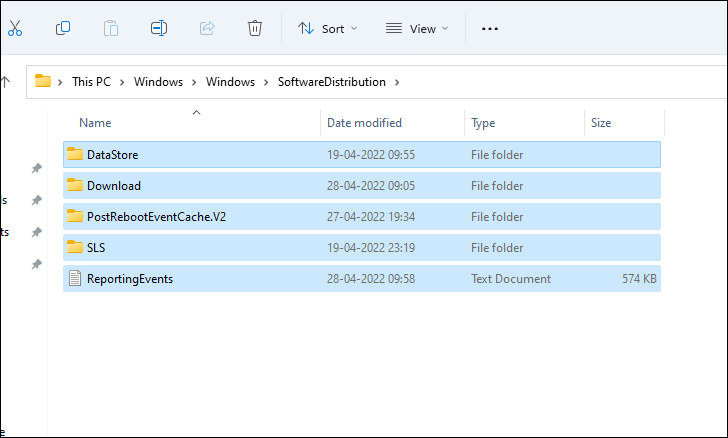
3. Delete Files from the Software Distribution Folder
Corrupted update files in the Software Distribution folder can interfere with the startup process. Deleting these files forces Windows to download fresh copies.
Restart your computer and see if Windows starts normally.
By following these steps, you should be able to resolve the restart loop issue on your Windows 11 PC. If the problem persists, consider seeking professional technical support.