If you’re part of the Windows Insider program and have encountered the error “This PC can’t be upgraded to this version of Windows” while trying to install a Windows 11 update, you’re not alone. This issue is particularly common among users with MSI motherboards, preventing them from installing new updates. Many users have reported being stuck at 35% during installation. The root cause often lies in an outdated cFosSpeed driver, which interferes with the update process. Fortunately, there is a straightforward solution to this problem.
In this guide, we’ll walk you through the steps to resolve this error and successfully install the Windows 11 update.
Resolve “This PC can’t be upgraded to this version of Windows” from the settings
Here’s how you can fix the issue quickly and efficiently:
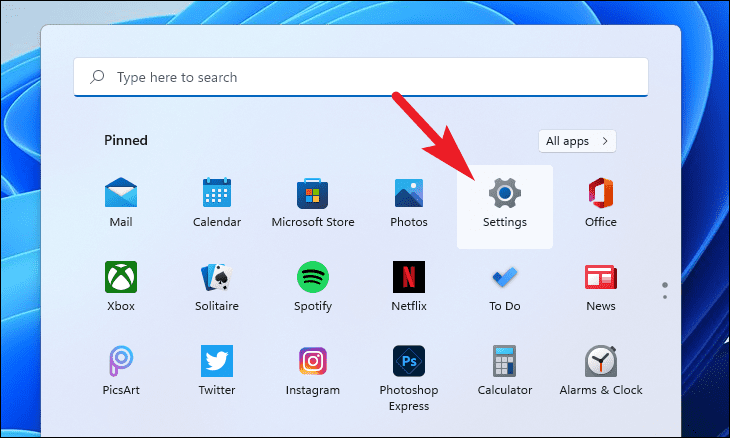
- First, open the
Settingsapp from your Windows 11 Start Menu.
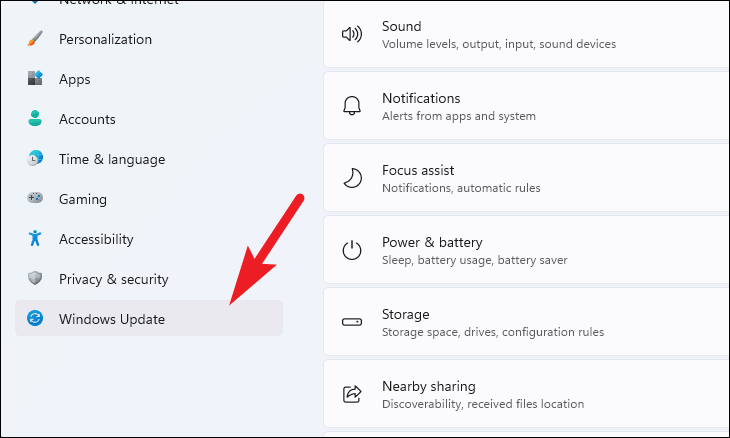
- Next, navigate to the
Windows Updatesection from the left-hand panel in the Settings window.
- Click on the
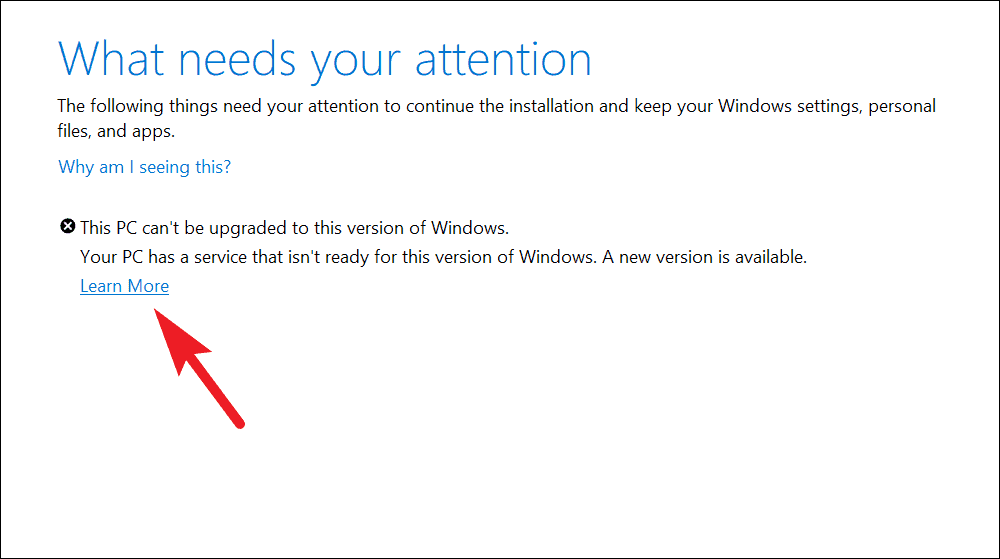
Fix Issuesbutton on the right side of the screen. This will open a new window with more details.

- In the new window, select the
Learn Moreoption. This will redirect you to the cFosSpeed download page in your default browser.
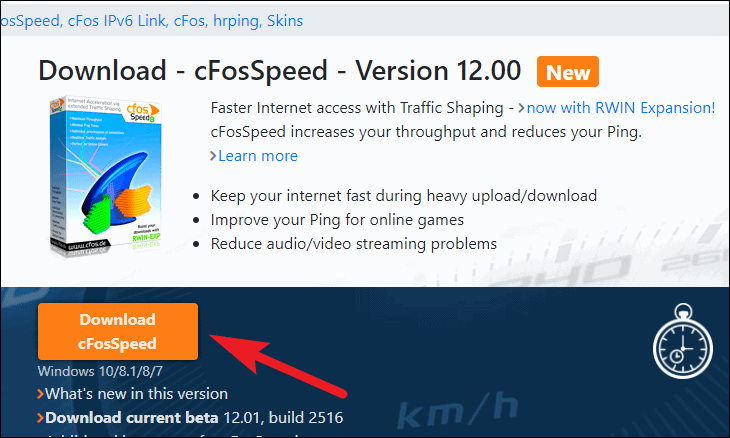
- On the cFosSpeed page, locate the latest version of the driver (currently Ver. 12.00) and click on the
Download cFosSpeedbutton.
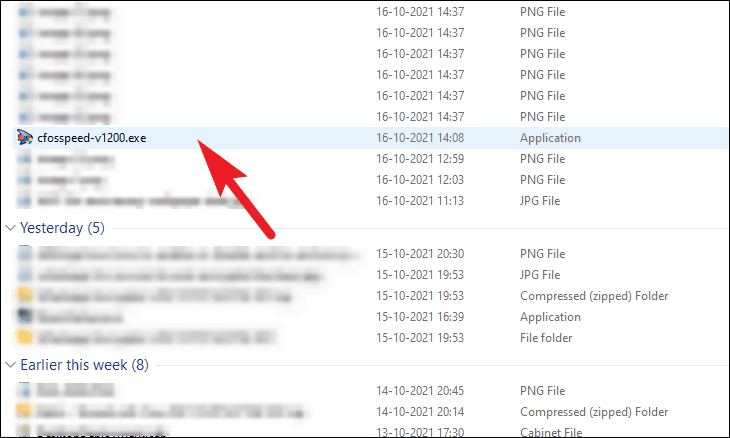
- Once downloaded, find the
cfosspeed.exefile in your default downloads folder and double-click it to start the installation.
Note: If you haven’t set a custom downloads directory, the file will be in the default Downloads folder.
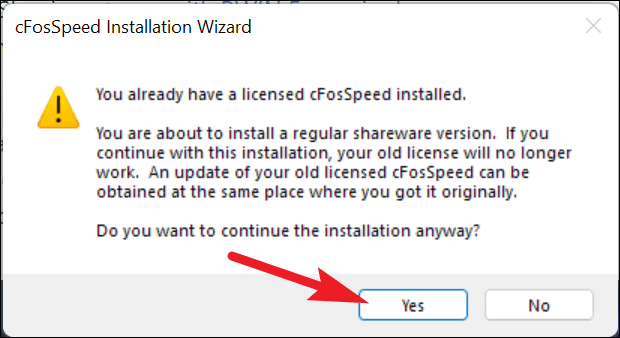
- During installation, you may see a prompt indicating that a version of cFosSpeed is already installed. Read the message carefully and click
Yesto proceed.
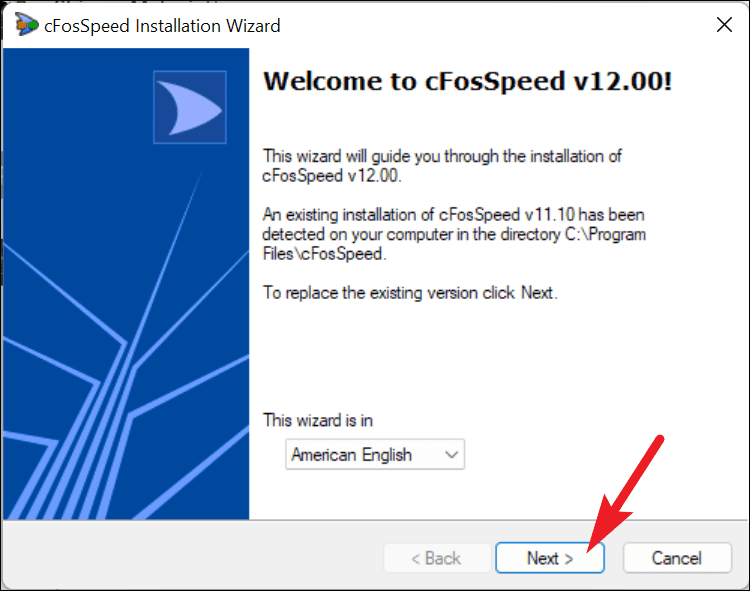
- In the installer window, click
Nextto move forward with the setup.
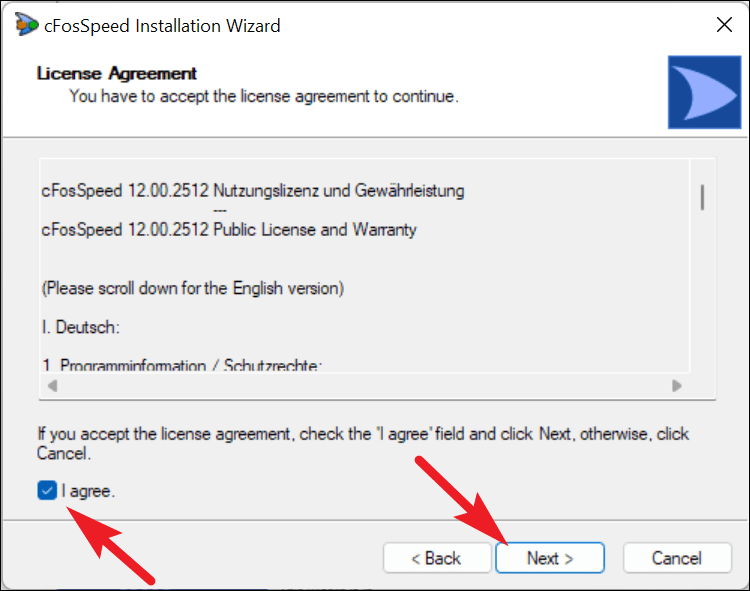
- Review the End User License Agreement (EULA), check the box next to
I agree, and clickNext.
- Choose the installation directory. If you installed cFosSpeed in the default location, leave it as is. Otherwise, click
Changeand select the correct directory.

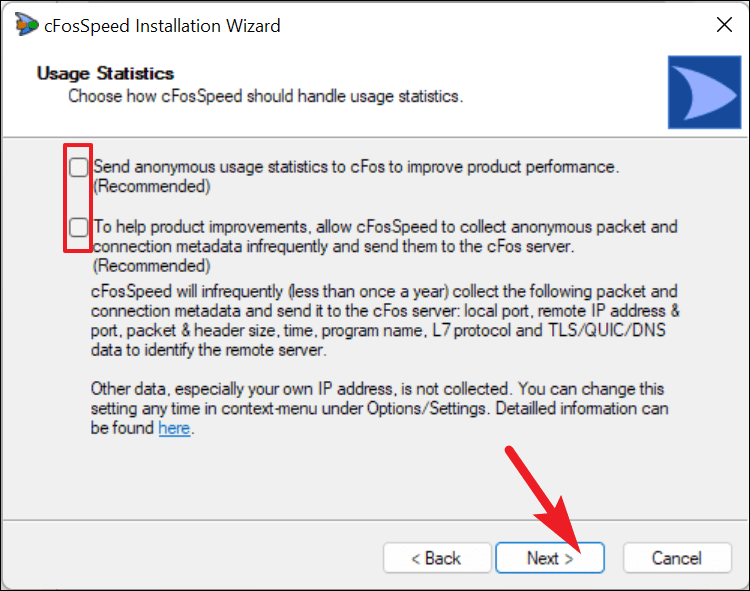
- On the
Usage Statisticsscreen, decide whether to share data by checking the relevant boxes. Then, clickNextto initiate the installation.
Note: Sharing usage statistics is optional.
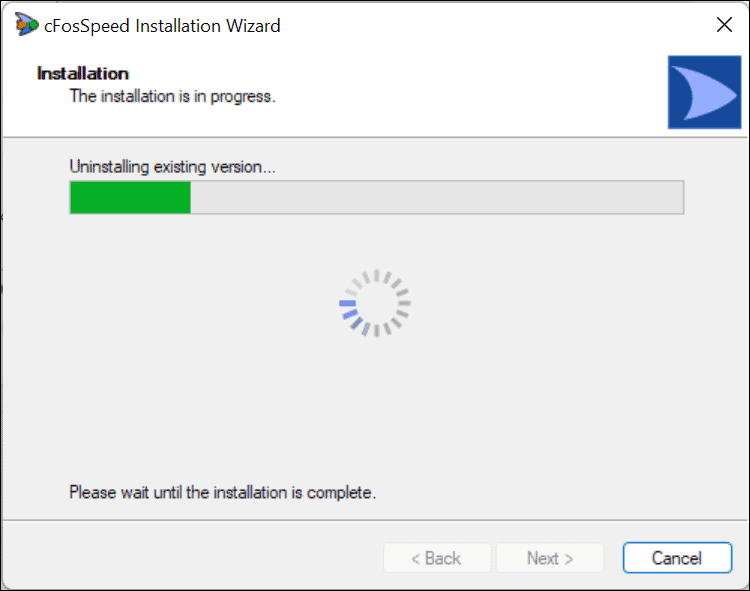
- Wait for the installation process to complete. This may take a few minutes.
- Once the installation is successful, click
Finishto close the installer.
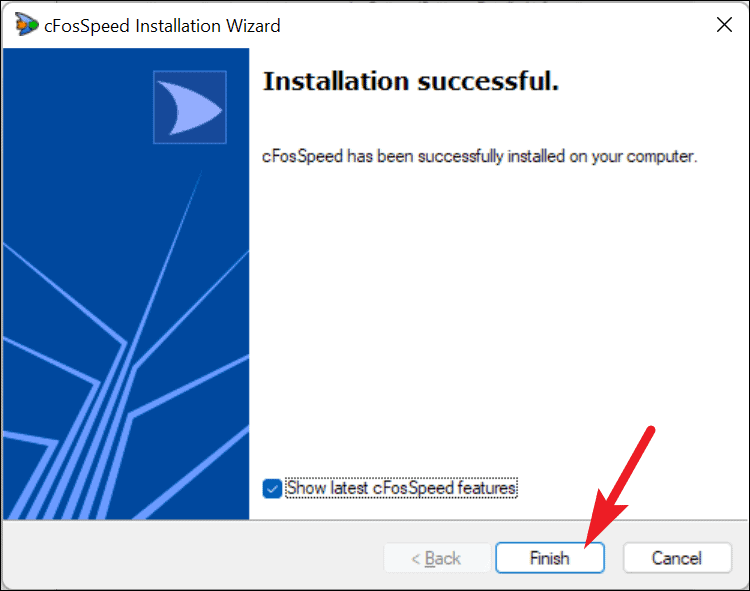
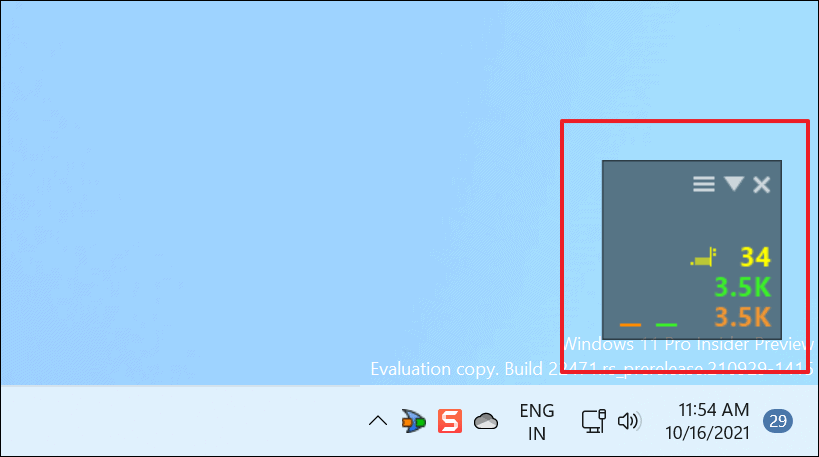
cFosSpeed will automatically start in the background, displaying a small overlay showing network metrics in the bottom-right corner of your screen.
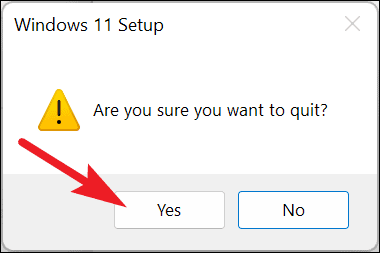
- Close the
Windows 11update window if it’s still open.
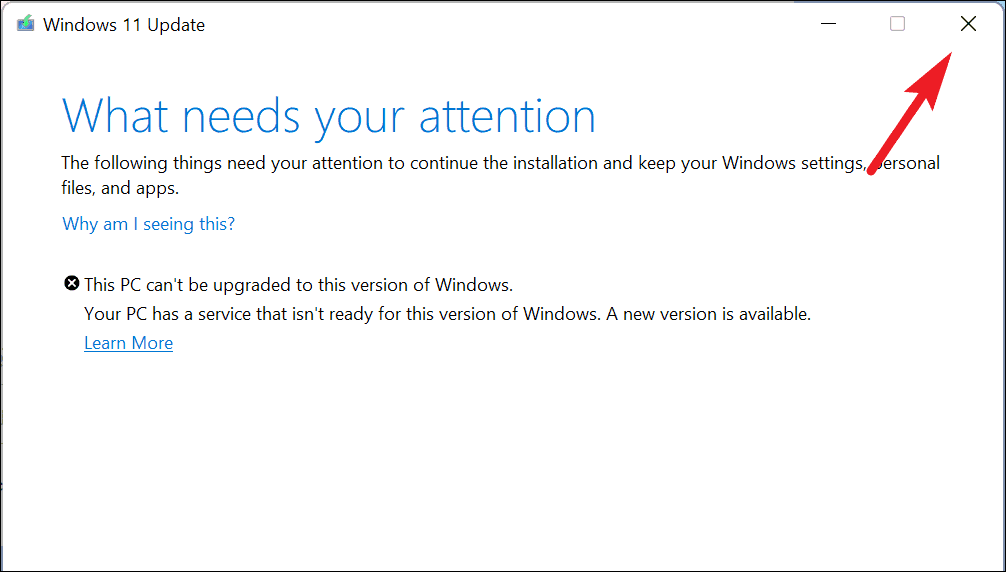
- When prompted to confirm exiting, click
Yes.
- Return to the
Windows Updatesection in theSettingsapp.

- If the error is still present, click
Fix Issuesagain to refresh the page.
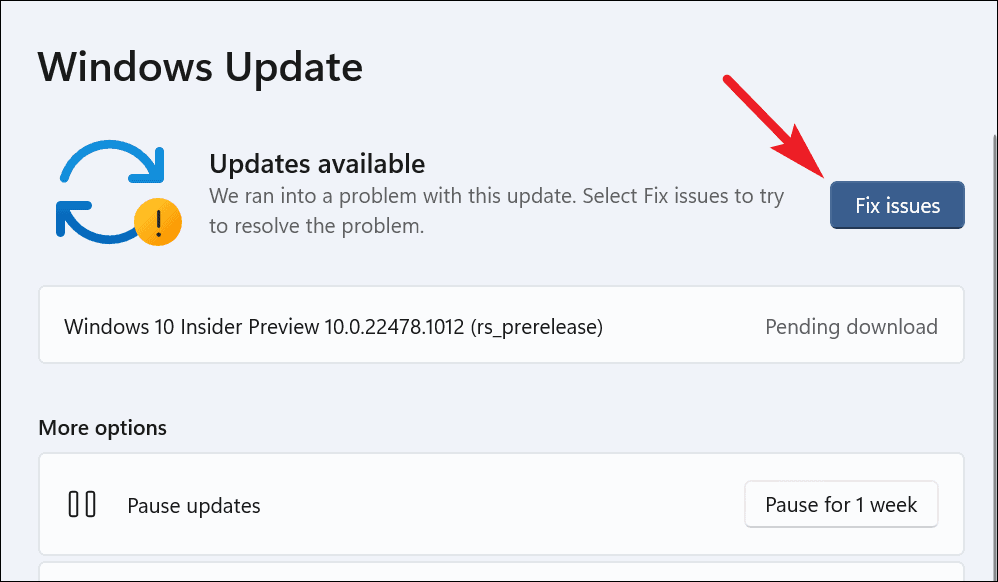
Windows may take a few minutes to recognize the changes. Once it does, the update process will resume, and you will see the update downloading on your system.

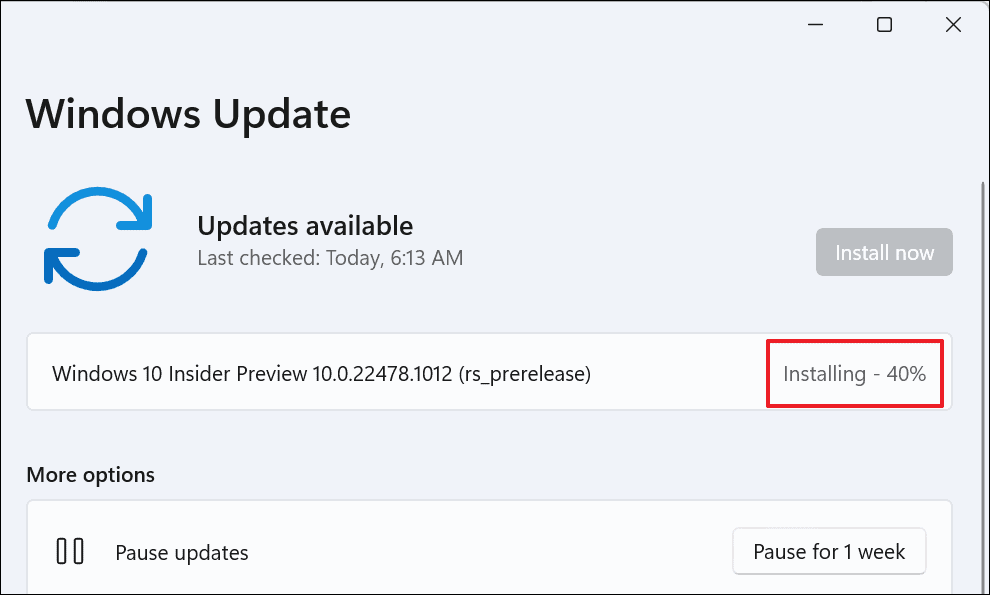
Finally, check the Windows Update screen to verify that the update is being downloaded.
If you’re seeing this error while trying to update Windows 11, following this guide should help you resolve the issue and proceed with the update.


