
The black screen issue after logging into Windows 11 can be incredibly frustrating, leaving users with just a cursor visible and unable to access their desktop. While there are several potential causes, from improperly connected monitor cables to corrupted system files, there are also multiple effective solutions to try. This guide will walk you through the most promising fixes, starting with the methods most likely to resolve the problem quickly.
Check monitor connections
For desktop PC users, the first step is to verify all monitor cables are securely connected. Unplug and firmly reconnect both the power and display cables to eliminate loose connections as a potential cause. Though simple, this can often resolve display issues.
Restart your computer
A basic restart can sometimes clear up temporary glitches causing the black screen:
- For laptops: Press and hold the power button for at least 20 seconds to force a shutdown. Wait a few moments, then power on normally.
- For desktops: Press the physical power button on the case to shut down. You can also unplug the power cable, wait 30 seconds, then reconnect and restart.
Disconnect peripheral devices
Faulty drivers or conflicts with connected peripherals can sometimes trigger display issues. Try unplugging all external devices except your keyboard and mouse, then restart your PC to see if the problem resolves.
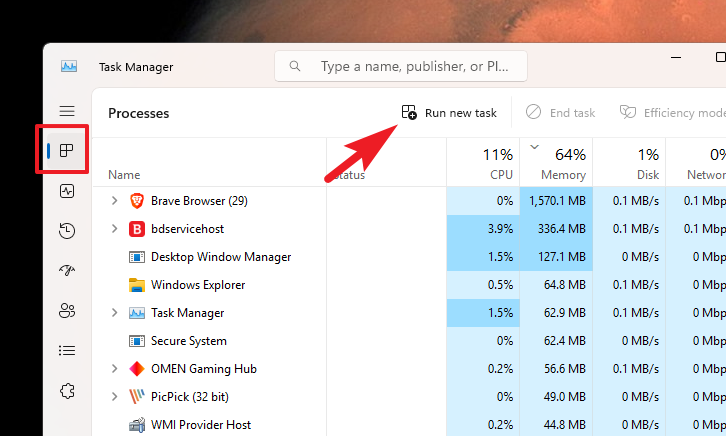
Reset Windows Explorer
Windows Explorer manages the graphical interface, so resetting it may restore your desktop view:
- Press
Ctrl+Shift+Escto open Task Manager. - Click “More details” if needed to expand the view.
- Select the “Processes” tab.
- Click “Run new task”.
- Type
explorer.exein the text box and click “OK”.
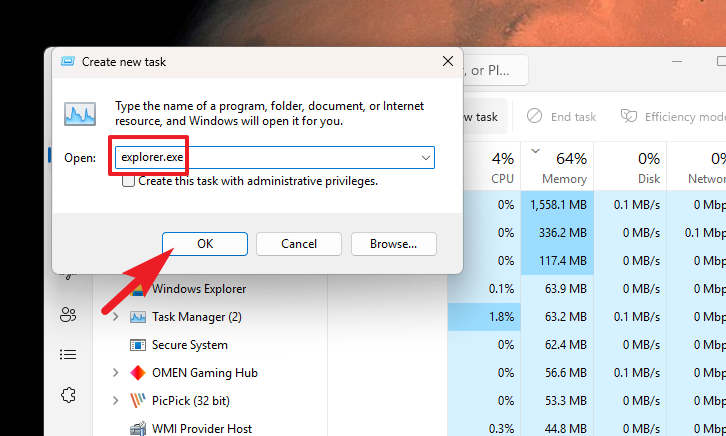
If successful, your desktop should reappear. If not, continue to the next method.
Use keyboard shortcuts
Certain keyboard combinations can help wake a sleeping display or restart the graphics driver:
- Press
Windows key+PorCtrl+Alt+Delto potentially wake the screen. - Try
Windows key+Ctrl+Shift+Bto restart the video driver.
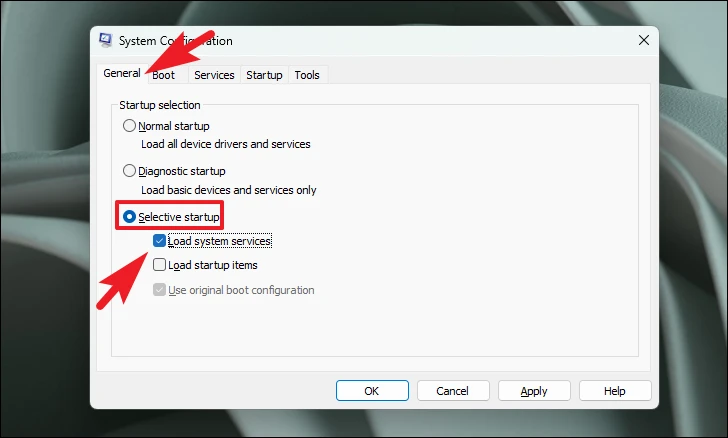
Perform a clean boot
Starting Windows with minimal services can help identify if third-party software is causing the issue:
- Press
Windows key+R, typemsconfig, and hit Enter. - In System Configuration, select “Selective startup” and check “Load system services”.
- Go to the “Services” tab, check “Hide all Microsoft services”, then click “Disable all”.
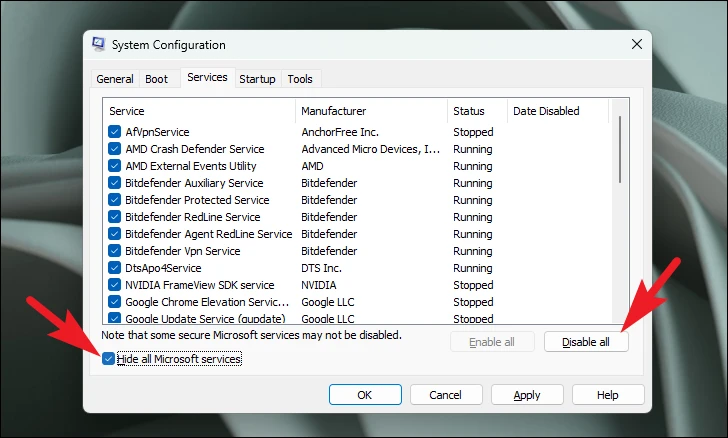
- Click “Apply” and “OK”, then restart your PC.
If the desktop loads normally, you can gradually re-enable services to identify the problematic one.
Boot into Safe Mode with Networking
Safe Mode loads Windows with minimal drivers and services, which can help troubleshoot display issues:
- Turn on your PC and immediately hold the power button for 20 seconds to force a shutdown.
- Repeat this process three times. On the fourth boot, Windows will enter Recovery Environment.
- Select Troubleshoot > Advanced options > Startup Settings > Restart.
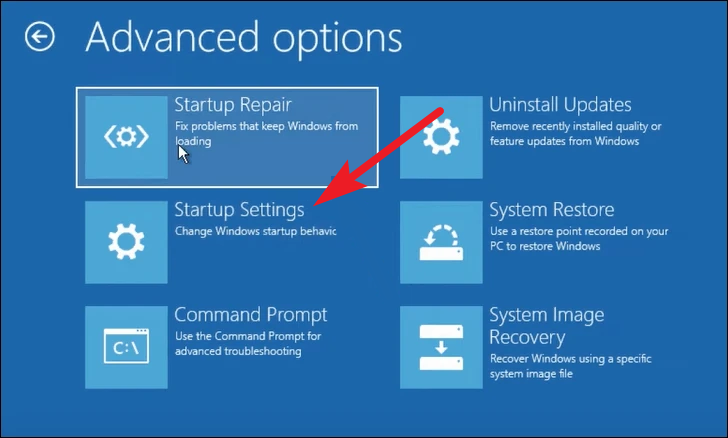
- When prompted, choose “Safe Mode with Networking”.
Update graphics driver
Once in Safe Mode, updating your graphics driver may resolve display issues:
- Open Device Manager (search for it in the Start menu).
- Expand “Display adapters”, right-click your graphics card, and select “Update driver”.
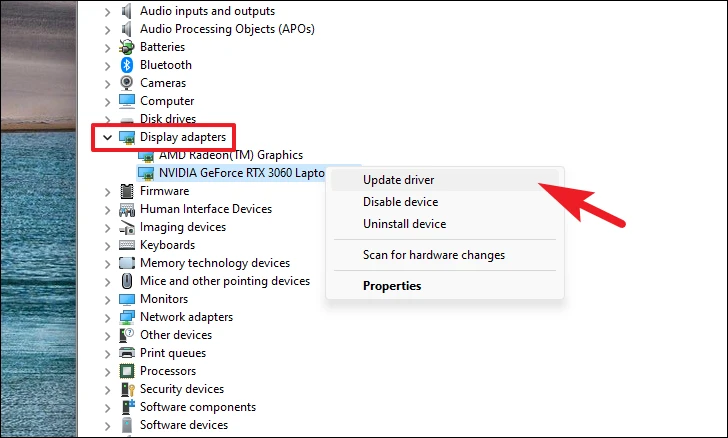
- Choose “Search automatically for drivers” and follow the prompts.
Perform Automatic Repair
Windows’ built-in repair tool can fix many system issues:
- Go to Settings > System > Recovery.
- Under “Advanced startup”, click “Restart now”.
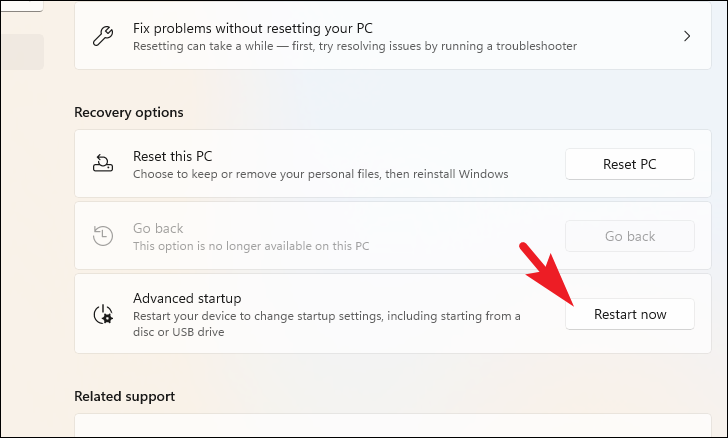
- Choose Troubleshoot > Advanced options > Startup Repair.
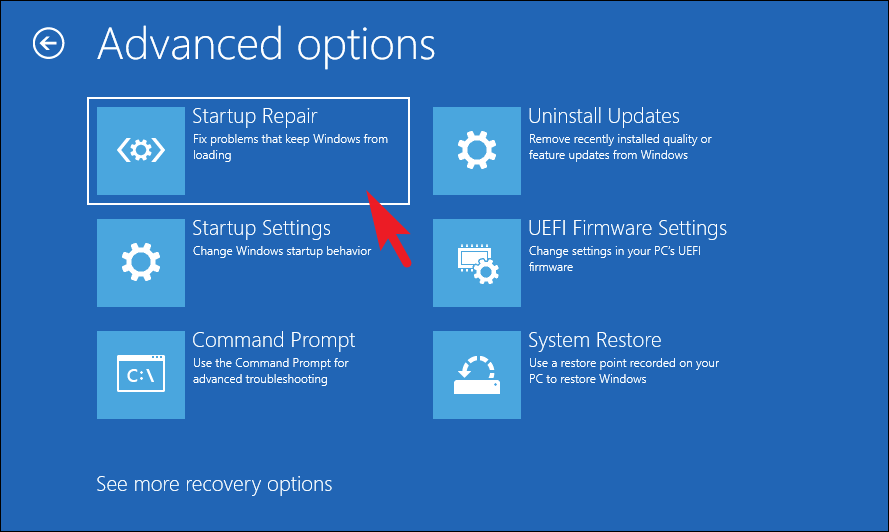
- Follow the on-screen instructions to complete the repair process.
Edit Registry files
If previous methods haven’t worked, carefully editing the registry may help:
- Open Task Manager and click “Run new task”.
- Type
regeditand click “OK” to open Registry Editor.
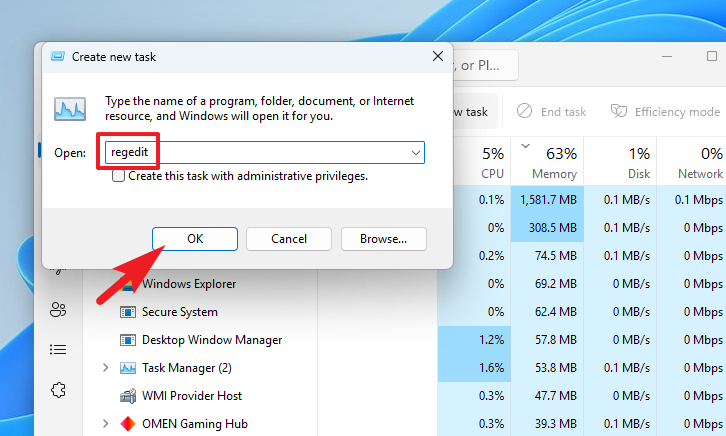
- Navigate to:
HKEY_LOCAL_MACHINE\SOFTWARE\Microsoft\Windows NT\CurrentVersion\Winlogon - Find the “Shell” entry, double-click it, and ensure its value is set to
explorer.exe.

System Restore
If you have a system restore point from before the issue began, you can roll back to it:
- Open Control Panel and navigate to Recovery > Open System Restore.
- Choose a restore point from before the black screen issue started.
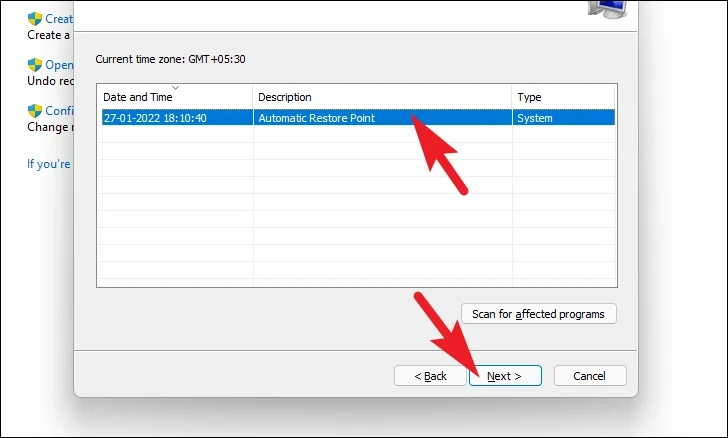
- Follow the prompts to complete the restoration process.
Fresh install of Windows 11
As a last resort, performing a clean installation of Windows can resolve persistent issues:
- Download the Windows 11 ISO and mount it.
- Run
setup.exefrom the mounted drive. - Choose “Change what to keep” and select “Nothing” for a completely fresh start.
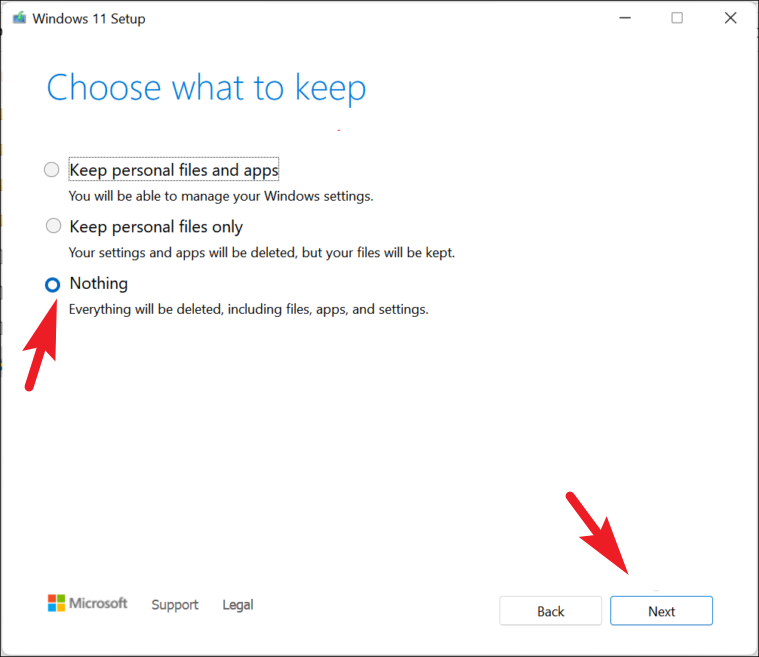
- Follow the installation wizard, making sure to choose “Set up as new device” when prompted.
By working through these methods systematically, you should be able to resolve the Windows 11 black screen issue and regain access to your desktop. Remember to regularly back up your important data to make troubleshooting and potential reinstallations less stressful in the future.


