Easy steps to move Steam, Origin/EA, Microsoft Store/Xbox Games, Epic Games, Battle.net, Ubisoft, GOG, Riot, and other games to a different drive.
Easy steps to move Steam, Origin/EA, Microsoft Store/Xbox Games, Epic Games, Battle.net, Ubisoft, GOG, Riot, and other games to a different drive.
by Raj Kumar
With the ever-increasing size of modern video games, it’s not uncommon for titles to exceed 150 GB, quickly consuming valuable space on your primary hard drive. Shifting these games to another drive can not only free up storage but also enhance game performance and organization. This guide offers detailed instructions on how to move your games to a different drive in Windows 11, covering various platforms like Steam, Microsoft Store, Epic Games, and more.
How to Move Steam Games to Another Drive
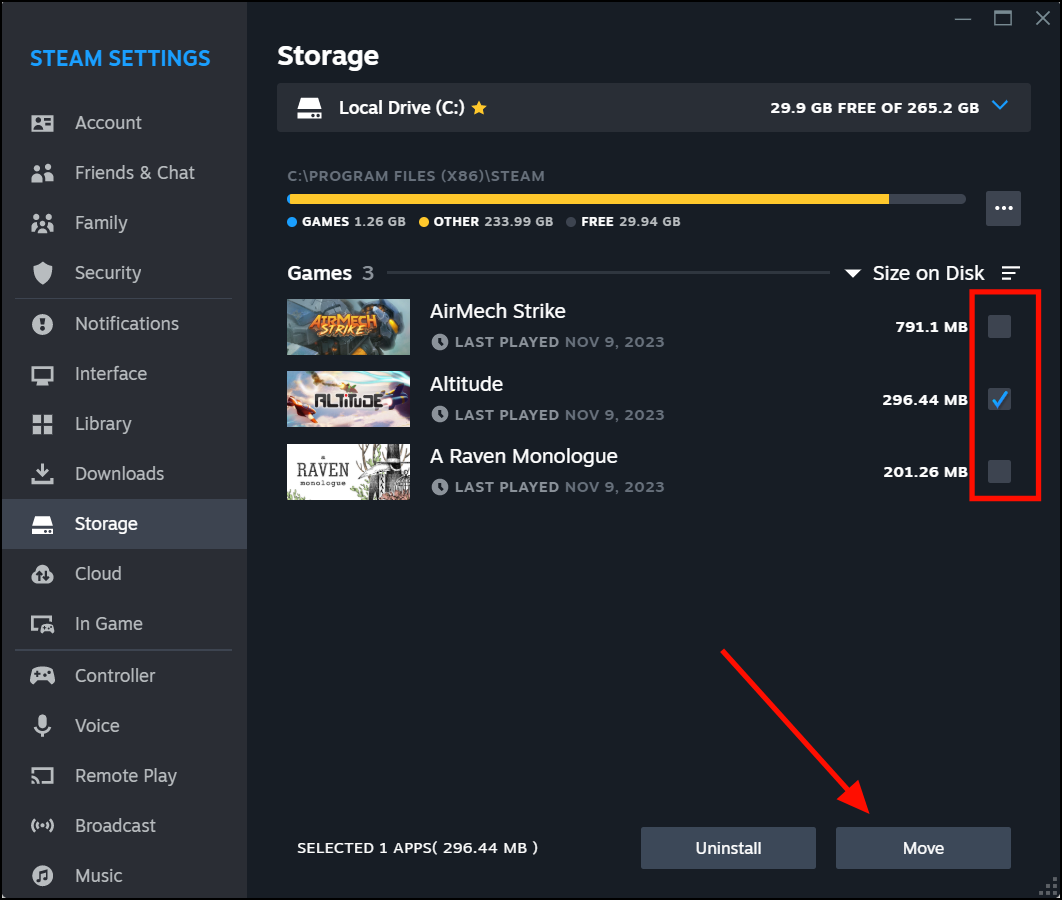
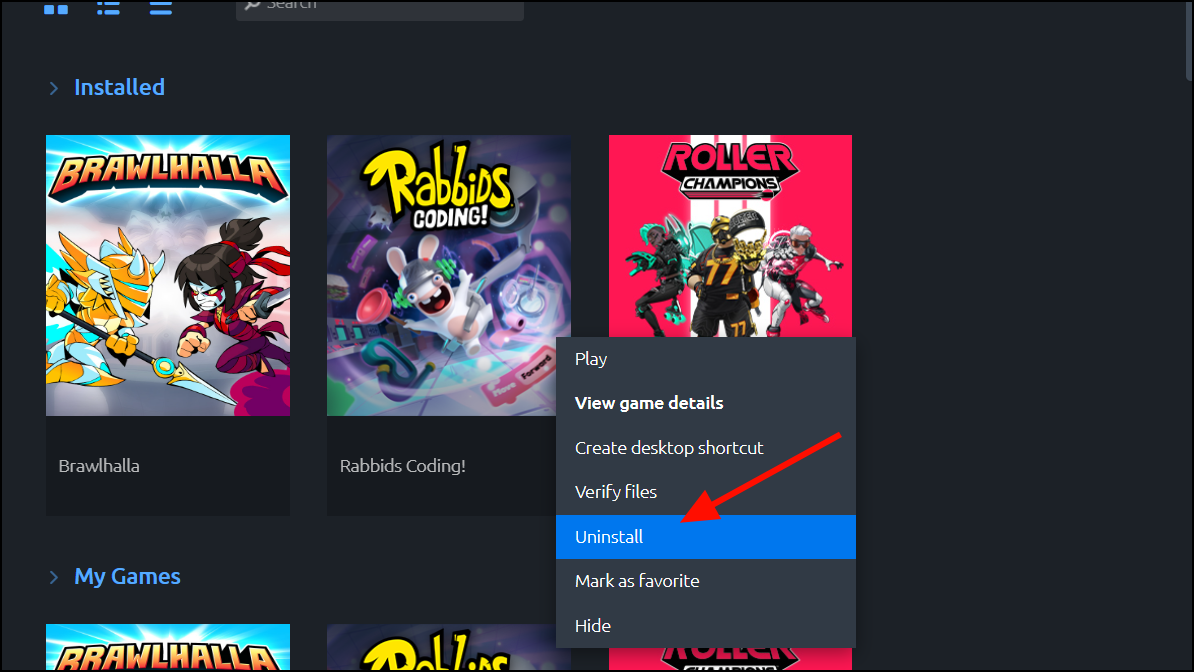
Steam provides a built-in feature that makes moving games between drives straightforward. By creating multiple Steam library folders, you can organize your games and store them on the most suitable drive.
In the Storage Manager, click on the ‘+’ icon or ‘Add Library Folder’. Select the new drive where you want to create the library and confirm by clicking ‘Add’.
Click ‘Move’ to initiate the transfer. The process may take several minutes depending on the game’s size. Once completed, your game will reside on the new drive.
For more detailed information on moving games in Steam, you can refer to our comprehensive article.
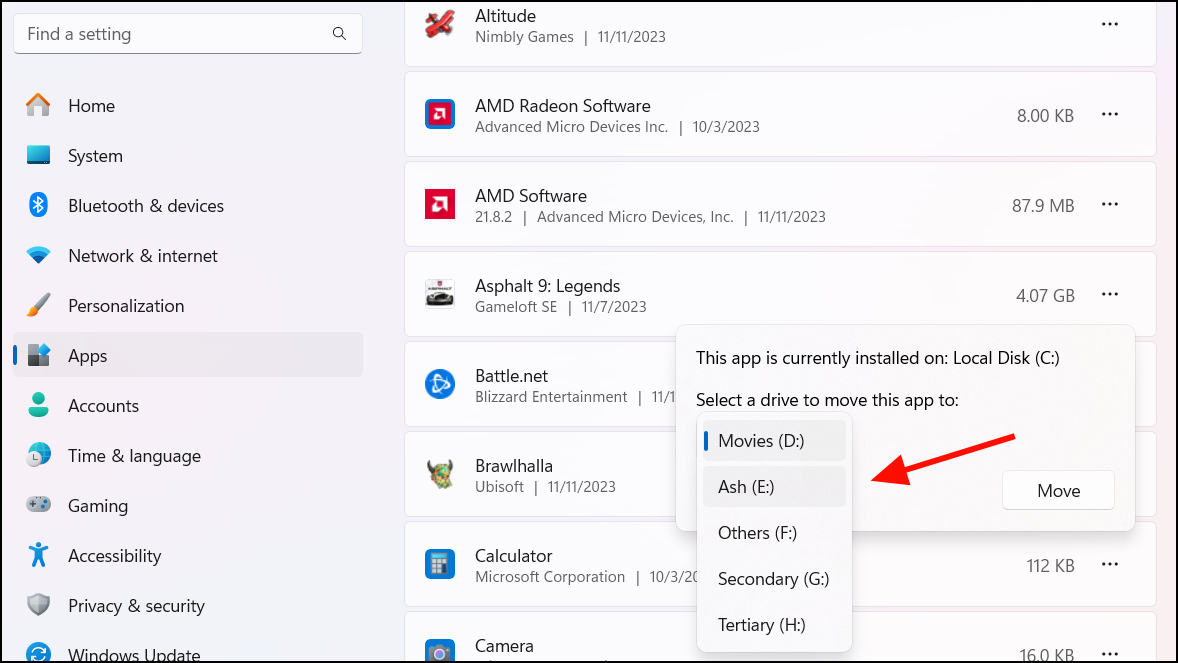
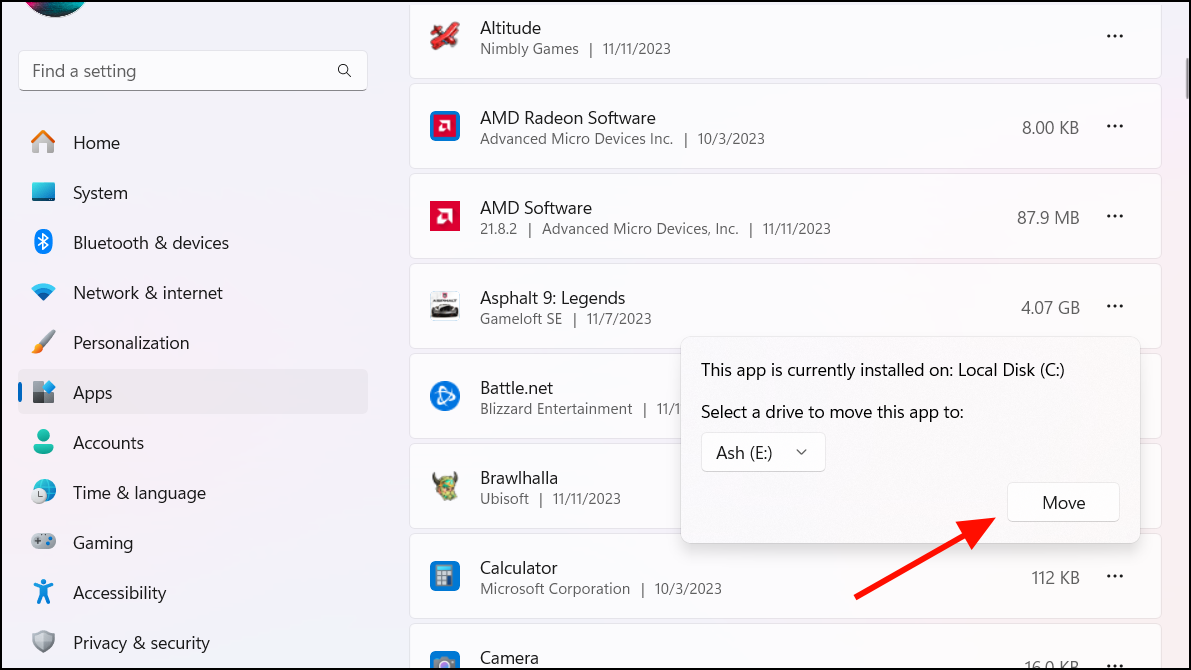
Wait for the process to finish. The game will now reside in a folder named ‘Xbox Games’ on the selected drive.
Launch the game as usual from the Start menu or Xbox app. Keep in mind that moving games to external drives may cause performance issues if the drive is not fast enough.
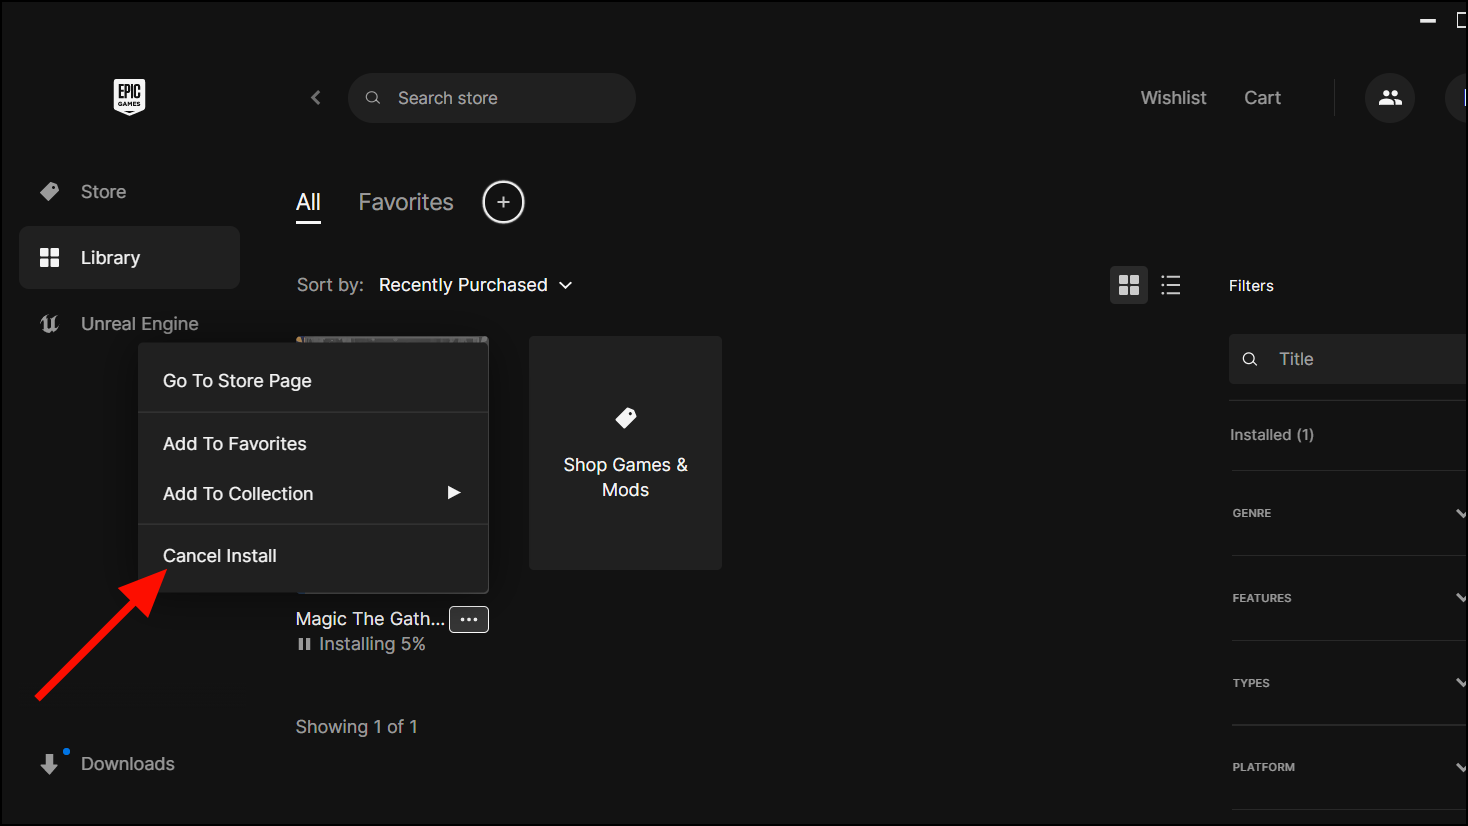
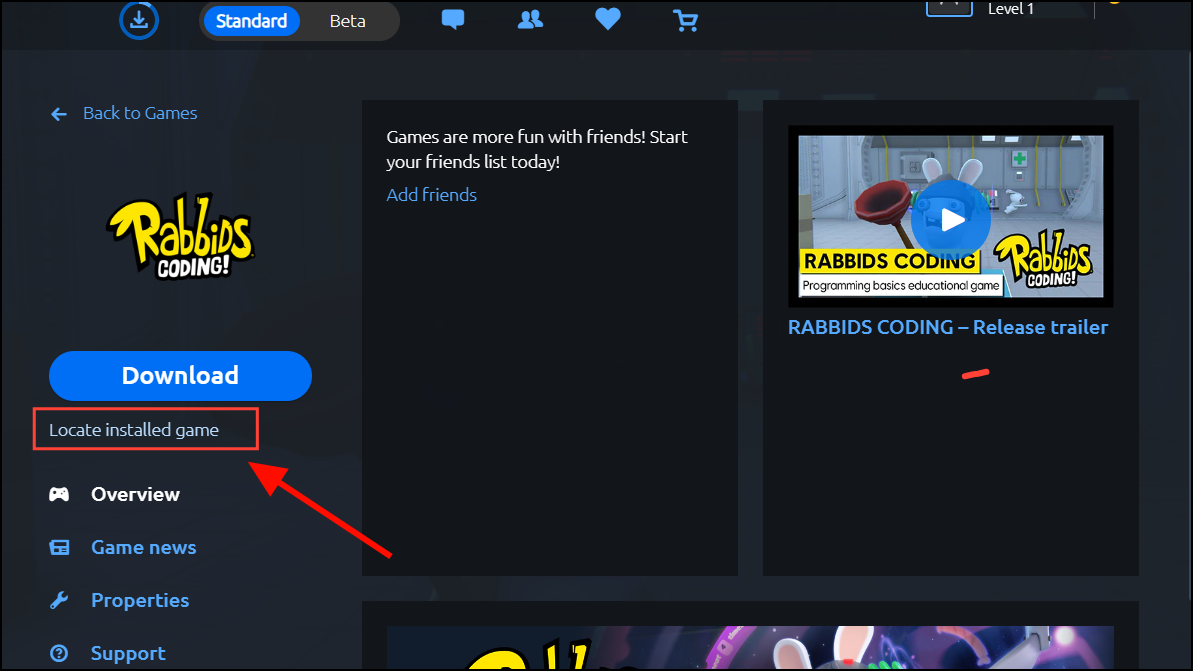
Moving Epic Games to Another Drive
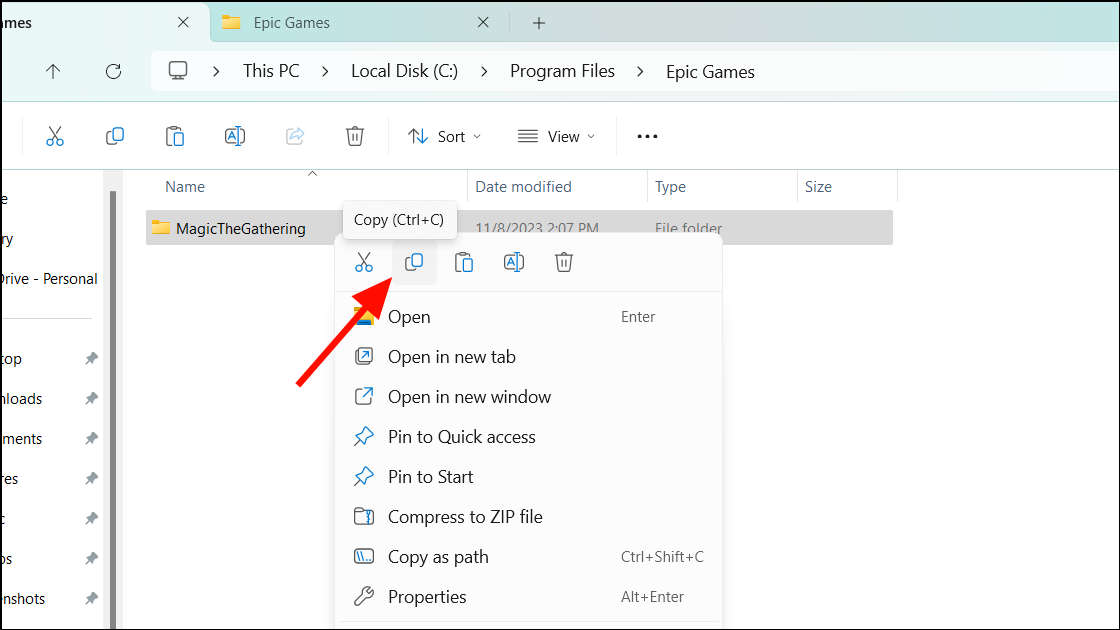
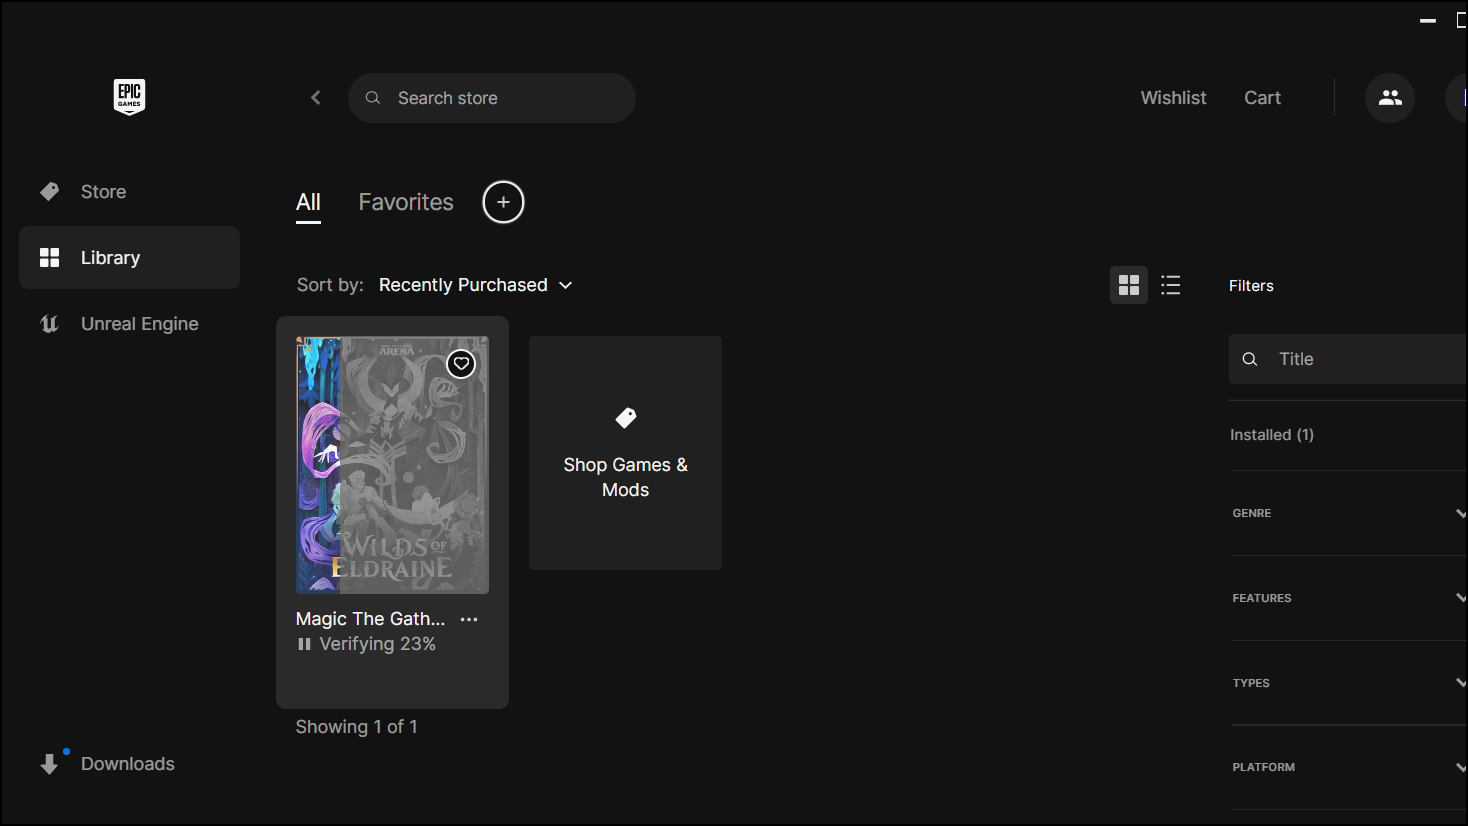
Transferring games installed through the Epic Games Launcher involves a few additional steps but is still manageable without needing to re-download your games.
Navigate to the temporary location where you copied the game files earlier. Move or copy them to the new installation directory, replacing any existing files when prompted.
Once verification is complete, the game will be ready to play from its new location.
Moving Blizzard Games to a New Drive (Battle.net)
Blizzard’s Battle.net doesn’t offer a direct method to move games, but you can manually relocate them by moving the files and updating the launcher settings.
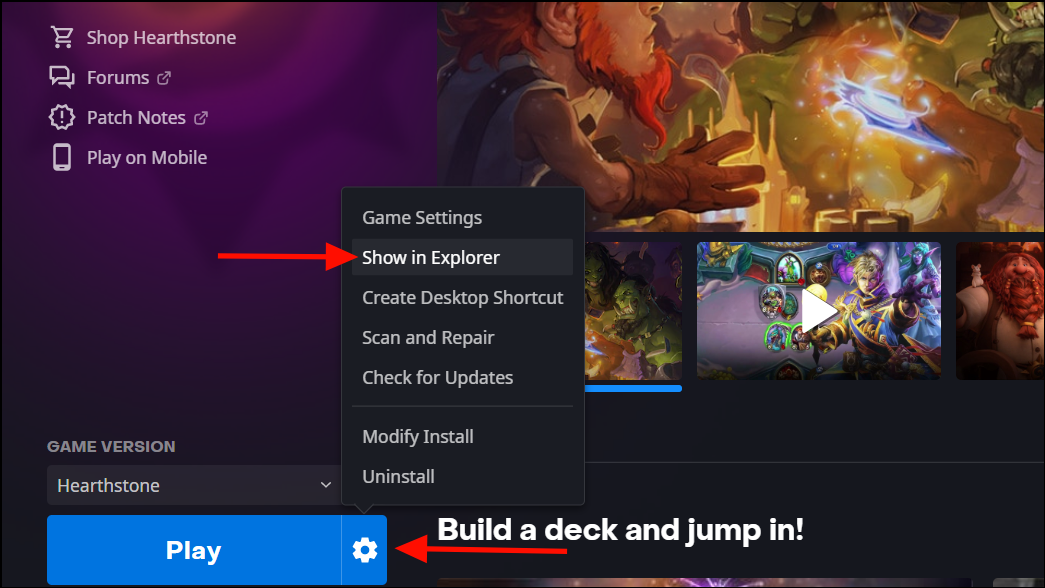
Open the Battle.net launcher and select the game you want to move. Click on the ‘Options’ (gear icon) next to the ‘Play’ button and choose ‘Show in Explorer’ to locate the game files.
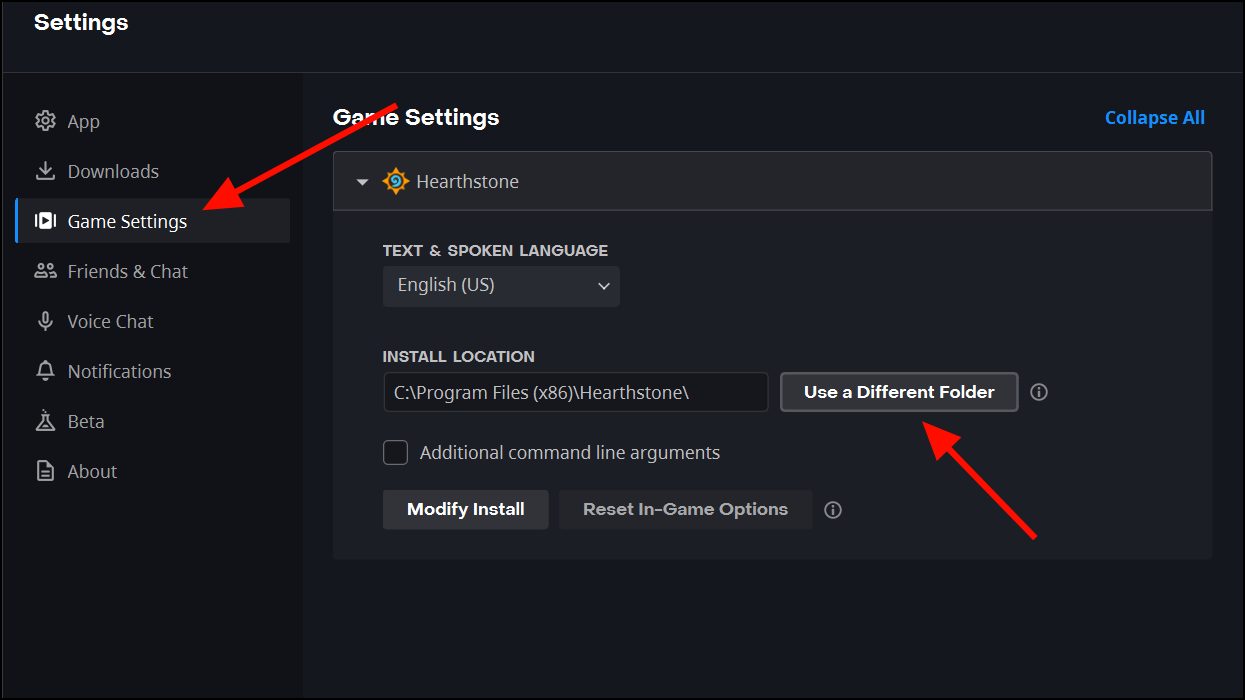
In the Battle.net launcher, go to ‘Settings’ by clicking the Blizzard icon in the top-left corner. Navigate to ‘Game Install/Update’ and click ‘Use a Different Folder’ under the game you moved.
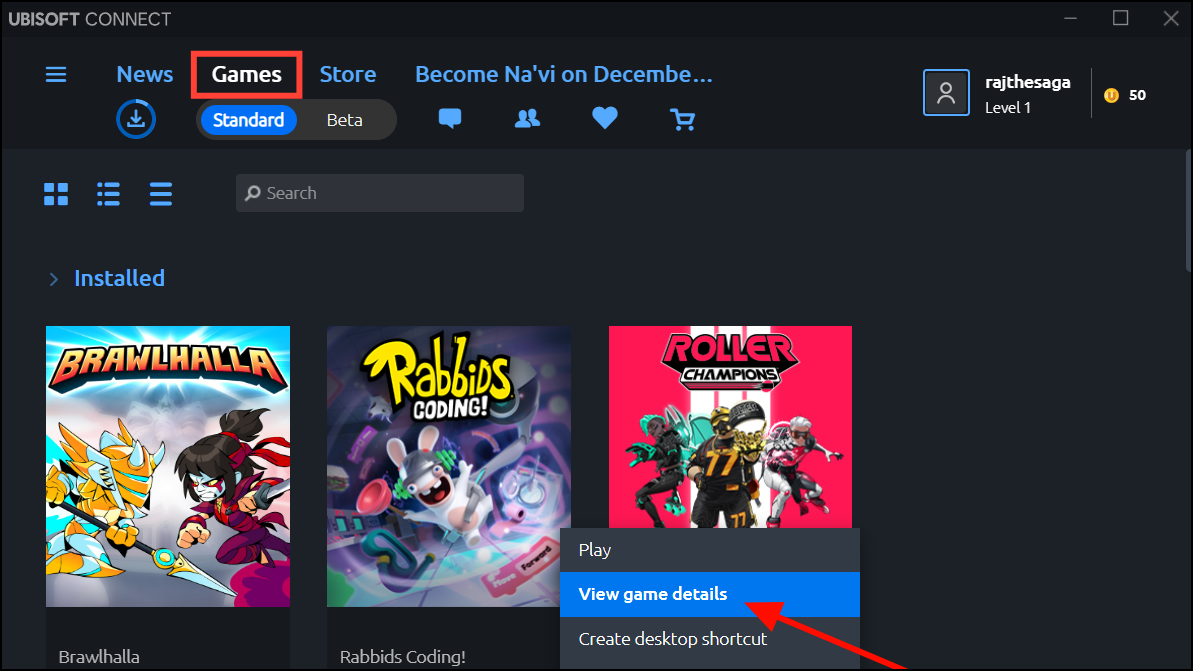
Browse to the new location of the game folder and select it. Ubisoft Connect will verify the files and recognize the game as installed.
The game is now ready to be launched from its new location without the need to re-download.
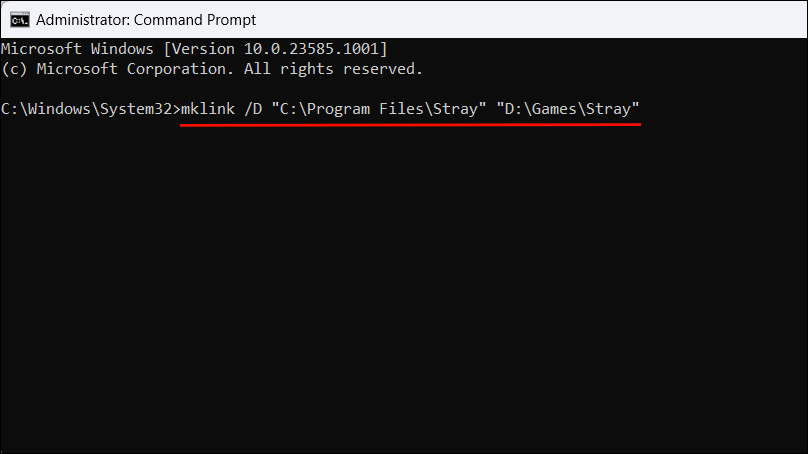
Creating a Symbolic Link to Move Games
If a game launcher doesn’t support moving games directly, creating a symbolic link can be an effective workaround. This method tricks the system into thinking the game is still in its original location while it’s actually on another drive.
Open Command Prompt as an administrator. You can do this by searching for ‘Command Prompt’ in the Start menu, right-clicking it, and selecting ‘Run as administrator’.
Replace "C:\Original\Game\Path" with the path where the game was originally installed and "D:\New\Game\Path" with the new location where you moved the game files.
Press ‘Enter’ to execute the command. A symbolic link will be created in the original location, pointing to the new location.
You can now launch the game as usual, and it will run from the new drive without any issues.
Using Third-Party Tools to Move Games to Another Drive
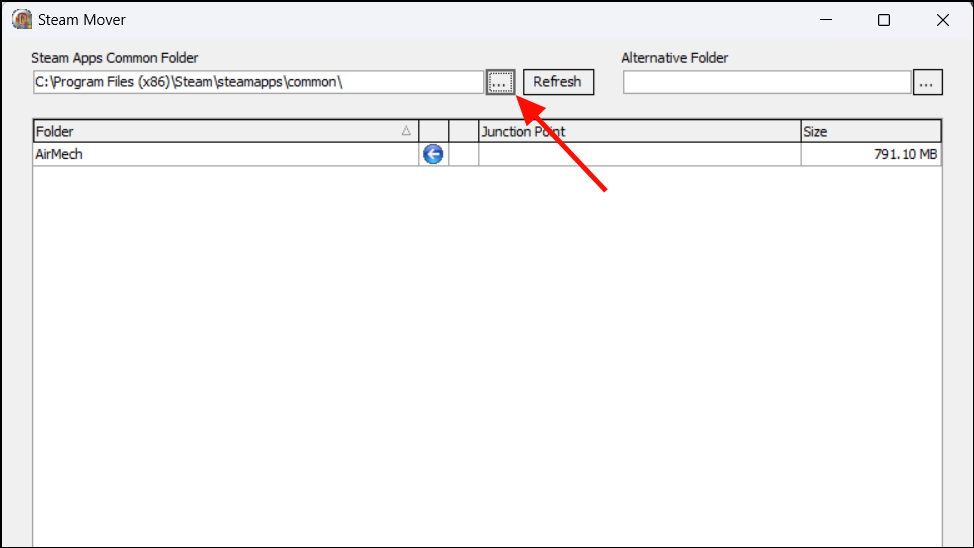
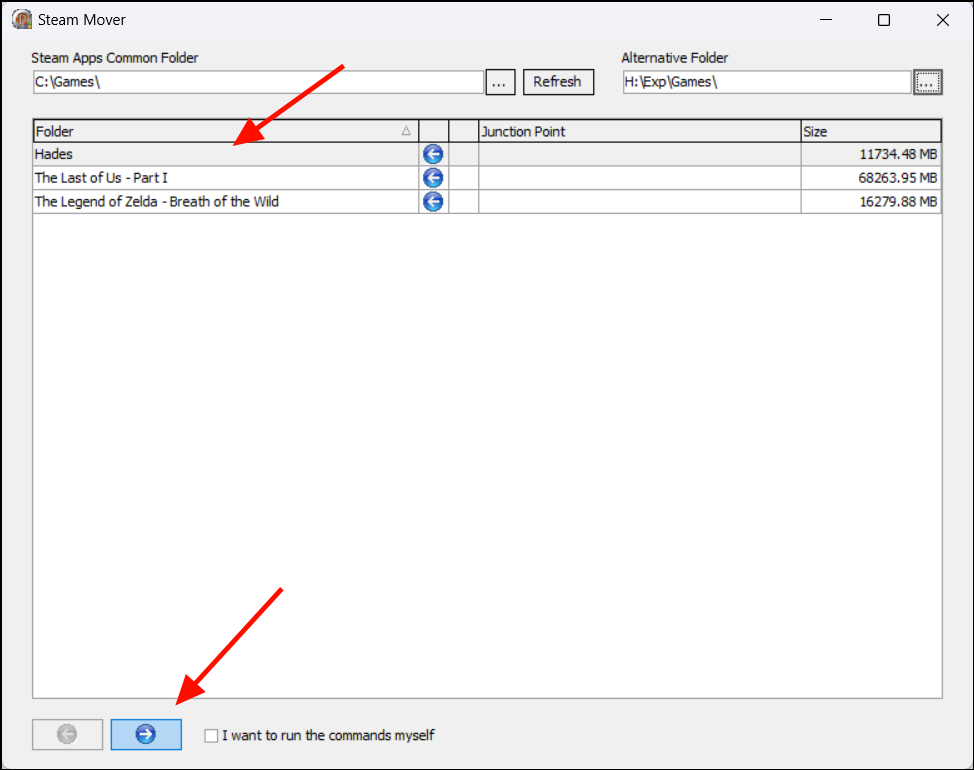
Third-party applications like Steam Mover can simplify the process of moving games between drives, especially when dealing with multiple games or large libraries.
Use Steam Mover to Move Games
Steam Mover is a free utility that allows you to move games and create symbolic links seamlessly.
Once completed, symbolic links to the new locations will be created, and you can play your games without any additional steps.
Note: Ensure that the drives you’re moving games to are formatted in NTFS, as Steam Mover requires it to create symbolic links.
By utilizing these methods, you can effectively manage your game installations, optimize storage space, and ensure your system runs smoothly while enjoying your favorite games on Windows 11.