Google Meet is one of the forerunners in the video conferencing ecosystem, as one would expect it to be. And quite right too, products from such big companies often spark such expectations. And yet, even though Google Meet is steadily ahead in the race, it’s not winning.
It has been consistently behind its competitors in bringing the features that users most covet. Even an offhanded comparison with it’s biggest competitors, Zoom and Microsoft Teams, would show that it’s been the last to bring features such as virtual backgrounds and tiled view in meetings. These features have persistently been fan favorites, the ones users haven’t been shy in voicing their love for.
Google Meet has now caught up considerably, but it seems like there’s still a long way to go. Even though you can share your screen in meetings that make it possible to deliver presentations or just share content, something essential is sorely missing on Google Meet. And you guessed it right! It’s almost unbelievable that Google Meet doesn’t have the mechanics to also view the meeting participants’ videos while you’re presenting.
Not being able to see other participants’ videos while you’re sharing your screen makes it incredibly difficult, almost impossible even, to connect with students, colleagues, or even friends trying to watch a movie together. Fortunately, the lack of a feature hasn’t stopped anyone before. There are a few ways you can see the participants’ videos while sharing your screen. They might not be as ideal as a built-in functionality, but it’s at least something.
Attach a Second Monitor to your Computer
This has to be the solution that most users find the most convenient in every sense. It’s easy to pull off, and you get to view the presentation as well as the video feeds on full screens. The only requirements are a spare monitor, a cable for the required ports, and the desk space. Many people will find it at home, whether it’s a screen from an old computer or a spare TV screen.
Whether you’re using a laptop or a desktop computer, you can attach a second monitor to it. Most systems have multiple VGA or DVI ports. The easiest perhaps might be using the HDMI port, though. It’s also a better solution. And there’s a good chance your laptop will have it. If not, you could use a USB to HDMI adapter.
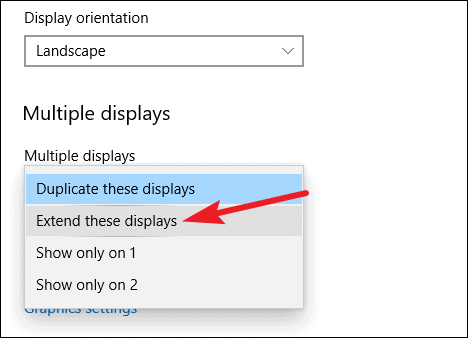
Once you connect the second monitor to your system, you want to ensure that the screen is extending, not duplicating. On Windows 10, right-click on the desktop and select ‘Display settings’ from the menu.
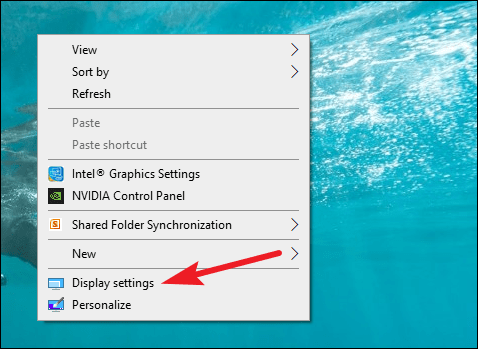
The display settings window will open. Scroll down until you find the option for ‘Multiple Displays’.
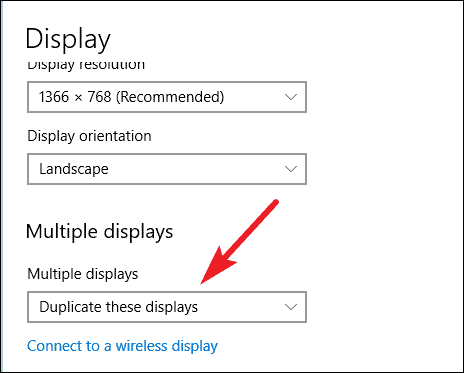
‘Duplicate these displays’ will be selected by default. Click on it to expand the drop-down menu and select ‘Extend these displays’ from the options.
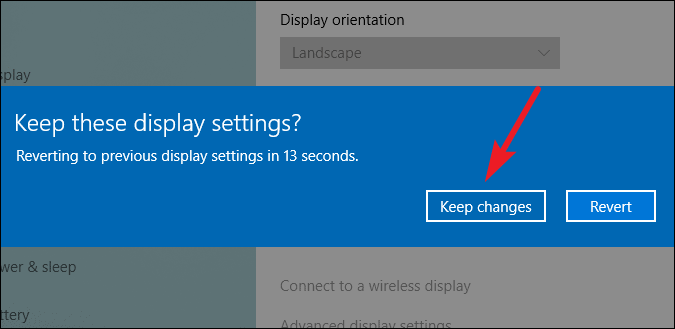
A confirmation message might appear on your screen asking whether you want to keep these changes, or else the changes will revert back in a few seconds. Click the ‘Keep changes’ button.
Now, when you need to share your screen in Google Meet, remember to do this. If the content you want to share is a Chrome tab, pop it out as a separate window. If it’s already a window, well, you need to perform one less step. Now, drag that window onto the extended monitor. Then, share it from Google Meet.
Now, one of your monitors will have the content you’re sharing, and on the other, you can see the video feeds of other participants.
Use the Dualless Chrome Extension
Now, for people who don’t have a second monitor or consider it too much of a hassle setting it up, you can use the Chrome extension ‘Dualless’ that produces a similar effect. But the only problem is that this is only useful when the content you’re presenting is in a browser window.
The Dualless extension splits your browser window into 2 screens of varying ratios. You can have one portion of the screen for your presentation content and the other for the Google Meet window to view the video feeds of other participants.
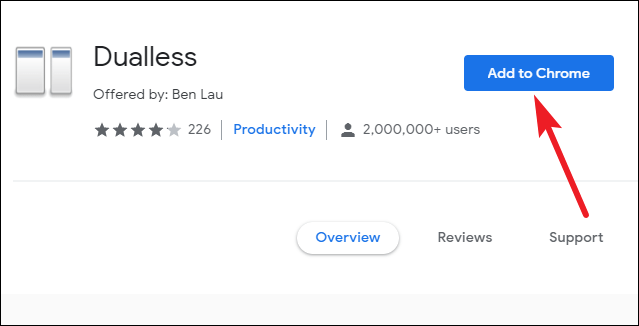
Go to the Chrome web store on Google Chrome or other browsers like Microsoft Edge that support it and search for ‘Dualless’. You could also click the button below to hop there in a jiffy.
Click the ‘Add to Chrome’ button to install the extension on your browser.
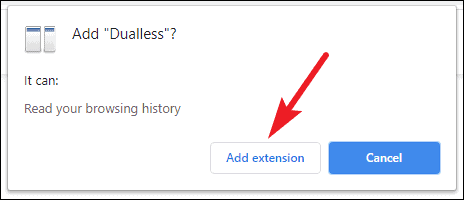
A confirmation dialog box will appear. Click the ‘Add extension’ button to confirm.
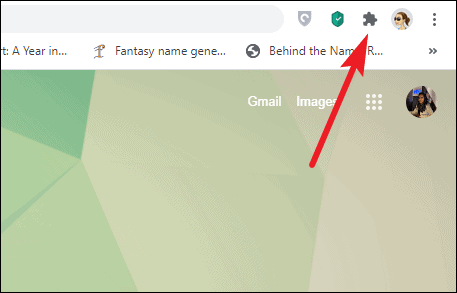
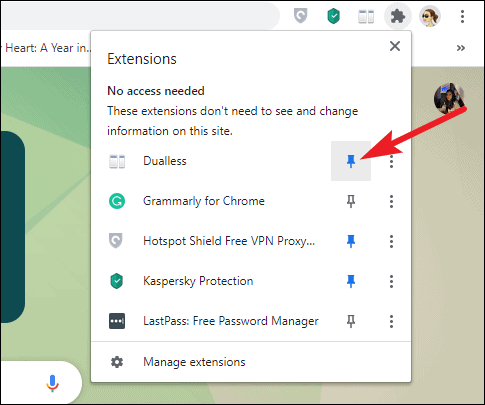
The extension will install, and the icon for the extension should appear on the right of your address bar. If it doesn’t, click the ‘Extensions’ button (the jigsaw-puzzle icon).
Then, click the ‘Pin’ icon next to the Dualless extension to pin the extension to your address bar. You could also use the extension from the Extensions menu every time without the need to pin it. Pinning it just makes it easily and quickly accessible.
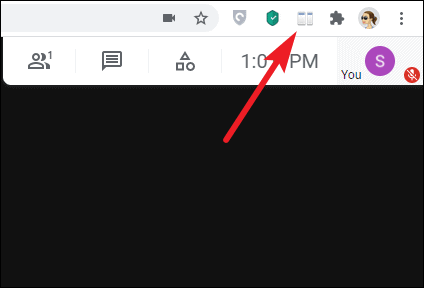
Now, use the extension in the meeting when you want to present your screen. Click the extension icon from either tab – Google Meet window or the tab you want to share.
Then, select the ratio of how you’d like to split your screen and click on it. Available ratios include 3:7, 4:6, 5:5, 6:4, and 7:3. You can change this ratio at any time later if you want to.

The tab from where you just clicked the extension icon will split in one part of the screen, left or right, depending on which side you clicked from Dualless’s menu. The rest of the tabs will split in the remaining part of the screen. It means that if you clicked the extension icon from the Google Meet tab and then clicked the left side tile, then Google Meet will appear on the left side and all remaining tabs on the right.
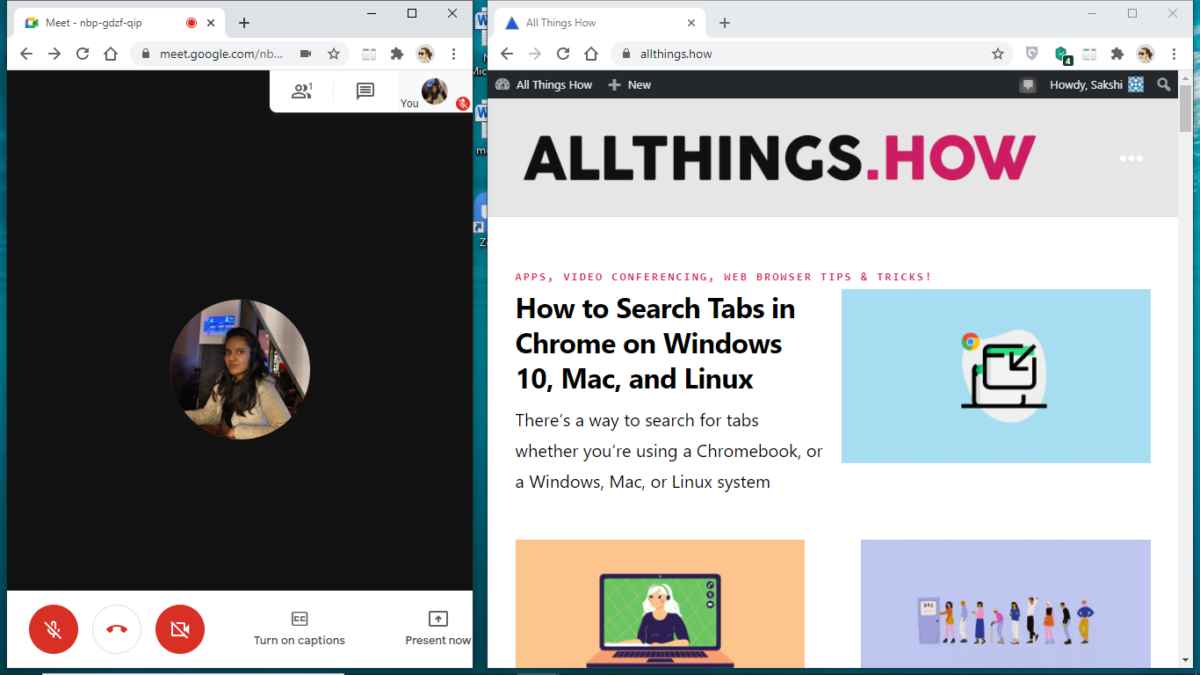
Now, share the screen from Google Meet, and you’ll be able to see the content you’re sharing on one side of the screen and participants’ videos on the other.
Use a Second Device to login to Meet a 2nd Time
So, you don’t have a second monitor, and the Dualless extension won’t help either as the content you want to share is not present in the browser tab. What else can you do? There’s still a couple of options.
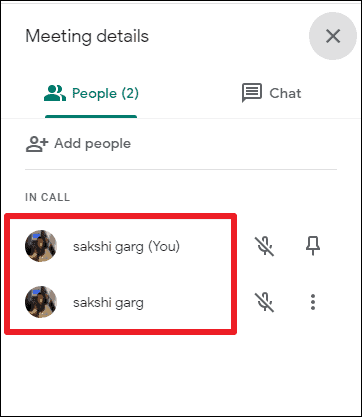
If you’re attending the meeting from your computer and have another device, perhaps a smartphone or a tablet, you can log into your own meeting a 2nd time from that device. Google Meet lets you log in to a meeting more than one time from a single account. This allows you to view the participants’ videos on that device while presenting the content from the first device.
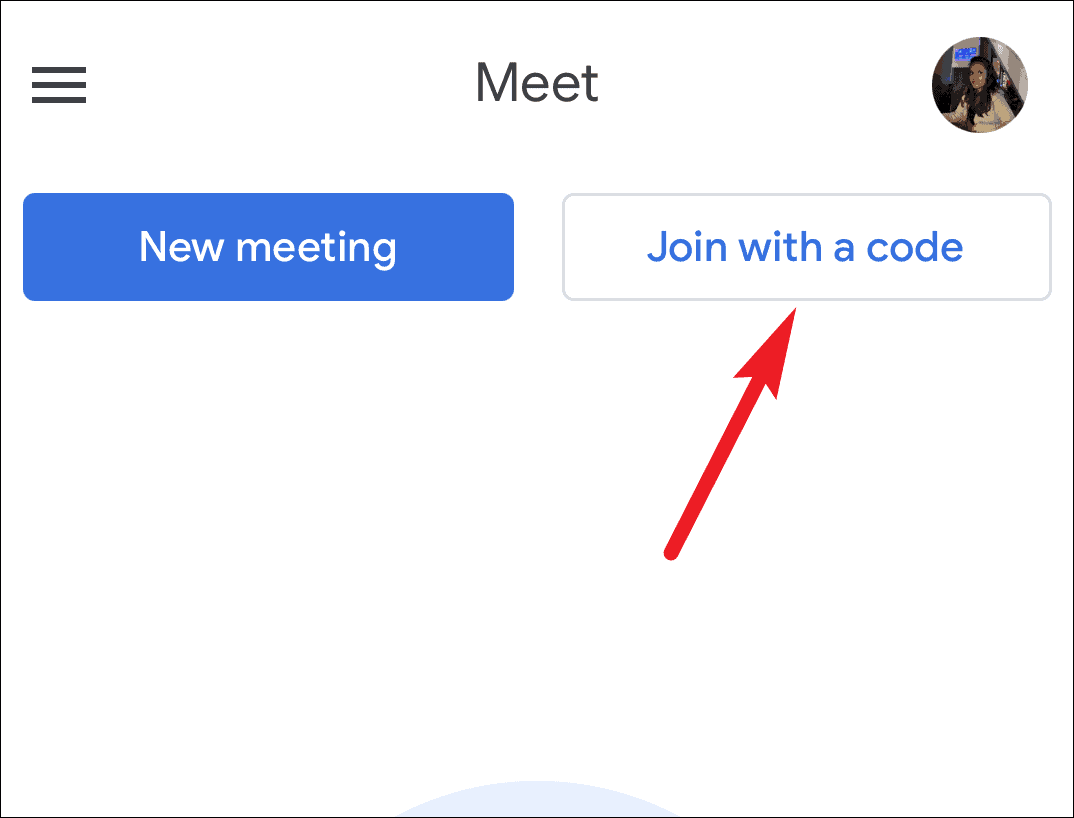
Open Google Meet on the 2nd device, and log in with your account. Now, click the ‘Join with a code’ button and enter the meeting code from the previous device. Remember to join the existing meeting and not start a new meeting.
The meeting will now have two instances of your account.
If you do choose to log in to a second device, remember to mute the microphone, as well as the speaker sound, on that device to avoid noise echo. Keep the 2nd device only to view the video feeds of other participants. Then, when the presentation is over, end the meeting on the 2nd device to return to the normal meeting experience.
Adjust Your Presentation and Meet Windows Manually
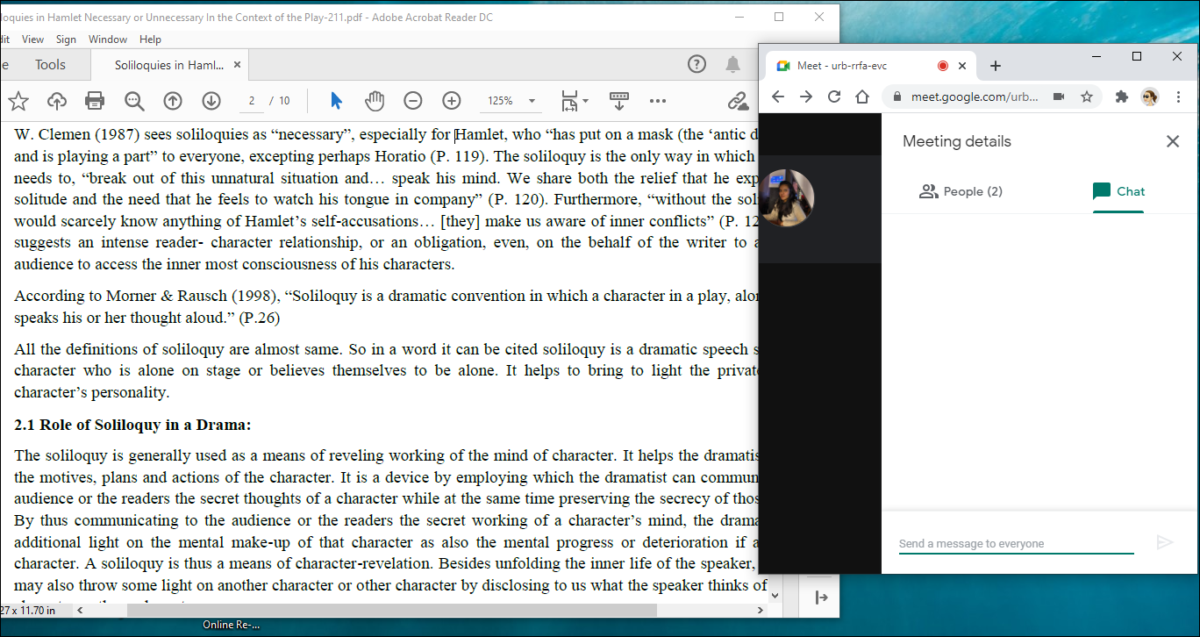
When you can’t use any of the above solutions, there’s the good old-fashioned manual adjusting of the windows. Restore down both your Google Meet and the presentation content window. Then, reduce their sizes and overlay them in a position that lets you see the presentation content on one side and Google Meet window on the other.
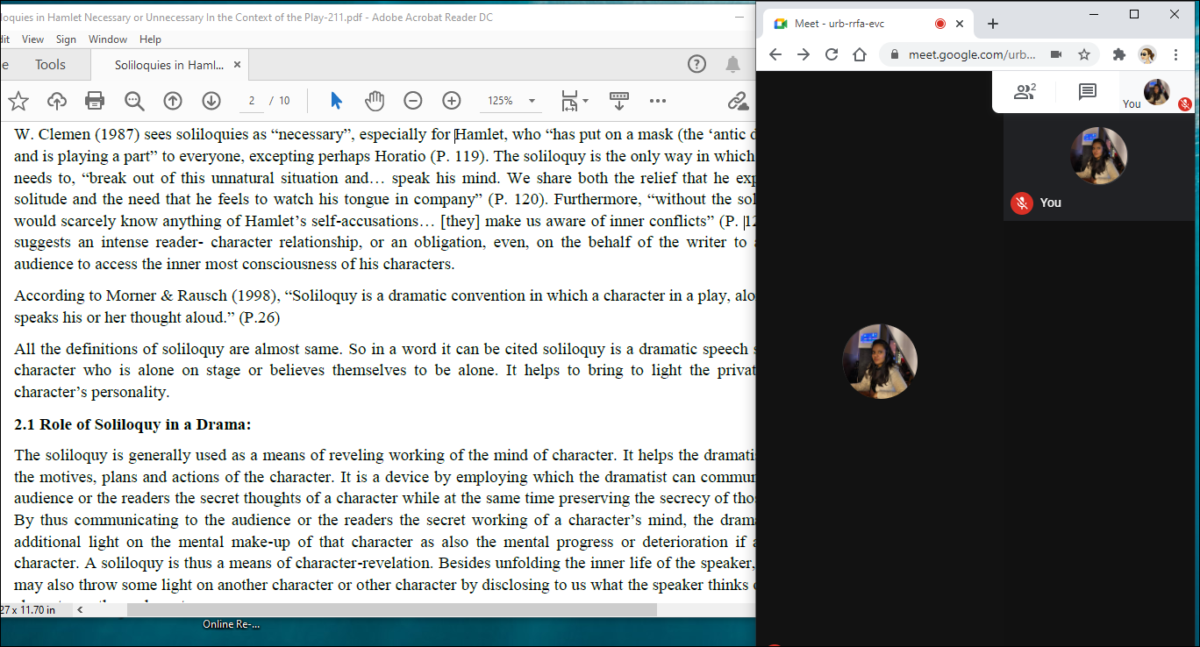
This might not be the most ideal solution, but for meetings with few participants at least, it’d work smoothly. If there are a lot of students in the meeting, you can direct the students to ask any questions in the chat. And you can keep an eye on the chat panel from the repositioned Google Meet window and open it while sharing your screen easily.
Imagine not being able to see other participants when you’re presenting in a real-world scenario. It would suck, just like it does in virtual meetings. Fortunately, these few tips might help you get ahead of the situation.