Hosting virtual meetings is essential in today’s collaborative environment, and Cisco Webex Meetings offers a robust platform for connecting with colleagues, sharing screens, and exchanging files. If you don’t have Microsoft Outlook, you can still schedule a Webex meeting through the Webex web app. Here’s how you can do it:
Scheduling a meeting on Webex
Open a web browser and navigate to signin.webex.com. Sign in to your Webex account using your credentials.
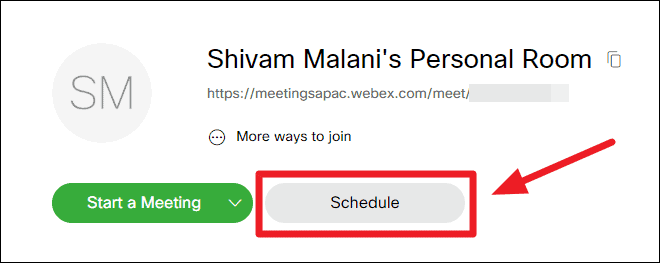
After logging in, click the ‘Schedule’ button located on the home screen, just below your name, to begin setting up your meeting.
Setting the meeting topic and password
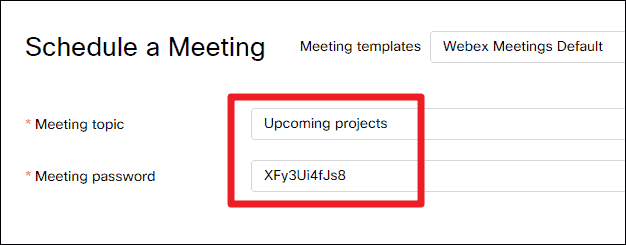
On the ‘Schedule a Meeting’ page, you can configure your meeting’s details. Enter a ‘Meeting topic’ that reflects the purpose of your meeting and set a ‘Meeting password’ in the respective fields. Webex may auto-generate a secure password, but you can modify it or click the ‘Reset’ button to generate a new one.
Selecting the date and time
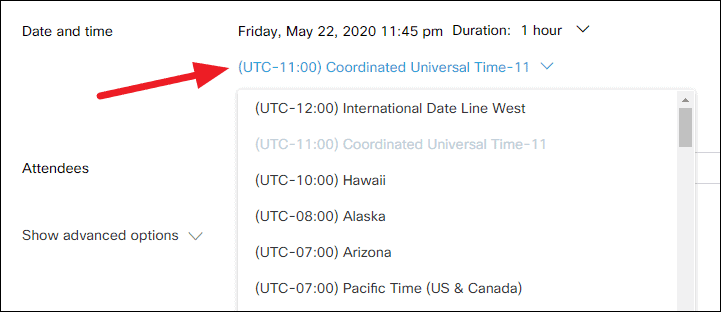
To schedule the meeting’s timing, click on the ‘Date and time’ option. A date picker will appear, allowing you to select the desired date, time, and duration for your meeting. After making your selections, click ‘Done’ to save the settings.

If you need to adjust the time zone, click on the time zone option displayed below the date and time settings (e.g., ‘UTC – 11:00…’). Choose the appropriate time zone from the list to ensure all participants join at the correct time.
Scheduling a recurring meeting
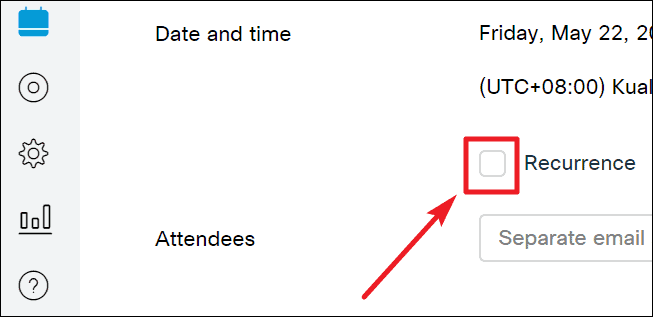
If you’d like to set up a recurring meeting, check the ‘Recurrence’ box located just below the time zone settings. This will allow you to configure how often the meeting repeats. (If you’re scheduling a one-time meeting, you can skip this step.)
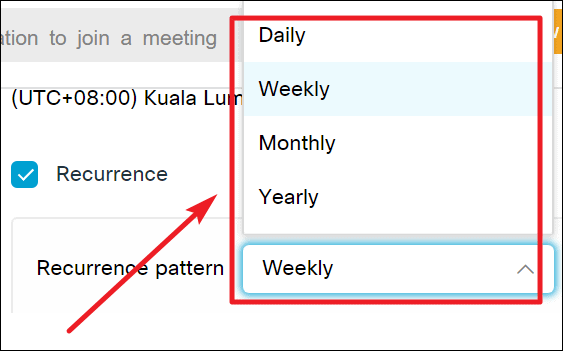
Click on ‘Recurrence pattern’ to choose the frequency of your meeting. Select from options like daily, weekly, or monthly, depending on how often you need the meeting to occur.
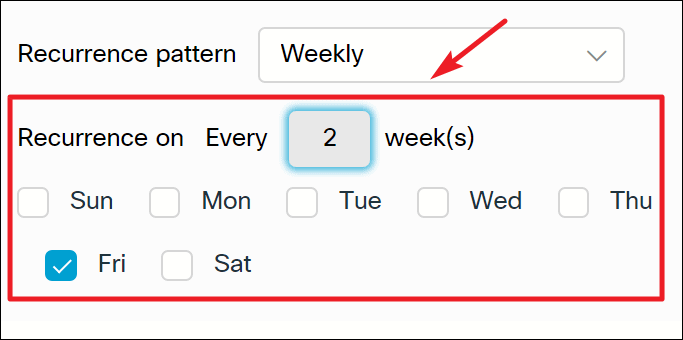
Specify the recurrence details. For example, if you select weekly meetings, you can choose the specific day of the week and set the interval (e.g., every two weeks on Friday). Adjust these settings to fit your schedule. Note that the options will vary based on the frequency you select.
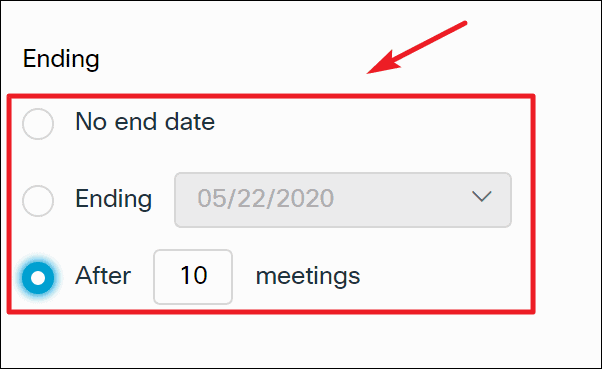
Decide when the recurring meetings should end. You can set an end date by checking the ‘Ending’ box and selecting a date, or you can choose to end the recurrence after a certain number of meetings by checking the ‘After’ box and entering the number of occurrences. If you don’t select an end option, the meetings will continue indefinitely.
Adding attendees to the meeting
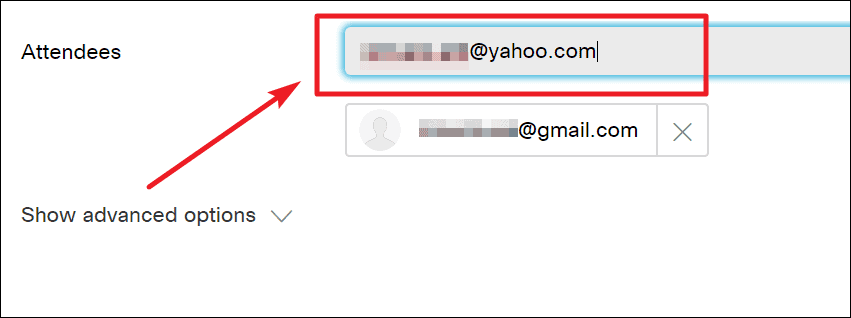
To invite participants, enter their email addresses in the ‘Attendees’ field. If you’re inviting multiple people, separate each email address with a comma.
Exploring advanced scheduling options
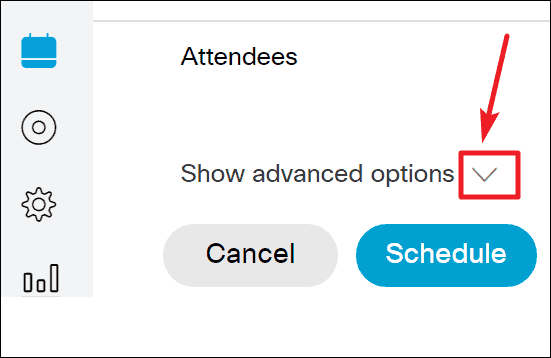
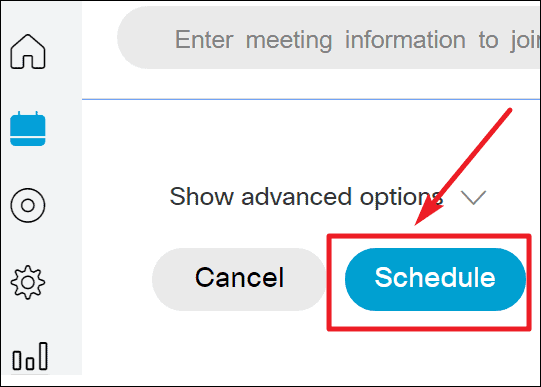
For additional customization, click on ‘Show advanced options’ located just above the ‘Schedule’ button. This will reveal more settings to tailor your meeting experience.
Including a meeting agenda
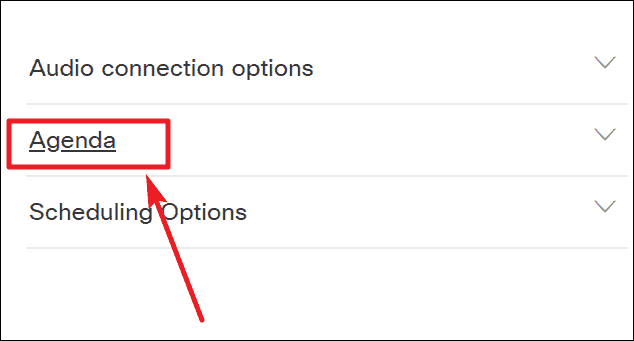
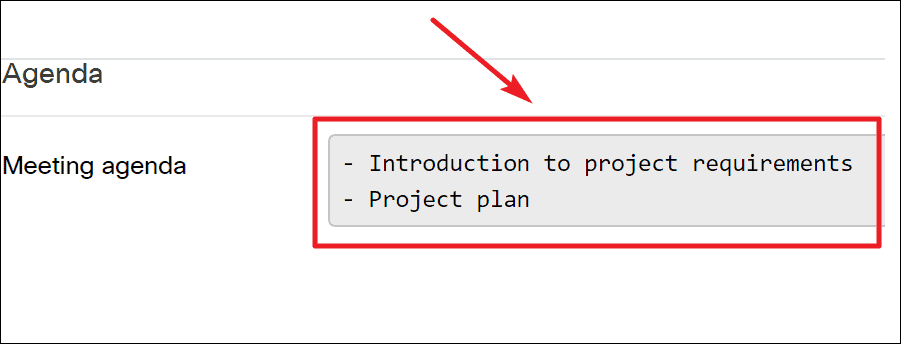
If you want to provide an overview of the meeting’s topics, click on ‘Agenda’ and type the details into the provided text box. Sharing an agenda helps participants prepare for the discussion.
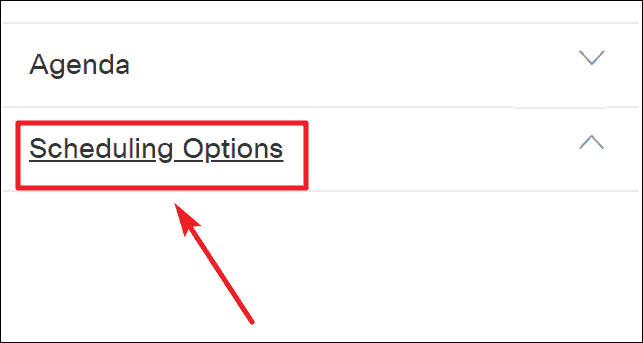
Adjusting scheduling options
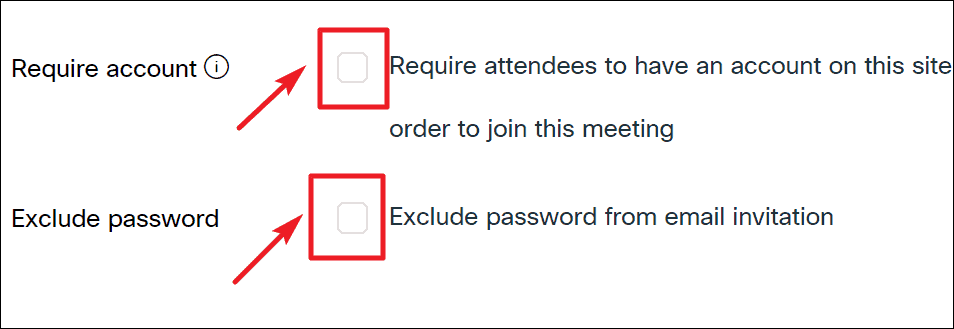
In the ‘Scheduling Options’ section, you can configure additional settings. To require attendees to have a Webex account to join, check the ‘Require account’ box. If you prefer not to include the meeting password in the invitation email and plan to share it separately, check the ‘Exclude password’ box.
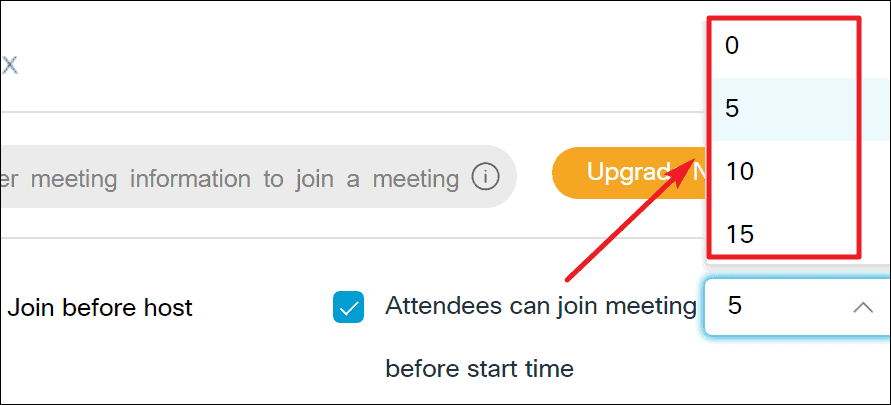
Setting attendee joining time
Control when participants can join the meeting by adjusting the ‘Join before host’ setting. By default, attendees can join up to 5 minutes before the host. Use the drop-down menu to change this interval or disable early joining if you prefer.
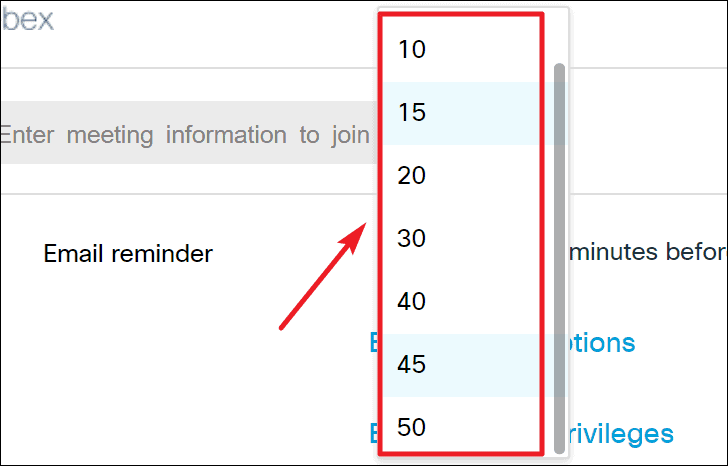
Configuring email reminders
To ensure participants are reminded about the meeting, adjust the ‘Email reminder’ setting. Click on it and select when you want the reminder to be sent—for example, 15 minutes, 1 hour, or 1 day before the meeting starts.
Finalizing and scheduling the meeting
Once you’ve configured all the meeting details and options, click the ‘Schedule’ button at the bottom of the page to finalize and create the meeting.
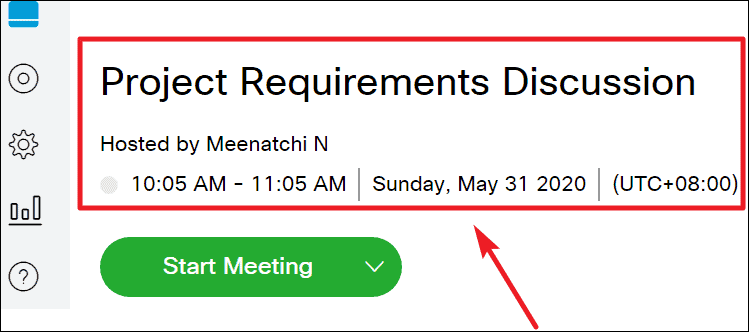
After scheduling, you’ll be redirected to a page displaying your meeting’s details. Here, you can review the information and make any necessary edits.
By following these steps, you can effortlessly schedule both one-time and recurring meetings on Webex without relying on Microsoft Outlook.