Many users of the iPhone have been loyal customers of the brand. So when most of them buy a new iPhone, they already have an old one. Apple has made transferring data from old iPhone to new iPhone very convenient over the years for this particular reason. Read below to find out all the ways you can transfer the data from your old iPhone to the new iPhone.
Transferring iPhone to iPhone over Wi-Fi
Quick Start has to be by far the quickest and easiest method to transfer iPhone to iPhone data while setting up a new iPhone.
If both your devices are running iOS 12.4 or newer versions, then Quick Start offers you ‘Tranfer from iPhone’ option. You can transfer all your data over Wi-Fi from your old iPhone to the new iPhone without any need for iCloud backup.
To get started, turn on your new iPhone. Then set up the language and region settings to get to the Quick Start screen. For this to work, your new iPhone should not be on the home screen, but the ‘Hello’ screen when you get started.
💡 If you have already set up your new iPhone
If you’re on home screen of your new iPhone then that means you’ve already set up your iPhone. To be able to use the iPhone Migration to transfer data from your old iPhone, you need to factory reset your new iPhone to get the “Hello” screen again. Go to Settings » General » Reset » Erase All Content and Settings to reset your iPhone. This will bring you to the ‘Hello’ screen.
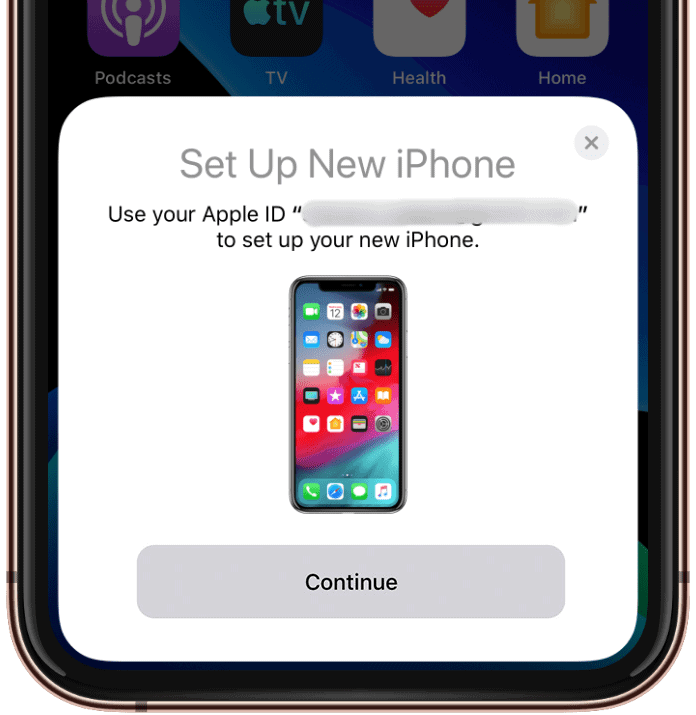
Once your new iPhone is on the ‘Hello’ screen, bring it closer to your old iPhone. The Quick Start screen will pop-up on your old iPhone and give you the option to use your Apple ID to ‘Set Up New iPhone.’ Tap ‘Continue’. Turn on the Bluetooth if you don’t see the ‘Continue’ option.
An animation will appear on your new iPhone. Hold your old iPhone over the new iPhone, then center the animation in the viewfinder. Wait until the message “Finish on New iPhone” appears on the old one. If you can’t use the camera on your old iPhone, select the ‘Set Up Manually’ option and follow the on-screen instructions.
Your new iPhone will ask you to enter the passcode of the older iPhone. Enter it, and the iPhone setup will begin. Complete the Face ID or Touch ID set up or you can also choose to set it up later.
Then, the “Transfer your Data” screen will appear on your new iPhone with two options: ‘Transfer from iPhone’ or ‘Download from iCloud’.
Tap ‘Transfer from iPhone’ to begin transferring your data from the old iPhone to the new iPhone.
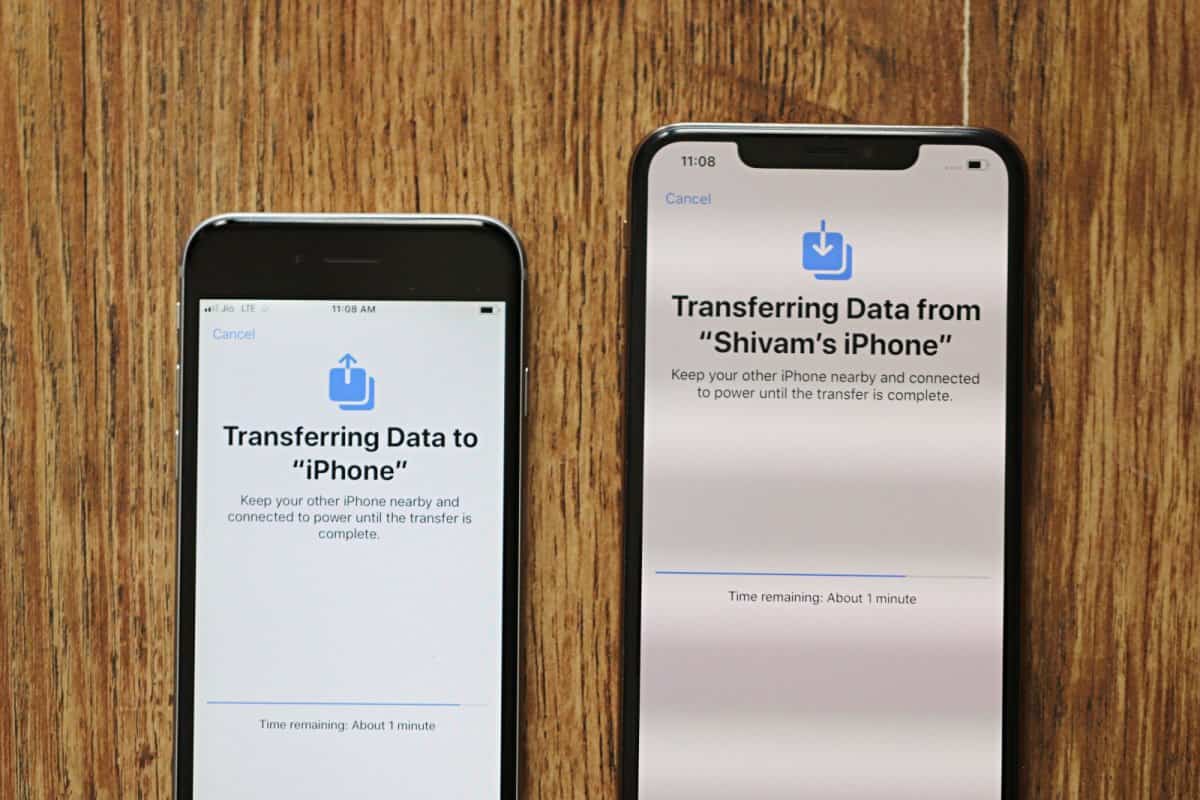
This process will take time depending on the amount of data you are transferring. While the data is transferring, you will also have to review the settings like Apple Pay, Siri, Location Services, etc. that you want to transfer from your old iPhone.
Once you have finished setting up all other services, the transfer screen will open. You can monitor the progress of the data transfer from here. While the data is transferring, keep both iPhones close and keep them connected to power. Once the transfer is complete, your new iPhone will reboot and will have everything from your old iPhone.
💡 Tip
If for any reason, transferring iPhone to iPhone wirelessly is failing for you, then try connecting your old iPhone to the new iPhone using a ‘USB to Lightning’ adapter on one of the devices and restart your new iPhone to initiate the whole process again. This will transfer iPhone to iPhone over cable and it’ll be much faster than the wireless method.
Important Note: In the instructions below, we’ll be using either the iCloud backup or iTunes backup of your old iPhone to set up your new iPhone. So make sure you take a new backup of your old iPhone so you’ve the latest data in either of the backups.
Check out our guide on How to Backup iPhone.
Using iCloud Backup to Transfer iPhone
If you initiated the transfer process using Quick Start but couldn’t use the ‘Transfer from iPhone’ option, then use the ‘Download from iCloud’ option to wirelessly restore your new iPhone.
If you don’t have your old iPhone nearby, you could skip the Quick Start way altogether, and set up your new iPhone right from the ‘Hello’ screen using your iCloud backup.
To restore new iPhone with an iCloud backup, turn on the iPhone so you can see the “Hello” screen. Then, follow the on-screen instructions until you see the Wi-Fi screen. Join a Wi-Fi network and then follow further steps until you see the Apps & Data Screen.
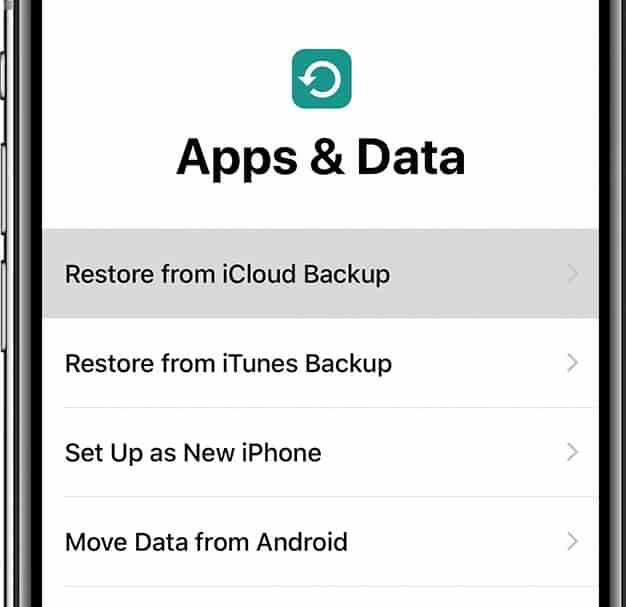
On this screen, select the “Restore from iCloud Backup” option. When iCloud sign-in screen appears, enter your information and login.
Then select a backup from the available options. Make sure its the correct one by looking at the date and size.
Stay connected until the restore process completes. After the setup is complete, your photos, apps, and music stored in iCloud will be downloaded to the new iPhone automatically.
Using iTunes Backup to Transfer iPhone
You can also use your iTunes backup to transfer data from your old iPhone to the new iPhone. First, make sure you have backed up your old iPhone using iTunes on your computer.
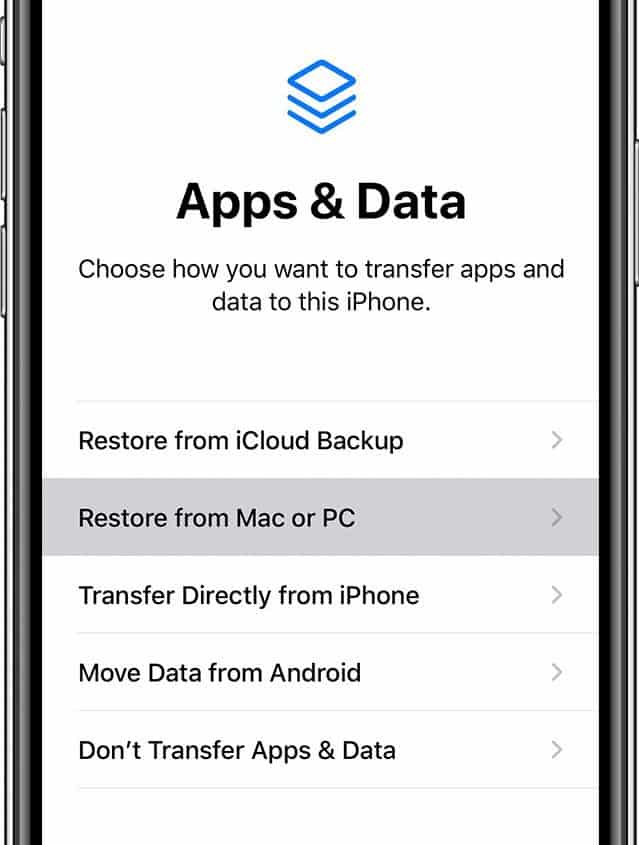
To set up your new iPhone using iTunes backup, turn it on so you can see the “Hello” screen. Follow the on-screen instructions until you see the Wi-Fi screen. Join a Wi-Fi network and then follow further steps until you see the Apps & Data Screen.
From the available options, select “Restore from Mac/PC” or “Restore from iTunes Backup”.
Then, connect the device to the computer using the cable that you use to charge your iPhone. Open iTunes and you’ll be greeted with a “Welcome to Your New iPhone” screen, select “Restore from this backup” option and then select the backup that you want to restore to your new iPhone.
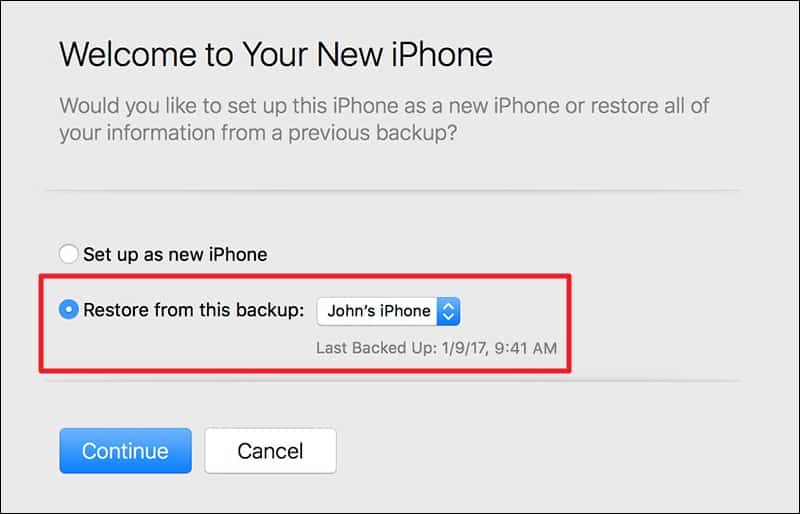
Check the Last Backed Up date of the iTunes backup you selected to determine its correctness. If you haven’t backed up your old iPhone in a while, we suggest backing it up before beginning the restoring process.
After selecting the correct backup, click the “Continue” button. Wait until your new iPhone is restored with your old iPhones backup from iTunes, do NOT disconnect the device until the process is finished.


