Every shot in Iron Nest: Heavy Turret Simulator starts with paperwork and ends with thousands of tons of steel jolting under your feet. The game hands you manual control of a 5,000-ton dieselpunk artillery turret in an alternate-history 1920s Spain, and it never fires for you. You read the orders, measure the target, solve the ballistics, load the gun by hand, and pull the trigger yourself.
Quick answer: Read the teletype for target coordinates, measure bearing and range on the map with the red marker, feed those numbers into the ballistic calculator to get your elevation and charge count, load the shell and powder, set elevation and bearing, arm the gun on the firing console, and pull the main trigger. Watch the map to confirm where the round lands.
The full firing sequence, target to trigger
The loop is the same every time. Follow the order below, because each step feeds the next. Skip the calculator and you have no elevation; skip the console check and you may fire the wrong gun or the wrong shell.
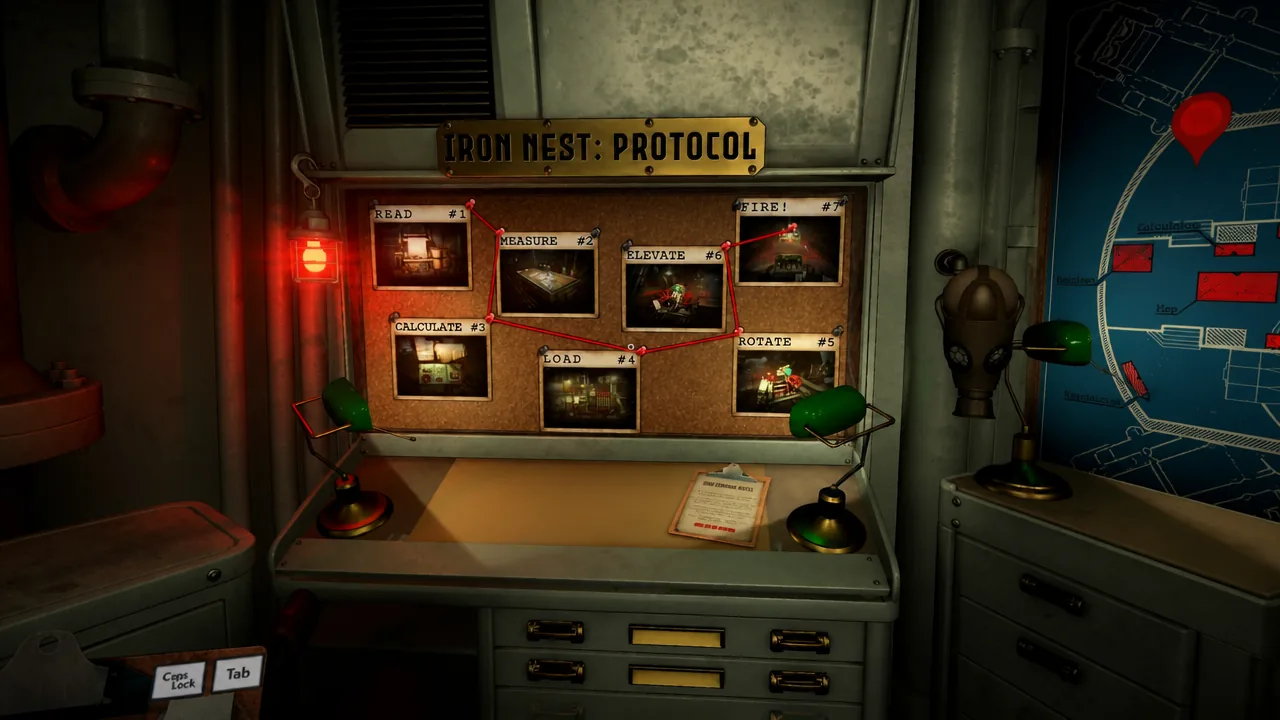
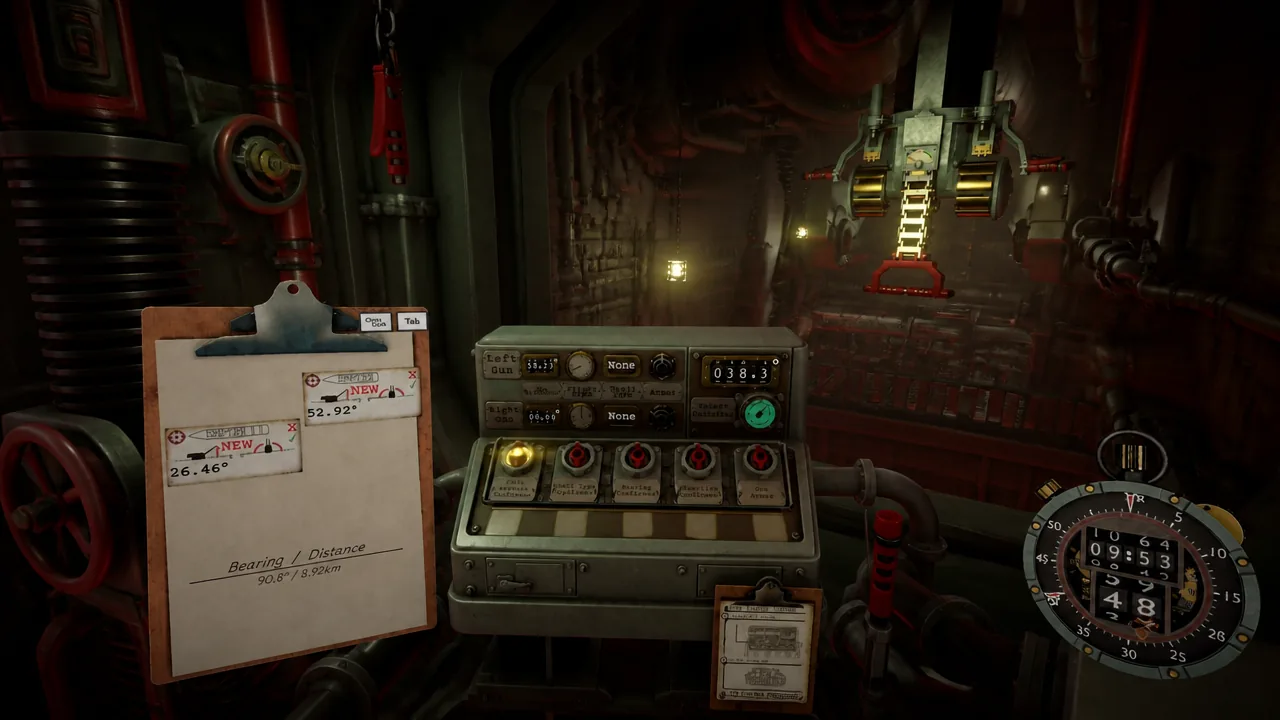
You know a shot worked when you see the round strike on the map and the terrain register the hit. The markers move, but the scars stay, which is how you track what you have already flattened.
Use the right map marker
The two markers do different jobs, and mixing them up is the easiest way to feed bad numbers into the calculator. Match them to the task below.
| Marker | What it does |
|---|---|
| Yellow | Measures bearing and range on the map. |
| Red | Records the measurement onto your clipboard for the firing solution. |
Manage powder and shells before you commit
Loading is a one-way process, so plan before you dispense anything. Powder charges cannot be returned once they leave the dispenser, and a shell cannot be pulled back out once it is rammed into the barrel. Each rotary shell magazine holds six rounds, so keep an eye on your stock and make sure you have enough charges for every fire mission you have planned.
Adding more powder lowers the required elevation and cuts the round’s flight time. That is useful when you need a faster shot on a moving or time-sensitive target, so long as you have the charges to spare.
Pick the shell that fits the target
Ammunition choice is not just about damage. Blast rounds can catch your own troops, and precision rounds keep collateral down. Check the blast radius calculator before firing anywhere near allied units.
| Round | When to load it |
|---|---|
| HE / HCH | Area effect on soft targets, but the blast can damage friendlies in range. |
| AP | Precision work such as supply depots and fire direction centers, or when friendlies sit close to the target. |
If you need more eyes on the ground before choosing, request aerial photography from the requisition bench. The photos are placed on your map automatically, giving you a clearer read on what is where.
Plan around counter-battery fire
When enemy artillery is present, plan your fire missions before you fire the first round. Counter-battery fire starts the moment your first shell lands, so the opening shot effectively puts you on the clock. Line up your measurements and loadout in advance, then correct in small steps after each impact rather than re-measuring from scratch. Precise paperwork is the whole game here, and a clean firing solution is what keeps the frontline crumbling instead of your own position.