
A single passive skill turns Palworld’s self-destruct moves from a one-time sacrifice into a repeatable attack. Pair Heavily Armored with Megaton Implode, and your Pal detonates over and over while staying at full health. The setup works, it is fun to watch, and it clears tower bosses, but it is not the highest-damage option once cooldowns are factored in.
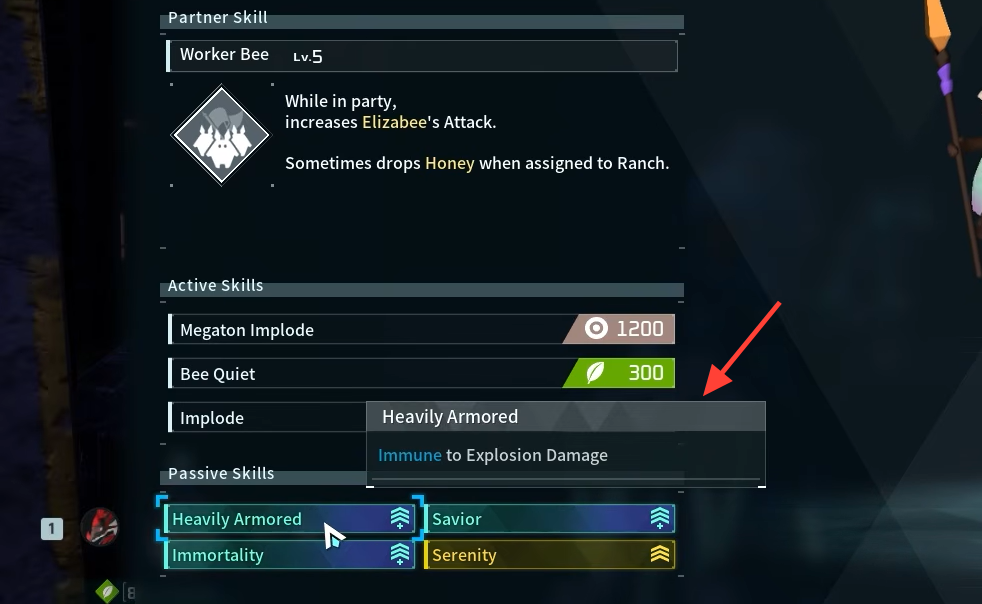
Quick answer: Give a Pal the Heavily Armored passive (“Immune to Explosion Damage”) and teach it self-destruct skills like Megaton Implode, Implode, or Bee Quiet. The Pal keeps triggering explosions and takes zero self-damage, so it never becomes incapacitated.
What Heavily Armored does in Palworld 1.0
Heavily Armored is a positive passive skill added in the 1.0 update. Its only effect is that the Pal is immune to explosion damage. On its own that sounds narrow, but it directly cancels the drawback of every self-destruct move in the game.
Normally, a Pal that uses Implode or Megaton Implode harms itself and becomes incapacitated afterward. With Heavily Armored active, the Pal does not die and does not lose health from its own blast. It can fire the same explosion again as soon as the cooldown ends.
The self-destruct skills that pair with it
Three explosion skills form the core of the build. All three inflict Burn and all three would normally take out the caster. Heavily Armored removes that risk entirely.
| Skill | Element | Power | Cooldown |
|---|---|---|---|
| Megaton Implode | Neutral | 1200 | 60s |
| Radiant Barrage | Neutral | 700 | 30s |
| Implode | Neutral | 300 | 16s |
| Bee Quiet | Grass | 300 | 16s |
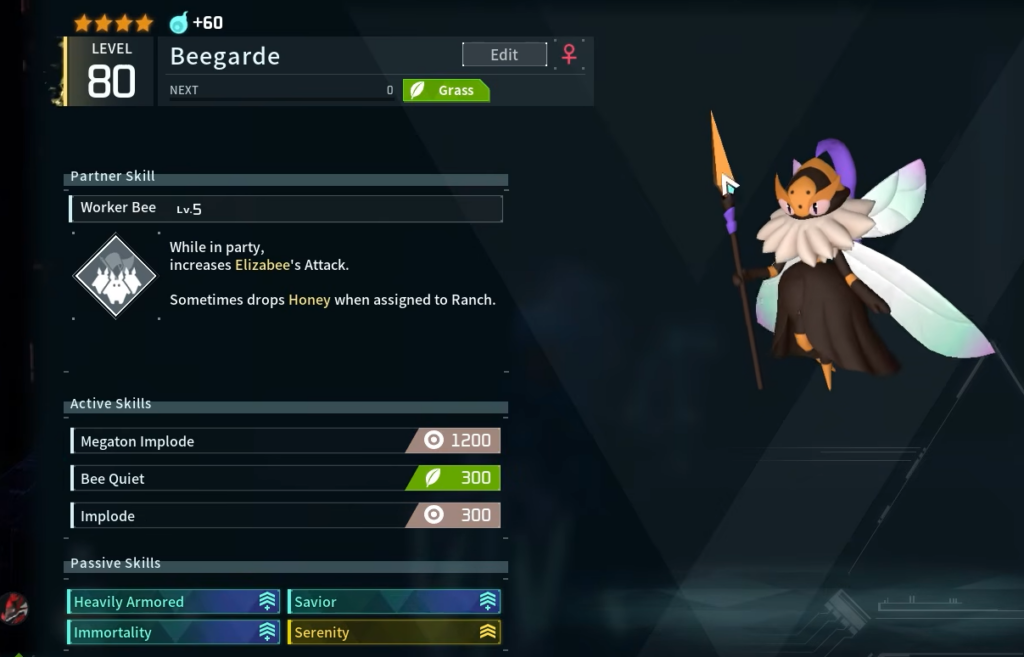
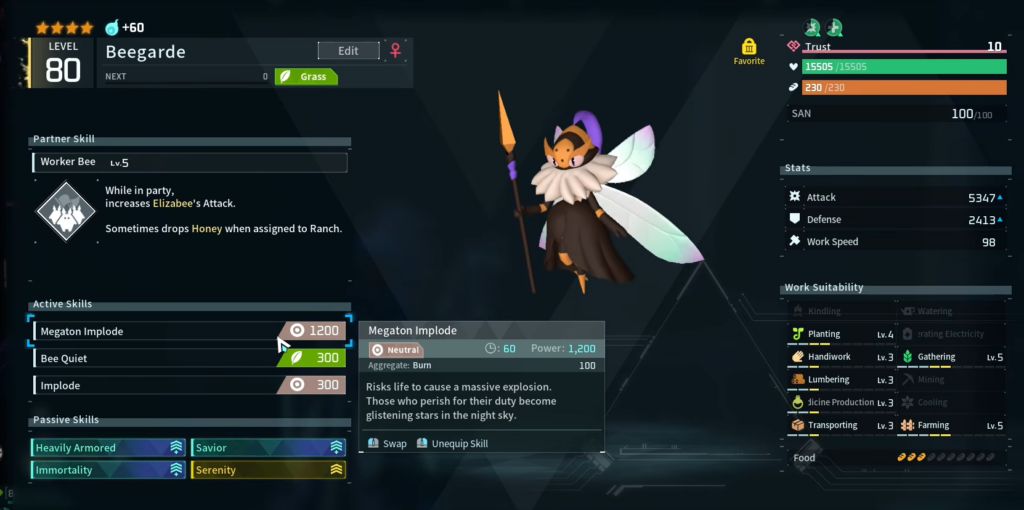
Megaton Implode is learned naturally by Tocotoco at level 22 and can be passed to other Pals through breeding. That is how it ends up on Pals like Beegarde or Knocklem Ignis, which do not learn it on their own.
Full passive loadout for the explosion build
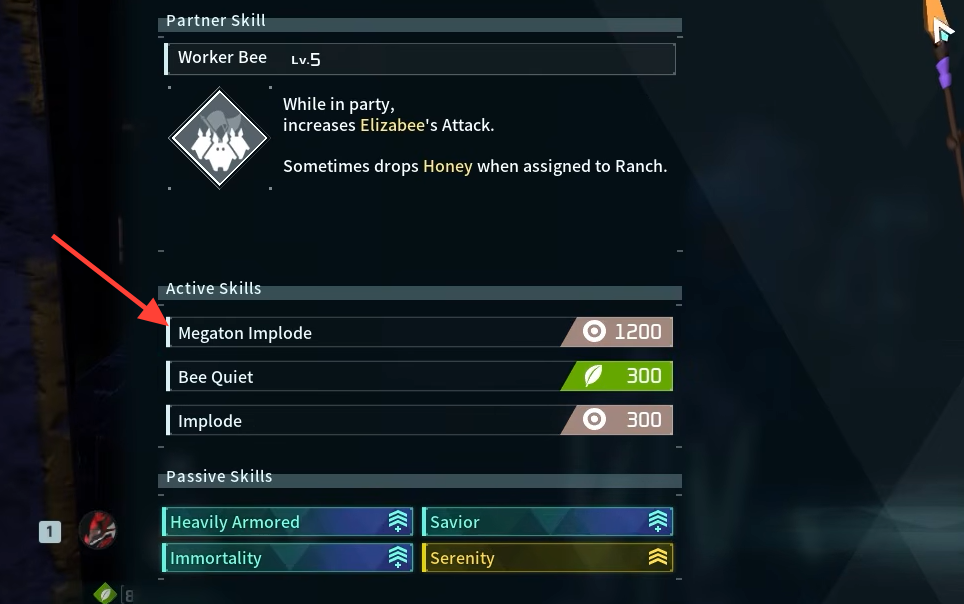
A Pal can hold up to four passive skills. Alongside Heavily Armored, three offensive and sustain passives round out the setup and keep the Pal alive between detonations.
| Passive | Effect |
|---|---|
| Heavily Armored | Immune to Explosion Damage |
| Savior | +30% Neutral attack damage, +30% Grass attack damage |
| Immortality | Life Steal +5%, Auto Health Regen +100%, Attack +15% |
| Serenity | Active skill cooldown reduction 30%, Attack +10% |
Immortality matters even off the field. A benched Pal carrying it regenerates health in the party menu, so it is topped up before you swap it back in. Serenity shortens the long Megaton Implode cooldown, letting you fire it more often.
How to get Heavily Armored and Megaton Implode
Passive skills only appear when you capture a Pal. Each Pal rolls up to four random passives, so catching multiple copies of the same species is how you fish for Heavily Armored. A “perfect” Pal usually means catching many duplicates until the passive shows up.
Breeding is the more reliable route. Offspring can inherit their parents’ passives, so once you have Heavily Armored on one Pal, you can chain-breed it onto the species you actually want. Inheritance is random and can take several attempts. The same breeding process is how you transfer Megaton Implode onto a Pal that cannot learn it by leveling.

Running the build against a tower boss
The build is easiest to see in action against Zoe & Grizzbolt in the Rayne Syndicate Tower, a Level 80 boss with 464,000 HP. Two Pals handle it well with the same passive set, but they are played slightly differently.
Beegarde (straightforward detonation)
Knocklem Ignis (partner skill first)
How you know it worked: the Pal stays alive after every explosion instead of becoming incapacitated, and the boss screen shows “BOSS ELIMINATED” once Grizzbolt is down. Petting your Pal afterward confirms it finished at full health.
Some explosions register 0 damage when the boss moves out of range. This is a hitbox timing quirk, not a broken build, so reposition or wait for the boss to close in before detonating.
Is the explosion build worth it for damage?
For raw sustained DPS, no. Megaton Implode hits for Power 1200 but sits on a 60-second cooldown. Radiant Barrage has Power 700 on a 30-second cooldown, so it fires twice as often and ends up dealing more damage over the length of a fight.
That makes the Heavily Armored explosion setup a novelty that clears content rather than an optimal damage build. It is reliable, it never sacrifices your Pal, and it is entertaining to run, but a standard high-power move on a shorter cooldown will out-damage it against a tanky target.