Net worth is the single number that gates almost everything in Storage Hunters: Open World. It decides which auction zones you can enter, which vehicles and garages you can buy, and how strong your base luck is. Grow it faster and you reach better lockers, rarer items, and higher-value mutations sooner.
Quick answer: Push toward each net worth milestone on purpose, bid only on lockers with a high starting price or visible value, hire an Assistant with Auto Accept set to about 15%, buy Tip Jar and Price Tags early, collect all 15 lost items for a permanent luck boost, and stack luck before opening your biggest auctions.
Net worth milestones and what each one unlocks
Income does not scale in a straight line. A handful of net worth thresholds act as turning points, unlocking new zones, garages, and shop upgrades that raise how much you can earn per run. Treat these as targets rather than surprises.
| Net worth | What it unlocks |
|---|---|
| $750 | Back Alley zone, Mythic and Legendary accessories |
| $3,000 | Advertising shop upgrade |
| $5,000 | Trophy Capacity shop upgrade |
| $10,000 | Farm Area zone |
| $50,000 | Barn garages in Farm Area |
| $60,000 | Trailer purchase recommended |
| $65,000 | Storage Box Space shop upgrade |
| $100,000 | Plot Capacity shop upgrade |
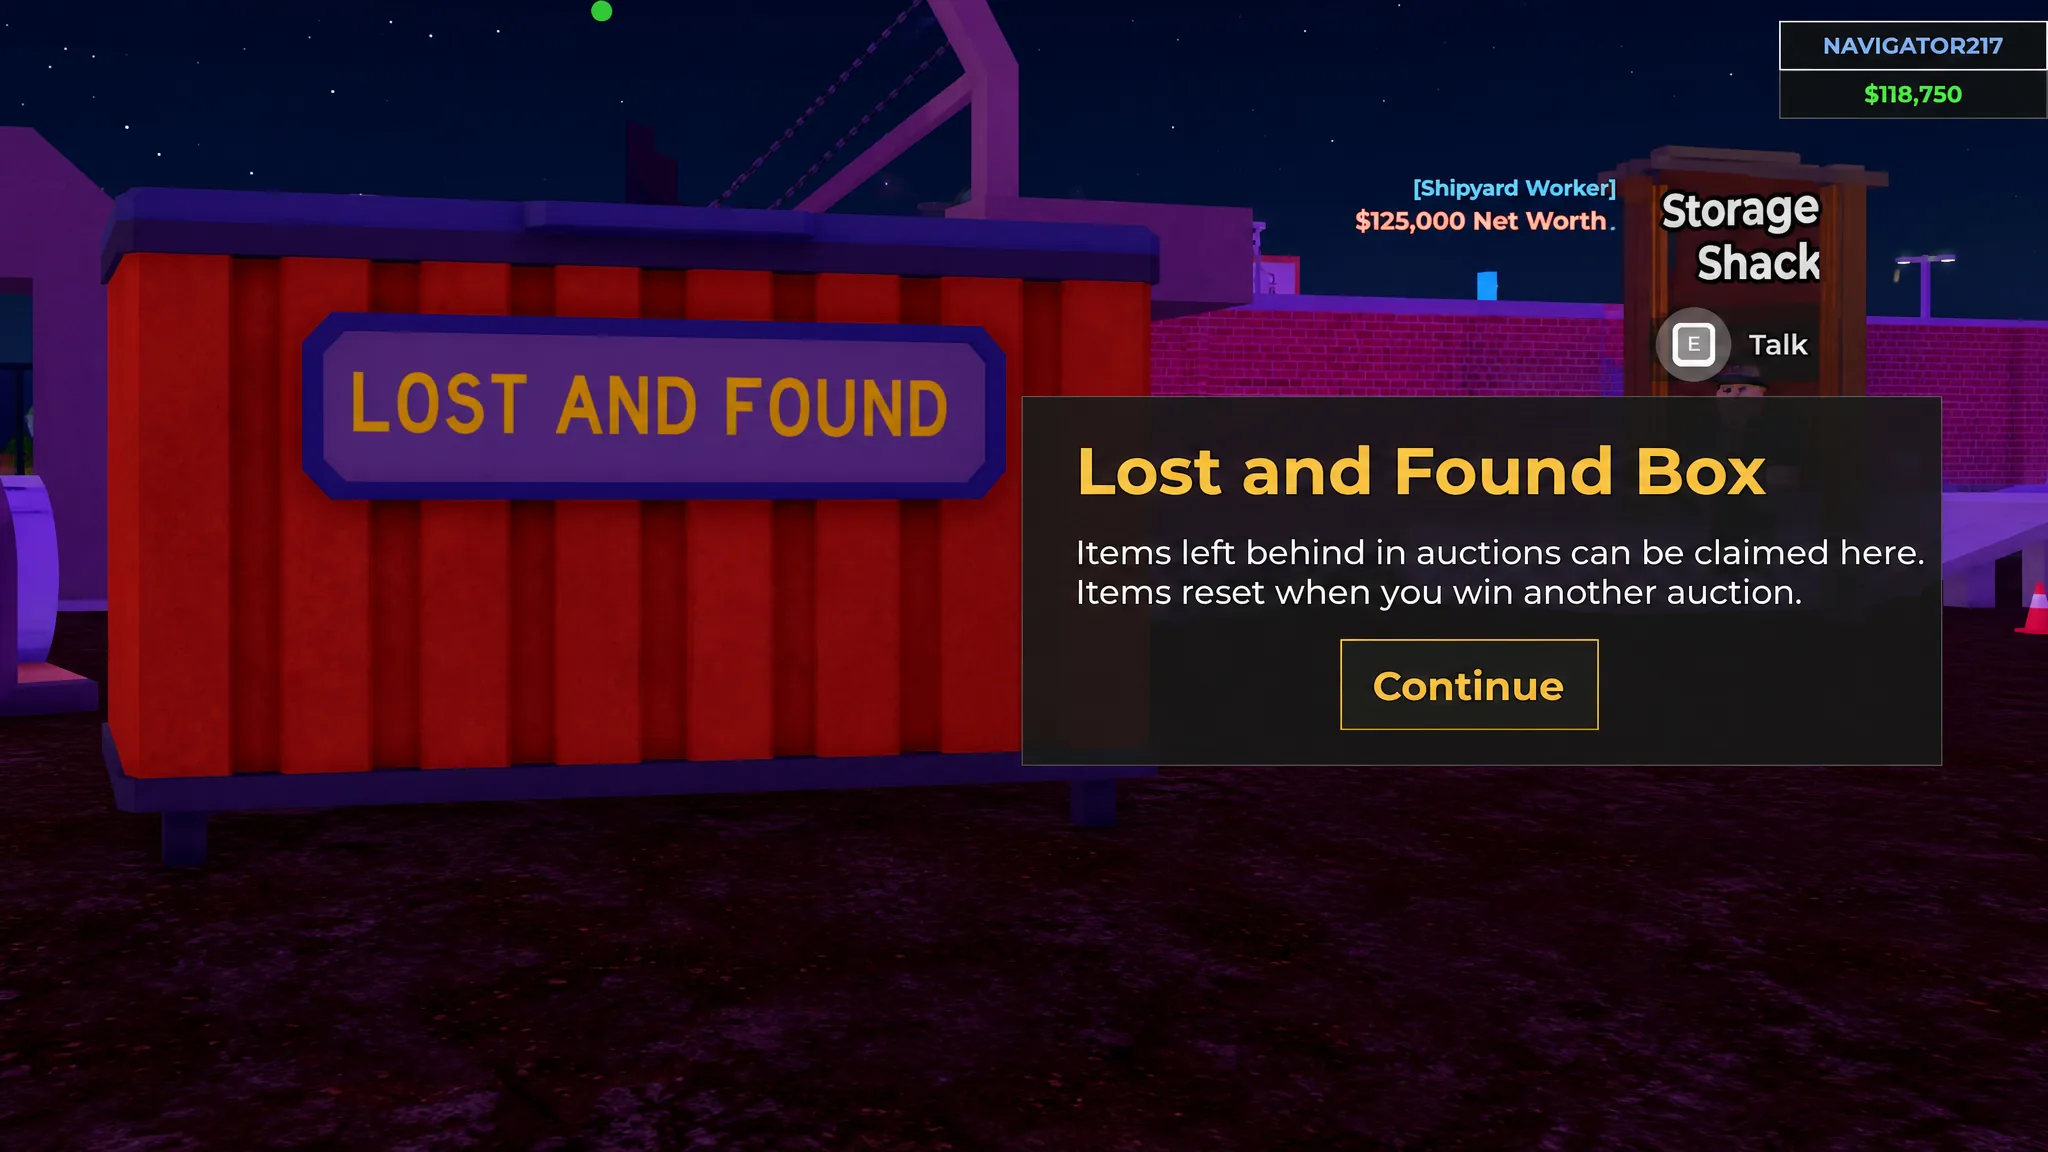
| $125,000 | Shipyard zone |
| $400,000 | Large container garages in Shipyard |
| $1,250,000 | Premium Shipyard garages |
Every zone you open drops better items and higher-value mutations than the last, so lingering in an area you have outgrown leaves money on the table. Once you reach $60,000, buy a Trailer from the Farm Area. Carrying more items per trip cuts the number of runs back to your shop, which raises your earnings per hour.
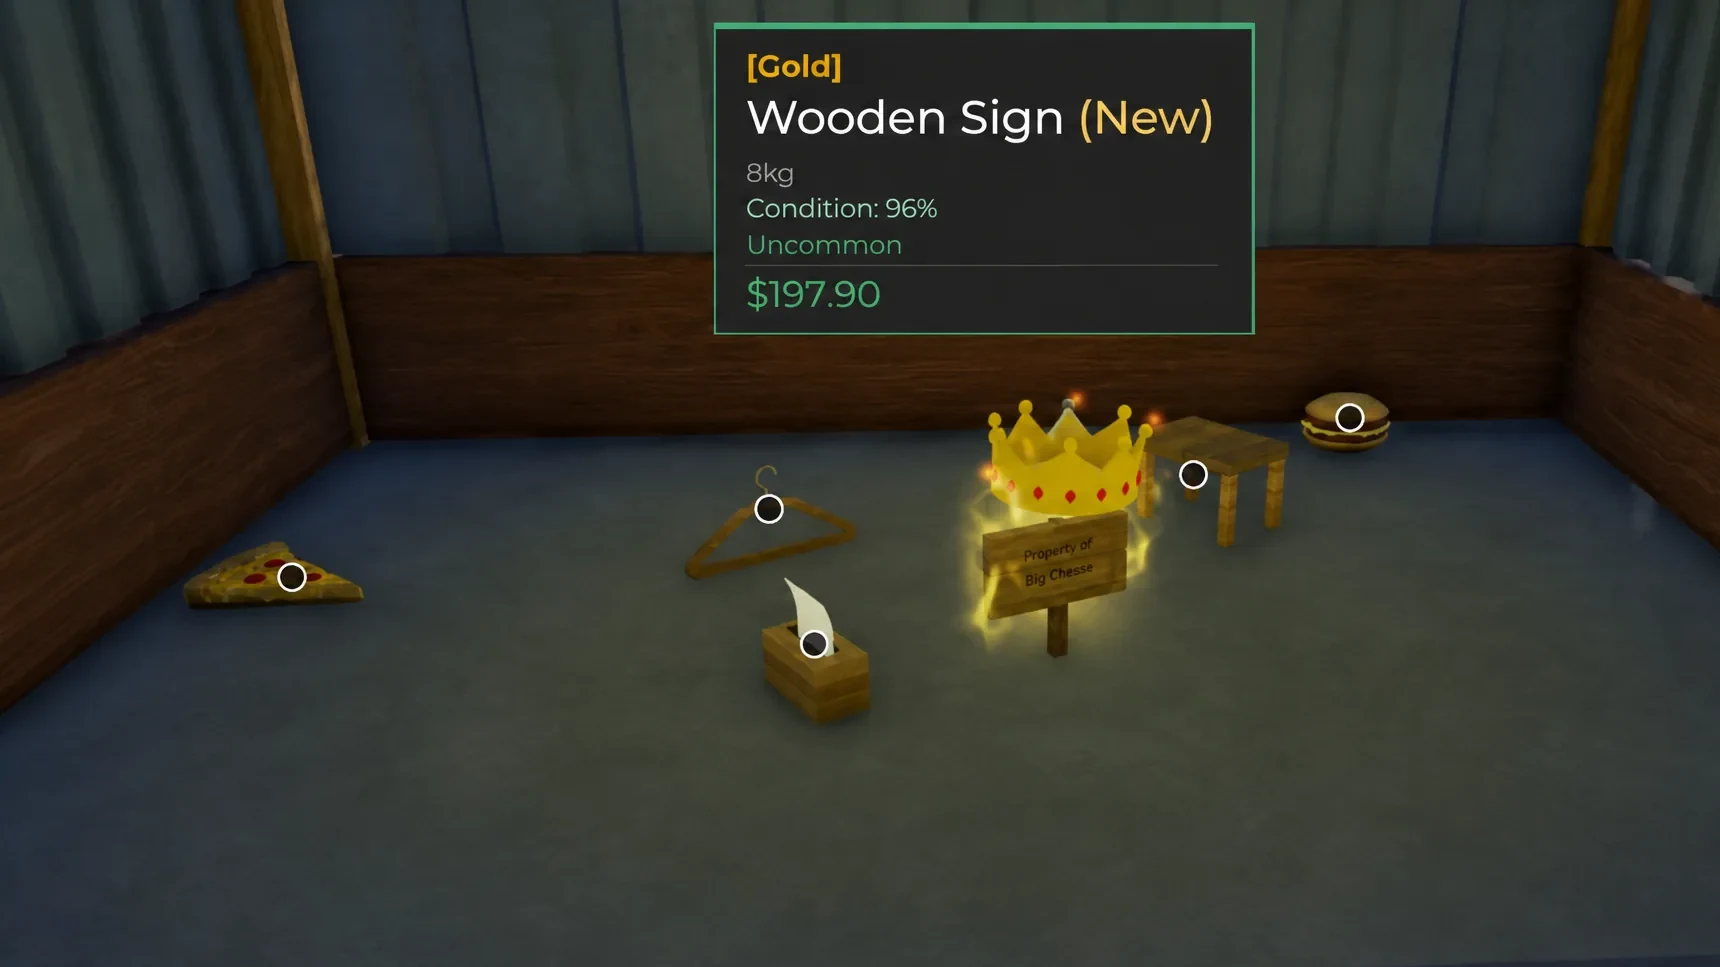
Bid only on lockers worth your money
Not every storage unit is worth entering. Before committing to a bid, check the starting price and glance at whatever is visible through the open door. A higher starting price usually signals more valuable contents, because the game tends to reflect item quality in the opening bid.
If a locker opens low and the visible contents look like cheap clutter, walk away and wait for the next one. Winning auctions full of junk drains both your cash and your time, and neither is easy to recover quickly. You can also use a calculator to estimate a unit’s total value and X-Ray Vision to inspect contents before you bid.
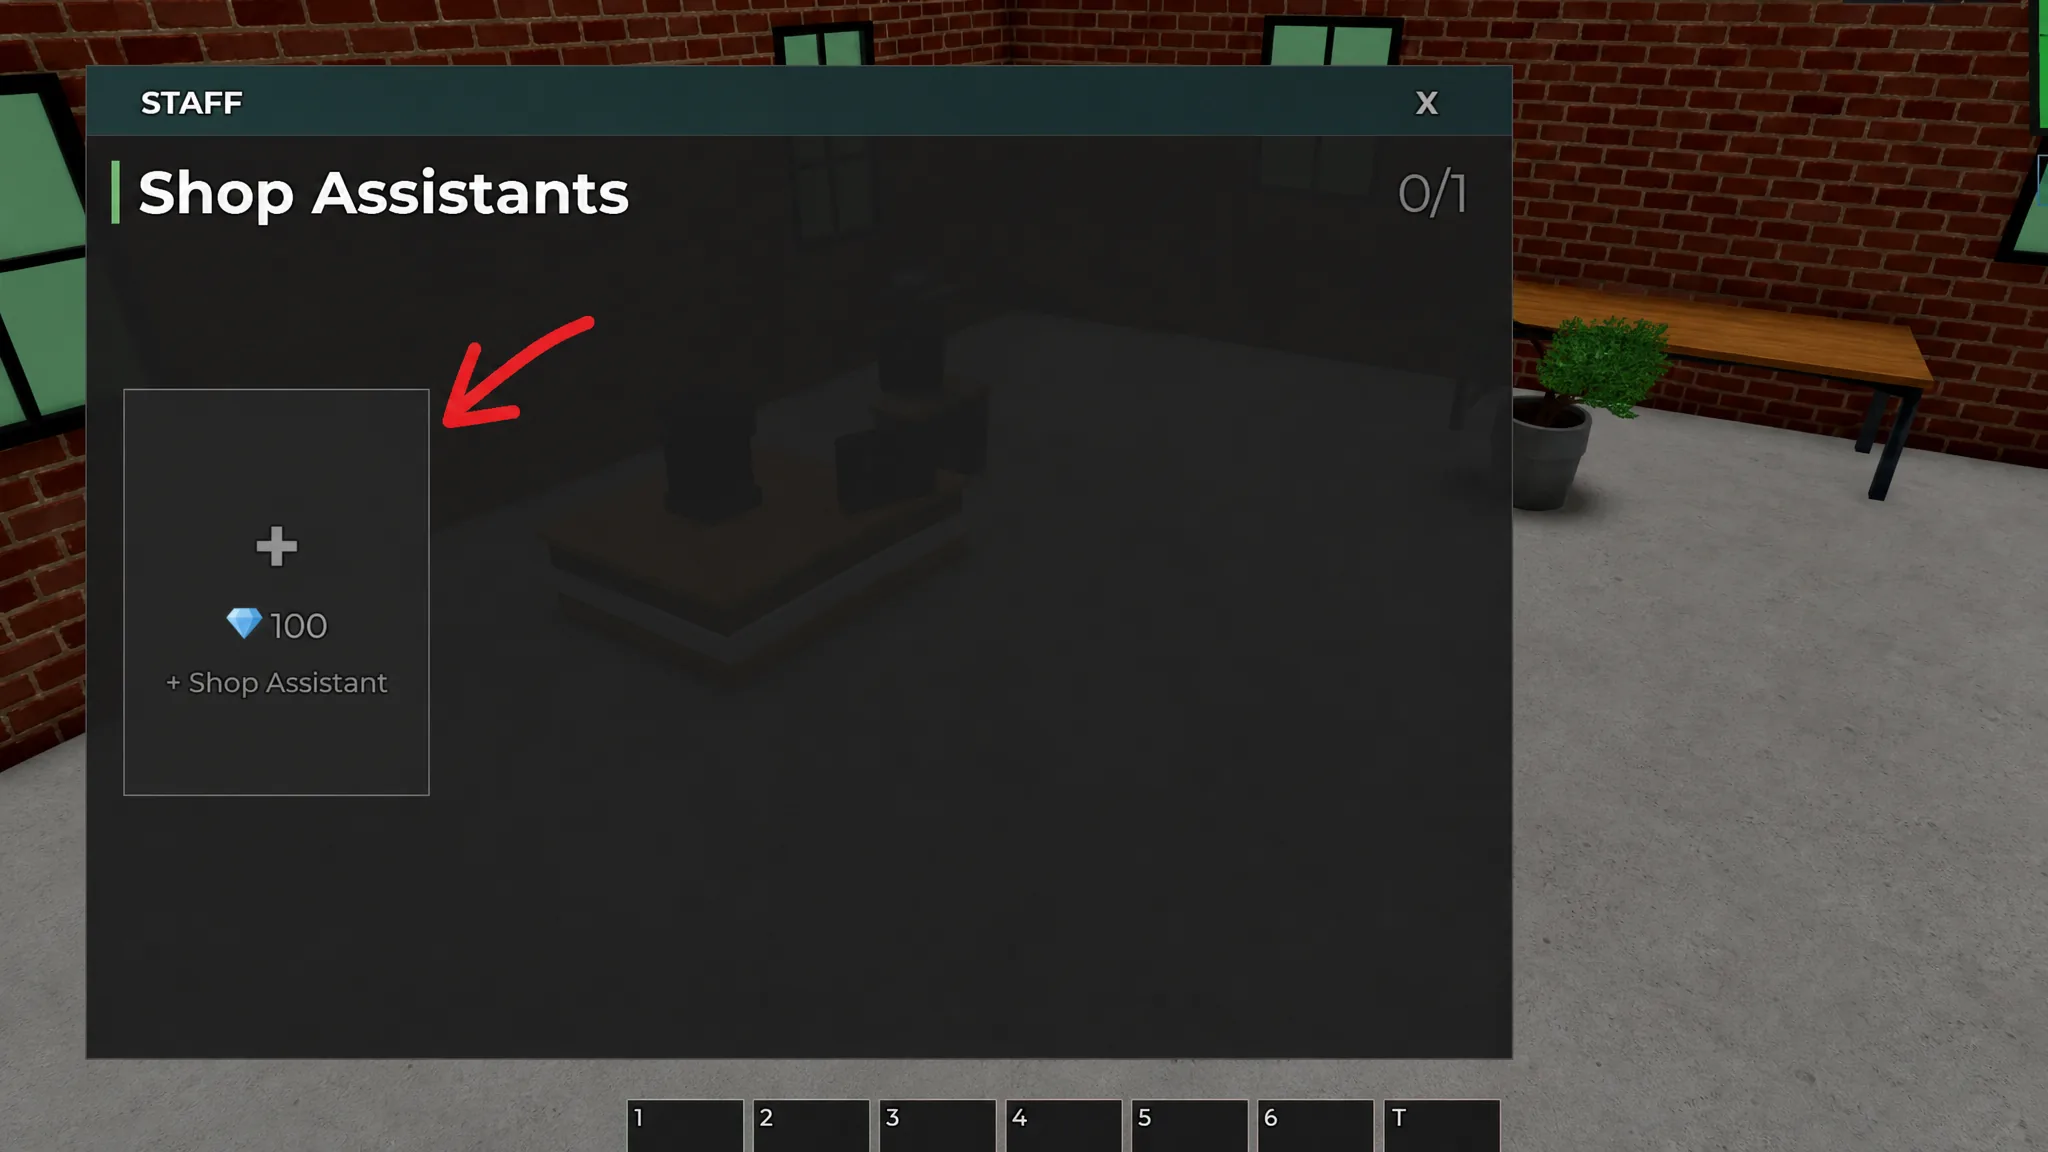
Hire an Assistant and set Auto Accept to 15%
Selling is where net worth actually rises, so automate it early. Hire a Shop Assistant for 100 Gems from the upgrades menu. The Assistant sells items on your shelves at the profit margin you set, even while you are away running auctions.
Set your Auto Accept threshold to around 15%. That keeps customers moving through your shop at a steady pace without giving away too much value, and it stops you from accidentally accepting lowball offers while you focus on bidding.
Chase mutations for the biggest value jumps
Mutations separate a good locker from a great one. A mutated item sells for far more than its base version, and the rarer the mutation the larger the value jump. Landing a Gold or Diamond mutation on something high value like a car or a large appliance can move your net worth up sharply in a single run. Mutations can also stack on one item, and stacked multipliers add together rather than multiply, so Silver (2x) plus Gold (4x) equals 6x.
| Mutation | Effect |
|---|---|
| Dirty | 0.8x, sells below base until cleaned |
| Pure | 1.5x value |
| Silver | 2x value |
| Gold | 4x value |
| Void | 35x value |
| Secret | 50x value |
Trophies are the best passive tool for improving your odds. Each trophy placed in your shop boosts the chance of pulling the specific mutation shown on it. Unlocking the Trophy Capacity upgrade at $5,000 net worth adds more trophy slots, letting more passive luck stack in the background. The Time Capsule is worth using on high-value items too, since it gives them a chance to gain a better mutation over time, though it costs Gems and takes patience.
Collect all 15 lost items for a permanent luck boost
Lost items are scattered across the map, and finding all 15 rewards you with a permanent +15% luck boost. Higher luck improves the mutations you pull from auctions, which raises the value of your sales across the board.
Because the boost is permanent, collecting these early means you benefit from it for far longer. Prioritise tracking them down as soon as you start playing rather than leaving them for later.
Buy the right shop upgrades first
The correct upgrades make your shop steadily more profitable. Tip Jar and Price Tags are the two best early buys. Tip Jar gives customers a chance to leave Gem tips on purchases, while Price Tags pushes customers to start their offers closer to an item’s real value, so you lose less on every sale. Both pay for themselves quickly and compound the more you sell.
Add Selling Space alongside those two. More shelves on display means more items selling at once while you are out running auctions, which keeps a steady stream of cash flowing into your net worth.
Tip: Place your shop plot as close as possible to the auction zone you are grinding. Shorter round trips mean more runs per session, and a quieter server gives you more freedom over where you drop the plot.
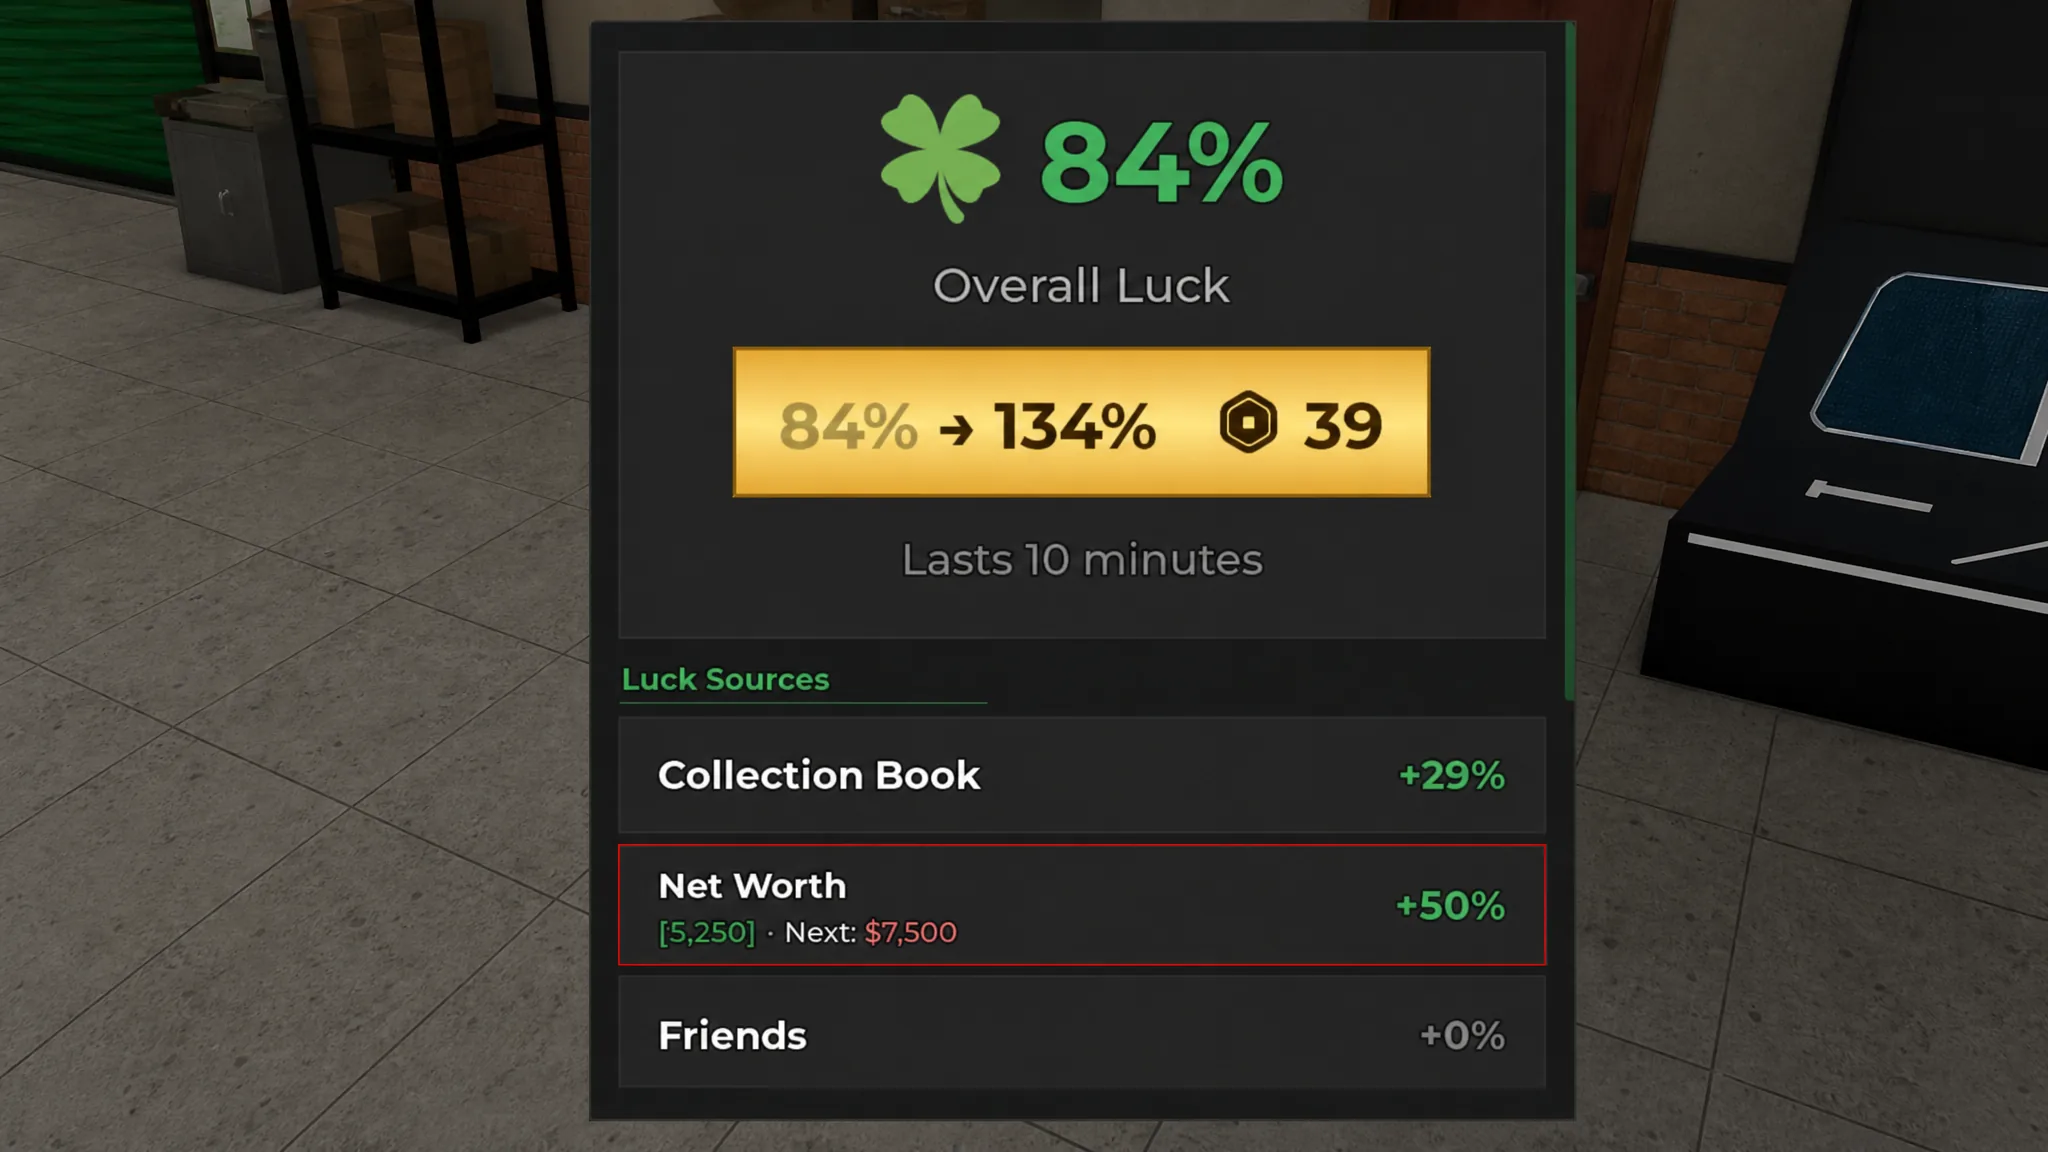
Stack luck before your biggest auctions
Luck governs the quality of mutations you find, which makes it one of the highest-leverage stats for growing net worth. Your net worth itself provides one of the largest luck boosts in the game. Reaching $5,000 net worth grants a 50% luck bonus, so raising net worth quickly also raises your base luck. On top of that, accessories from the Back Alley, trophies in your shop, lost item collections, and drinks from the Energy Cafe all stack together.
| Luck source | Boost |
|---|---|
| Luck Drink 1 | +50% luck for 10 minutes (12 Gems) |
| Luck Drink 2 | +150% luck for 10 minutes (25 Gems, $25,000 net worth) |
| Luck Drink 3 | +300% luck for 10 minutes (65 Gems, $100,000 net worth) |
| All 15 lost items | Permanent luck boost |
| Each friend in your server | +5% luck |
| Net worth $5,000 | 50% luck |
Luck drinks stack each time you drink one, so save them for your strongest lockers. They are especially powerful in the Shipyard zone, where containers are largest and potential item values are highest.
Put these together and net worth starts to snowball. Keep your bids disciplined, sell efficiently with an Assistant, let mutations and stacked luck do the heavy lifting on value, and hit each milestone on purpose. Every accepted sale adds to your balance, and a rising net worth is what carries you from the Junk Yard all the way to the $125,000 Shipyard.