


Gold is the bottleneck in Survive The Swarm, the FAKT-made roguelite where you fight waves of enemies, kill a boss, then try to reach the extraction portal before the ghosts catch you. Runs that end in a million-plus payout are not luck. They come from a specific set of choices made in the lobby, in the loadout menu, and in the first three level-ups of a run.
Quick answer: Max Damage in the lobby first, bring only weapons with a View Evolution option, run Mending Charm plus Swift Boots, and farm your highest unlocked stage on Easy.
Lobby upgrade order: Damage, then weapon slots and passives
The lobby upgrade board is where every run starts, and the order you buy in decides how quickly your gold compounds. Damage comes first because it shortens every wave and gets you to the boss with time left on the clock. Once Damage is scaling, move to extra weapon slots and passive slots, since both of those directly widen how many evolutions a single run can hold.
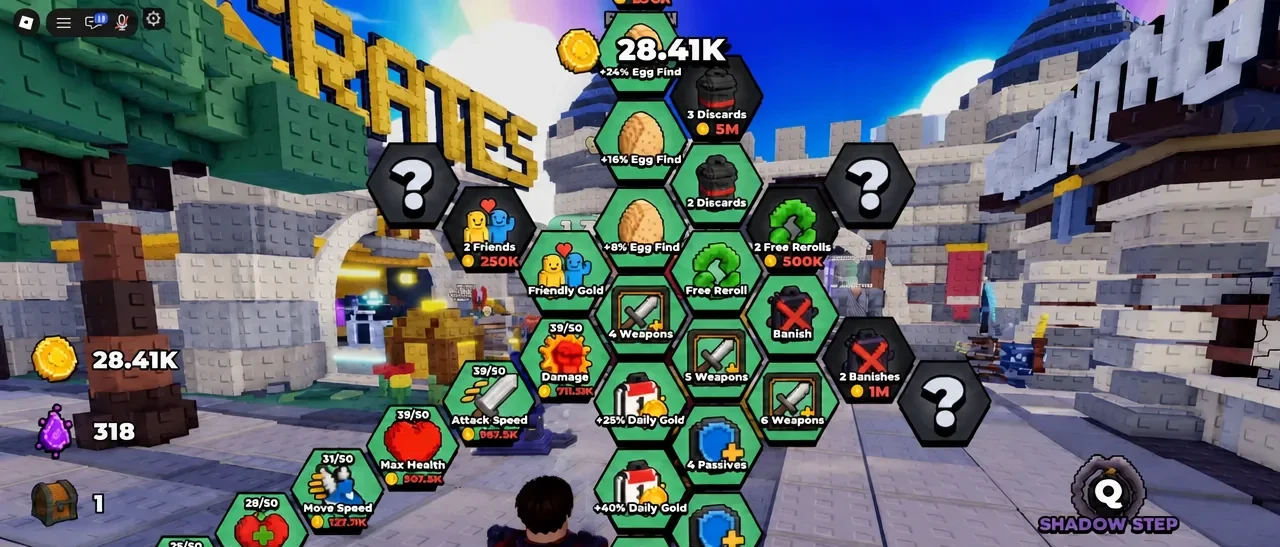
Armor upgrades look overpriced next to everything else on the board, and they are worth it anyway. The stat boost they hand over carries into every run you do afterward, so the gold spent there comes back faster than it does on smaller one-off purchases.
Loadout rules: evolvable weapons only, plus two passives
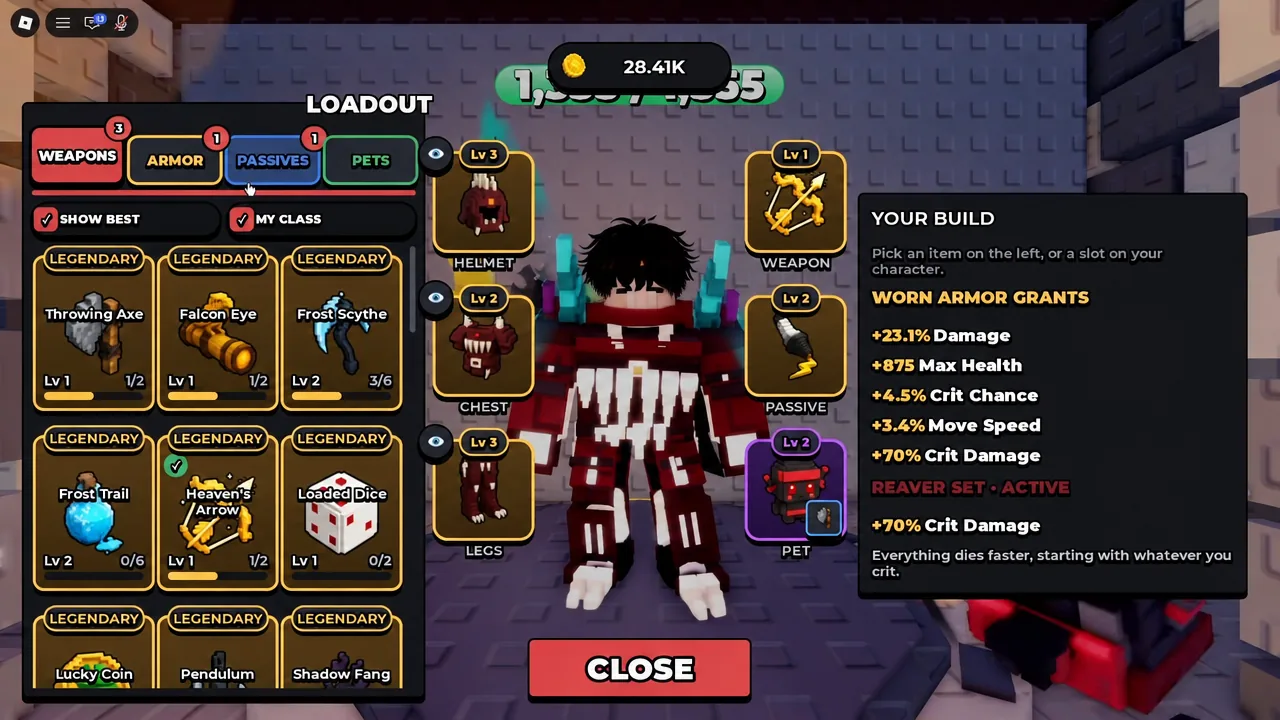
Open a weapon in the loadout menu and look for a View Evolution line on its card. If it is there, the weapon can be combined with a partner item mid-run and turned into a far stronger version. If it is not there, the weapon is a dead end and should not take up a slot.
Two passives do the heavy lifting for a solo run. Mending Charm regenerates health, which is what keeps you standing through the boss and the ghost wave that follows. Swift Boots adds movement speed, and movement speed is how you avoid damage in a game where your weapons fire on their own.
Pick the highest unlocked stage on Easy difficulty
Difficulty and stage number pull in different directions, and the profitable combination is high stage, low difficulty. Later maps such as Rainbow Road drop better chests, including Legendary Chests, while Easy keeps enemy pressure low enough that you almost never lose the run before the portal.
Do not raise difficulty to chase a bigger multiplier. A completed Easy run on a high stage banks more gold than a failed harder run banks nothing.
In-run level-up priority for evolutions
A clean solo run on Rainbow Road lands Arrowgeddon, The Jackpot, and Crossfire in that rough order, with the boss fight arriving shortly after the third one comes online.
| Evolution | When it lands | What it changes |
|---|---|---|
| Arrowgeddon | First | Early wave clear |
| The Jackpot | Second | Sustained damage |
| Crossfire | Third | Boss readiness |
Movement: jumping, Shadow Step, and chest grabs
Jumping is useful for slipping past clusters of zombies, but jumping directly over one does not work the way it looks like it should. Their hitboxes extend upward, so a jump straight over an enemy still takes the hit. Angle your jumps around the pack instead of through it.
Shadow Step is the ability that makes risky gold worth taking. Use it to reach chests that sit inside a crowd, collect, and move out before the swarm closes back in.
Boss fight and the ghost wave after it
The Obsidian Colossus
Red circles on the ground telegraph where the boss is about to hit. The safest place is directly behind it or pressed extremely close to its body, since its attacks are aimed forward. Backing off to a mid-range distance is the position that gets players killed, because it keeps you inside the telegraphed zones without any of the safety of hugging the model.
Surviving the ghost wave
Killing the boss does not end the run. Ghosts spawn afterward, and the longer you last, the larger the gold total you can bank. Run along the outer edges of the map rather than cutting across the middle, and use Shadow Step when a group gets close, since it temporarily stops ghost movement and buys you room to keep circling.
Gold is only yours once you walk into the portal. Staying out for extra seconds risks the entire run total.
How to tell the run worked
The extraction screen is the confirmation. It lists Gold Earned, Enemies Slain, and Time Survived, and bonuses are applied on top of the base figure shown there. A properly built solo run on a high stage produces numbers in the range of 738,578 gold earned, 8,555 enemies slain, and roughly 12 minutes survived, which climbs past a million once bonuses land.
If your totals come in well below that, the usual gap is weapons that never evolved. Check the loadout before the next attempt and swap anything without a View Evolution option.
Free Gold and Essence from codes
Codes shorten the grind toward the lobby upgrades above. Gold buys weapons and gear, while Essence goes toward eggs, which hatch pets carrying permanent buffs such as damage, attack speed, or knockback, and toward unlocking new classes.
| Code | Reward |
|---|---|
| UPDATE | Free rewards |
| CLASSES | 25 Essence, 308.25k Gold |
| LAUNCH | 25 Essence, 15.41k Gold |
To redeem, launch Survive The Swarm on Roblox, press the Store button on the right side of the screen, scroll to the bottom of the Store window, type the code into the entry field, and press Redeem. Each code works once per account, and capitalization and stray spaces will cause a failure.
The game updates weekly, so the code list and the weapon pool both shift regularly. Check your loadout for newly added evolvable weapons after each patch, and keep the Damage-first, evolve-everything, extract-early routine as the constant underneath.





