


Coen’s strongest all-day, all-night setup in The Blood of Dawnwalker pulls from all three skill trees at once. Witchcraft supplies the critical hit buff and the healing, Swordmastery supplies the finisher, and Vampirism covers the night shift when your runic scars seal and claws take over. The whole thing is built around one number: weapon critical hit chance, pushed high enough that Artery Strike lands as a decapitation on most trash mobs.
Quick answer: Cast Soul Stigma on a target for +35% critical hit chance, then hit it with Artery Strike. With the Sword Sage ultimate unlocked, every kill resets your active ability cooldowns, so a decapitation immediately hands Artery Strike back for the next enemy.
How the Artery Strike combo loop works
Artery Strike is a Swordmastery ability that deals heavy single-target damage and carries a decapitation chance against weaker enemies. At rank 3 it hits for roughly 2,277 damage with a 35% decapitation chance, and that chance scales with how often you are critting.
Sword Sage is the piece that turns a strong ability into a repeatable one. It resets active ability cooldowns whenever you kill an enemy. Kill something with Artery Strike, and Artery Strike is available again instantly, along with everything else on your bar. Against a group of standard soldiers, that means you can walk down the line removing heads without ever waiting on a cooldown.
Soul Stigma is what keeps the loop honest. It stacks +35% critical hit chance and +10% critical damage against a marked target at rank 1, which is the single biggest crit source in the setup. Layer that on top of gear crit and Swordmastery crit perks, and Artery Strike stops being a gamble.
Activation Charges fuel all of it. Perfect blocks, attacks, and passive regeneration all feed the meter, so armor and jewelry that boost charge restoration effectively raise how many Artery Strikes you get per fight.
Day and night ability loadouts
Two of the four slots never change. Artery Strike and Charge stay equipped around the clock, because Artery Strike is the kill button and Charge is a cheap opener that closes distance, staggers, and applies bleed. The other two slots swap when the sun moves.
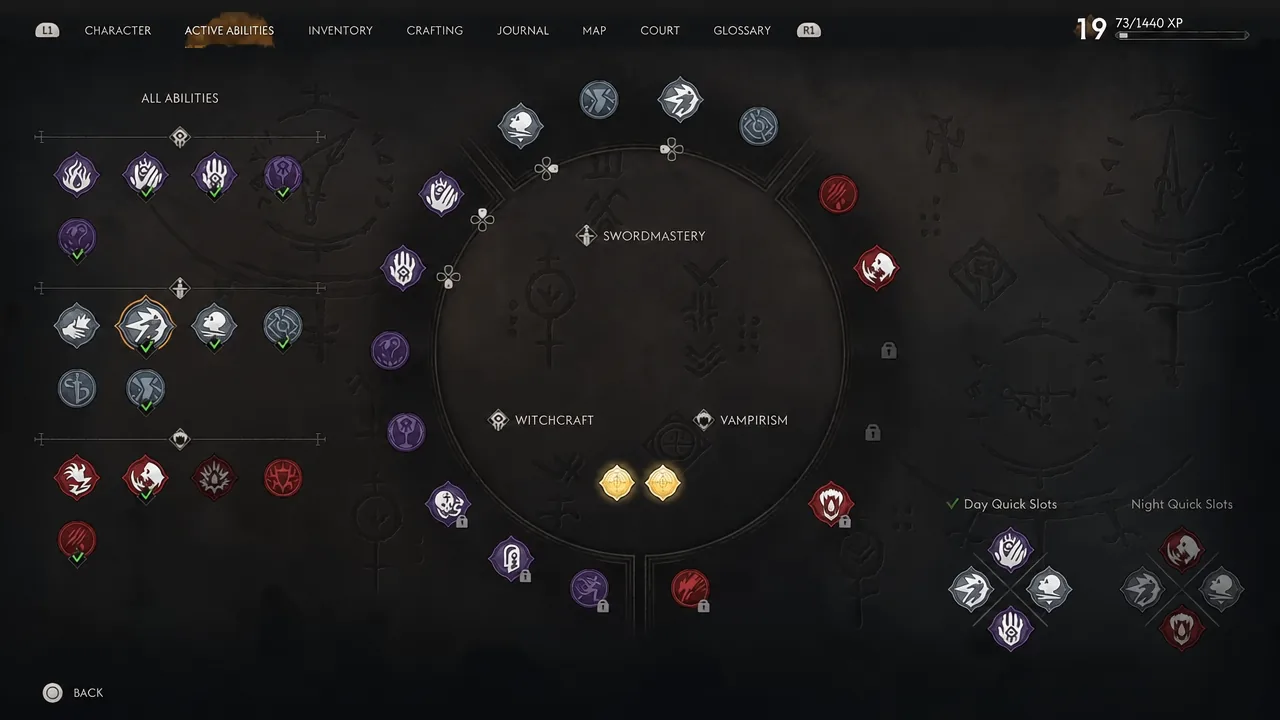
| Ability | Set | What it does |
|---|---|---|
| Artery Strike | Day and night | 2,277 damage with a 35% decapitation chance at rank 3 |
| Charge | Day and night | 669 damage, 50% bleed chance, 2-second stun |
| Soul Stigma | Day | +35% critical hit chance and +10% critical damage on the target |
| Soul Reaping | Day | 121 lifesteal per second and pushes the target into a passive state |
| Piercing Shriek | Night | 2-second stun, +15% damage taken by targets, -15% damage they deal |
| Voracious Bite | Night | 404 damage and restores 60% of a health segment |
Soul Reaping matters more than its damage suggests. Healing is restricted during daylight hours, so a sustained lifesteal channel is often the only reliable way to claw health back mid-fight. At night you drop it for Voracious Bite, which heals and feeds your Corruption at the same time.
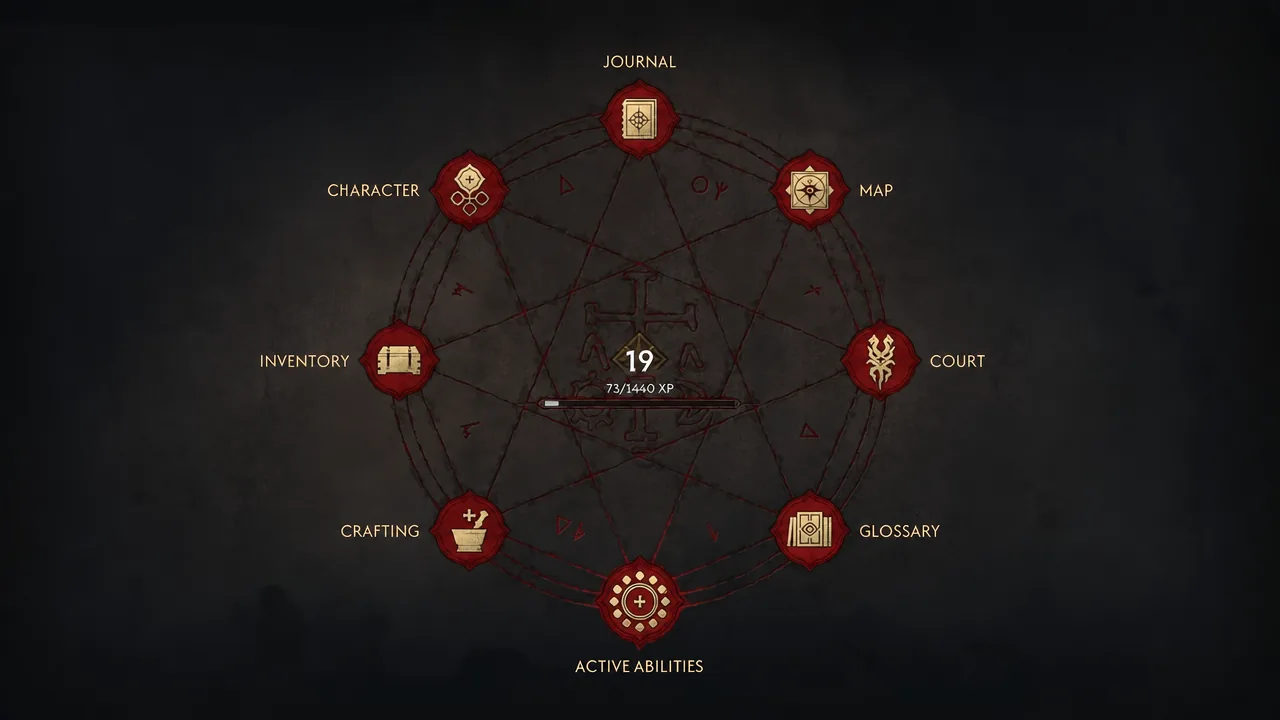
Swap the two sets through the radial menu rather than the pause screen. Open the wheel, pick Active Abilities, and rearrange the two flexible slots before you go into a fight rather than during one.
Skill tree priorities for the crit build
Skill points can only be spent at wayside shrines, and each rank you buy costs more than the last. Higher ranks also eat time segments out of your 30-day calendar, so spend deliberately and take the ranks that feed the crit loop before anything cosmetic.
Swordmastery: Sword Sage and Artery Strike ranks
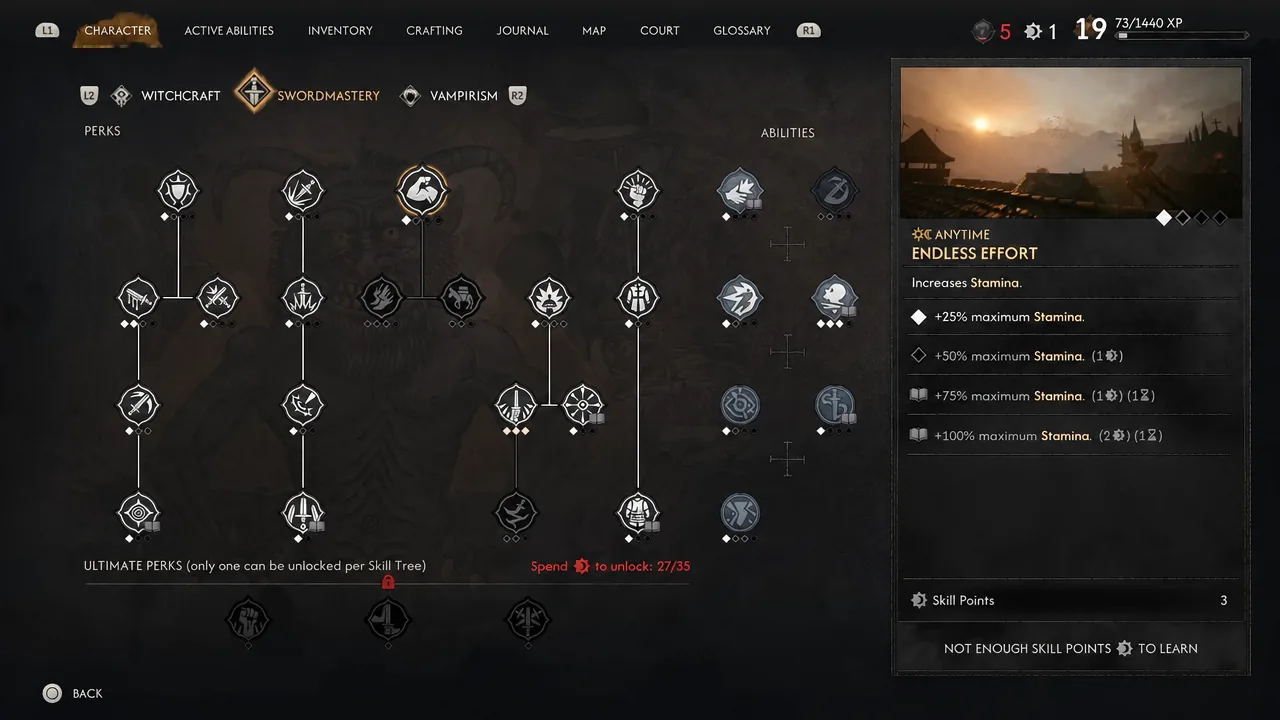
Swordmastery is the backbone because it improves health, stamina, weapon critical hit chance, and critical damage for both forms. Push toward the Sword Sage ultimate, and rank up Artery Strike along the way. Endless Effort for stamina and Vigour for health keep you alive long enough to use any of it, while Walking Fortress and Adrenaline Rush convert blocking and ability use into faster Activation Charge regeneration and lower cooldowns.
Witchcraft: Soul Stigma, Cycle of Ruin, and Soul Reaping
Take Soul Stigma first, then Cycle of Ruin, then Soul Reaping. Witchcraft abilities cost health to cast, which is exactly why the lifesteal from Soul Reaping is not optional. These are daytime tools only, since Coen’s runic scars seal after dark.
Vampirism: Shred, Piercing Shriek, and early claw passives
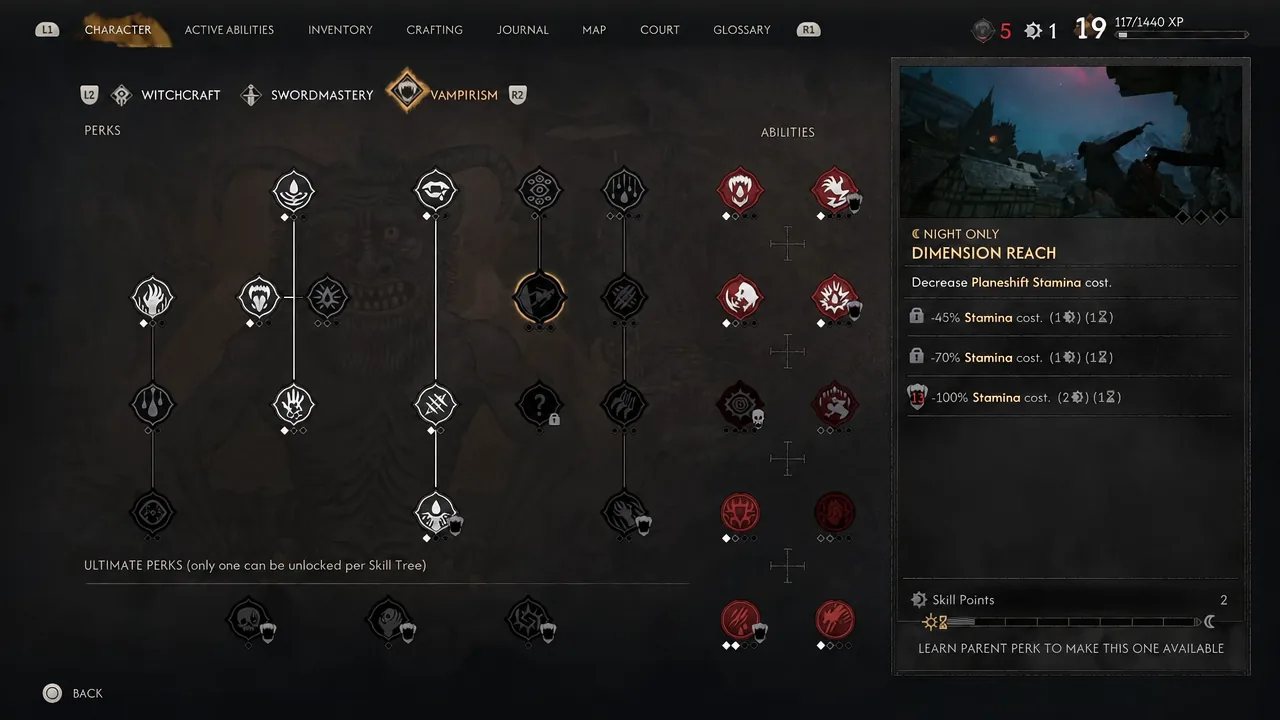
Vampirism nodes unlock through Corruption rather than manuals, and Corruption rises when you drain blood with Voracious Bite or drink phials you pick up. Shred is the standout early pick, adding a 25% bleed chance and +25% bleed damage at rank 3 across both weapon and claw attacks. Grab the basic claw damage passives after that, then Piercing Shriek for the night rotation.
Best gear for weapon crit chance and cooldown reduction
Gear priorities are simple here. Weapon critical hit chance and weapon critical hit damage come first, Swordmastery cooldown reduction second, and Activation Charge restoration third. Everything else is filler.
| Item | Level | Key stats |
|---|---|---|
| Imbued Sword of St. Mihai | 19 | 307 DPS, +7% weapon crit chance, +10.5% crit damage, -7% Swordmastery cooldown, +11.2% damage vs supernatural enemies |
| Durendal | 15 | 234 DPS, -21% attack stamina cost, -9% dodge stamina cost, -7% Swordmastery cooldown |
| Enhanced Armour of the Arbiter | 26 | 255 armour, +7.6% each to weapon, claw, and Witchcraft ability damage |
| Pieter’s Garb | 17 | 101 armour, +18.2% max human health, +3.6% weapon crit chance, +11.2% crit damage |
| Ambrus’s Cuirass | 15 | 203 armour, -4.5% vampiric ability cooldown, -11.4% attack stamina cost, +23.4% charge from perfect block |
| Ring of Quick Strikes | 22 | +9% weapon crit chance, +13.5% crit damage, +14.4% weapon damage |
| Mindbrace Amulet | 22 | +27% Activation Charge restoration from attack, block, and perfect block |
| Slasher’s Pendant | 22 | +5.6% claw crit chance, +8.4% claw crit damage, +9% claw damage |
Pieter’s Garb and Ambrus’s Cuirass carry the early and mid game as a day and night pair, with Durendal as the interim weapon. The Arbiter set and the Imbued Sword of St. Mihai are the endgame targets. Swap the Slasher’s Pendant in for the Mindbrace Amulet if you are leaning on claws at night, and keep the Ring of Focus in the second ring slot.
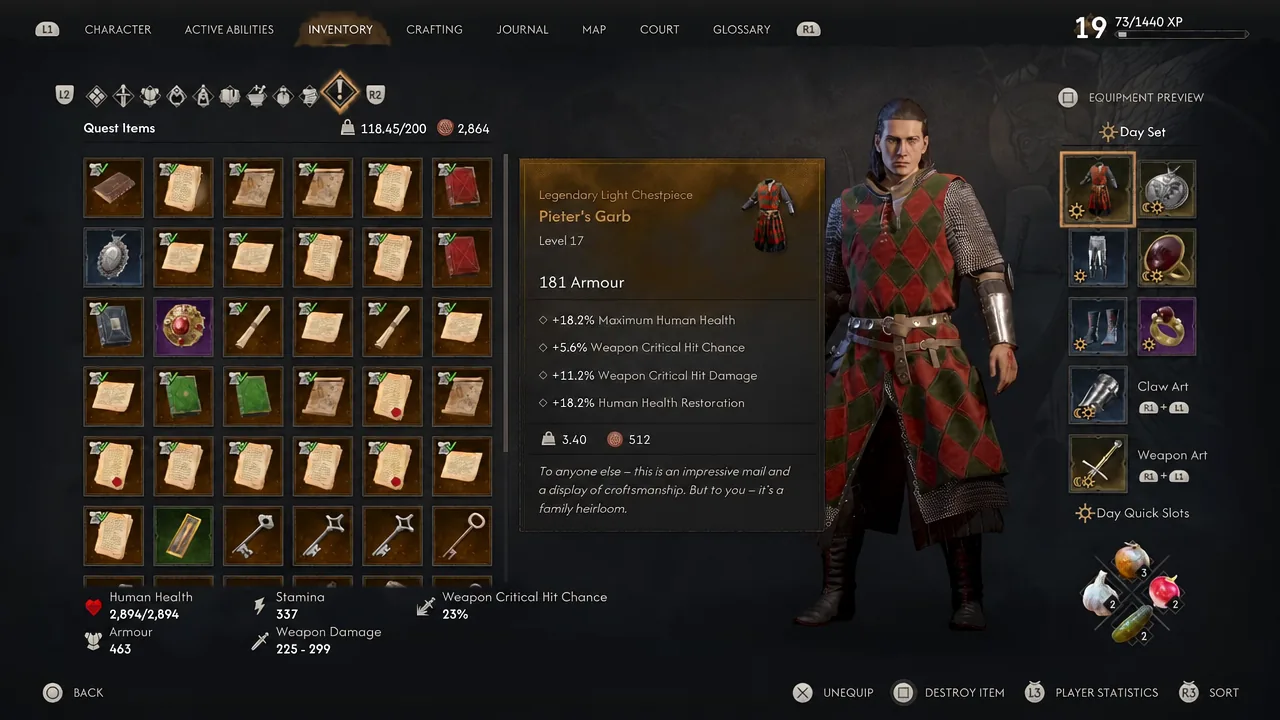
Note: upgrade the pieces you intend to keep. Armor and weapons can be improved, and a levelled Durendal will outperform a raw drop you found five minutes ago.
Where to find each manual and gear piece
Swordmastery and Witchcraft abilities need manuals before you can spend points on them. Some come from Ancient Circles, some from trainers, and a few are locked behind side content.
| What you need | Where to get it |
|---|---|
| Soul Reaping manual | Complete the Ancient Circle near Maragir or Briar Sloughs, or buy it from Vera at Vera’s Hut in the swamp |
| Soul Stigma manual | Complete the Ancient Circle northeast of St. Tyna’s Grove Tower, or buy it from Vera or the Matriarch Witchcraft vendor |
| Artery Strike manual | Speak to the merchant in Maragir to start Volk’s questline, meet Volk at his hut, finish his side quests, then beat him in a spar. Also sold by the trainers Ursul and Ocho |
| Charge manual | Buy from the trainer Ocho in the Svartrau City tavern after finishing her side quest |
| Walking Fortress and Adrenaline Rush | Purchase from sword trainers or find them in the St. Tyna’s Chapterhouse library |
| Piercing Shriek | Beat the blood guard during the “Taste of Power” court activity in Svartrau City, then drink the Phial of Brencis’s Blood |
| Pieter’s Garb | Finish Volk’s questline to reach his father’s stash |
| Ambrus’s Cuirass | Defeat Ambrus during his court activity |
| Durendal | On the ground beneath the broken bridge, in the valley west of the military camp |
| Ring of Quick Strikes | Complete the side quest at the broken shrine northeast of Rockfalls, then use the key on the chest in the Highland Grave ruins |
| Ring of Focus | Head hunter ambush in the Silts |
| Mindbrace Amulet | Complete “Xanthe’s Excavations: Malevolent Presence” in the ruins southeast of the Howling Keep |
The Imbued Sword of St. Mihai and the Arbiter set both arrive through longer questlines, so treat them as late-game goals rather than something to detour for at level 15.
How to tell the combo loop is working
The confirmation is visual. When a decapitation lands and Sword Sage fires, your ability icons flash back to ready with no cooldown sweep, and you can cast Artery Strike again on the next target immediately. If cooldowns are still ticking after a kill, one of three things is wrong.
- Sword Sage is not unlocked yet. The reset is tied entirely to that ultimate, not to Artery Strike itself.
- The enemy survived. Only kills trigger the reset, so tougher enemies that shrug off a decapitation attempt will not refund anything.
- Your Activation Charges are empty. Cooldowns resetting does not matter if you have no charges left to spend, which is why charge restoration stats sit so high on the priority list.
Elite enemies and bosses will not fall to a single Artery Strike, and the decapitation chance is aimed at weaker foes. Against those fights the rotation shifts: Soul Stigma to raise crit, Charge for the stun and bleed, Soul Reaping to stay topped up in daylight, and Artery Strike whenever charges allow.
Build order matters more than any single item. Soul Stigma and a leveled Artery Strike get the loop running early, Sword Sage makes it repeatable, and the crit gear simply raises how often the decapitation actually fires. Everything after that is upgrading the pieces you already have.





