
Encountering playback issues while watching a video on your Windows 10 system? It could be due to several reasons and you got to identify them in order to fix the error. Therefore, before we move to the fixes, it’s imperative for you to understand the various issues that lead to video playback problems.
Common Reasons of Video Playback Errors on Windows 10
Video playback errors can occur both for local playback and videos on the web browser. Some of the issues or misconfigured settings may lead to errors on both while others specifically affect one.
- Running an older version of Windows 10
- Unsupported file type
- Outdated or corrupt drivers
- Outdated video player
- Corrupt video file
- Misconfigured settings (system or browser)
Now that you know the various issues leading to the error, it’s time we walk you through the various fixes.
1. Update Windows
If you have been encountering errors with the built-in video player or other playback issues, look for Windows updates. With each update, Windows fix a lot of bugs and errors in the previous version.
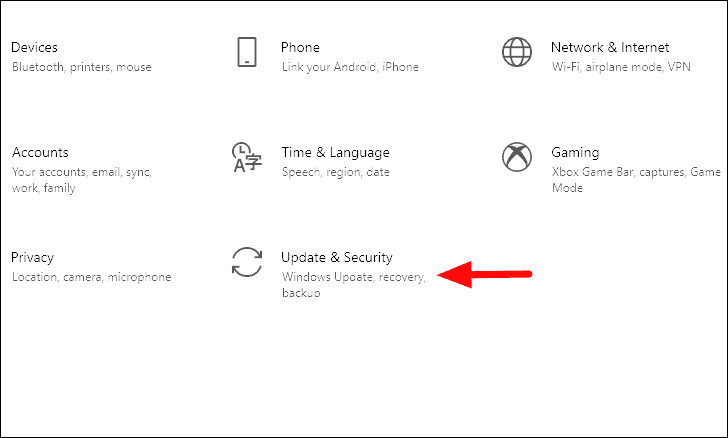
To update the Windows, press WINDOWS + I to launch system ‘Settings’ and then click on ‘Update & Security’ from the options.
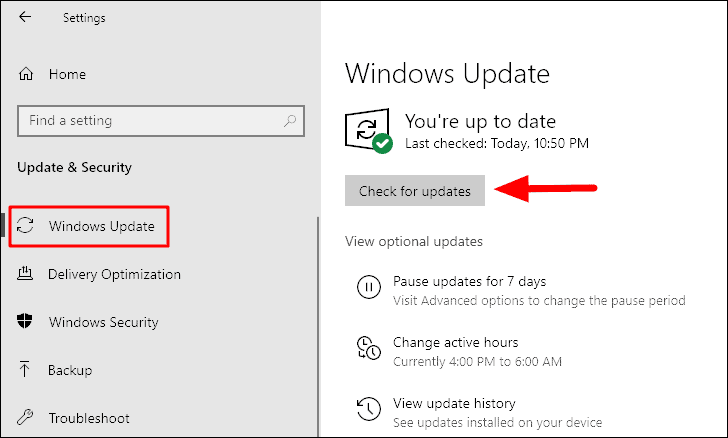
Now, in the ‘Windows Update’ tab, click on ‘Check for updates’. Any available updates will now be downloaded and installed on your system.
After the update is completed, check whether the issue with the video player or playback is resolved. If not move to the next fix.
2. Increase Processor Rate
Increasing the processor rate can help fix the video player or playback error if any software encoder is being used. By increasing the processor rate, you are trying to get the maximum power from the CPU which will in turn improve the playback. Before you proceed, make sure you are logged in as an administrator to execute the following steps.
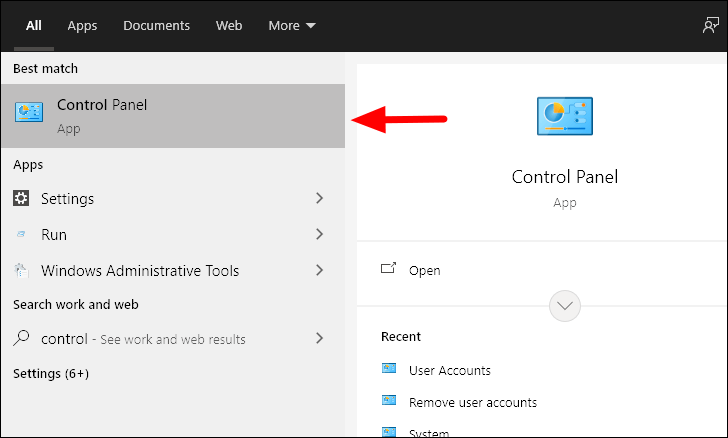
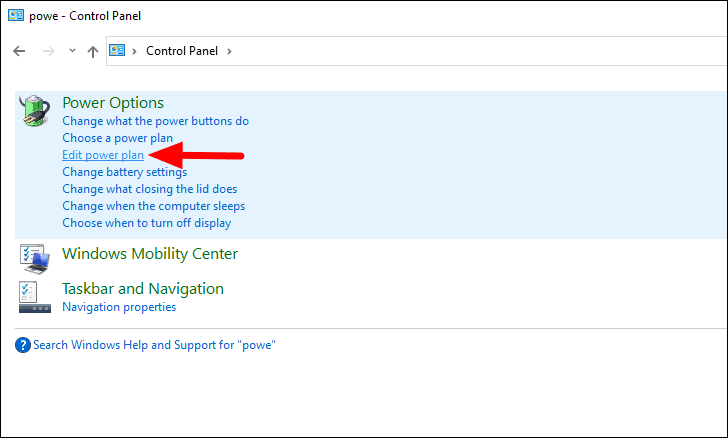
To increase the processor rate, search for ‘Control Panel’ in the ‘Start Menu’ and then launch the app from the search results.
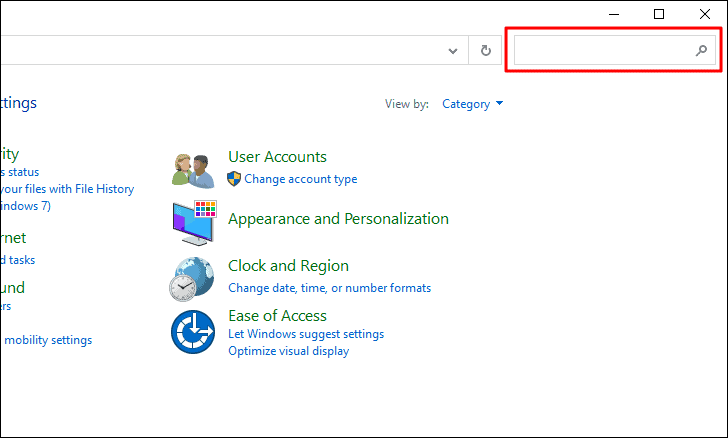
Next, enter ‘Power’ in the search box on the top-right corner.
The ‘Power Options’ will be mentioned at the top. Select ‘Edit power plan’ under it.
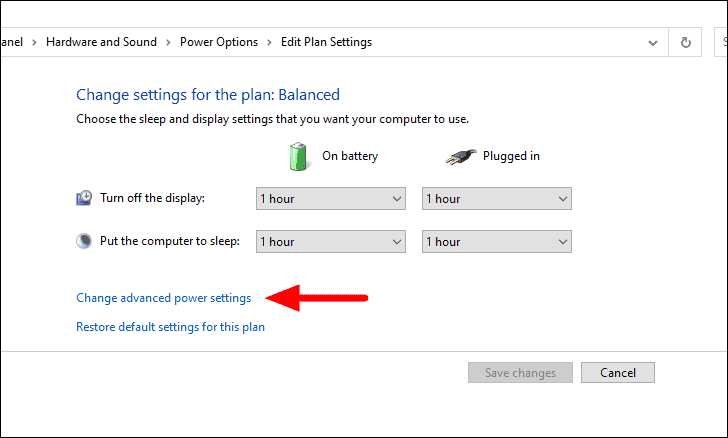
Now, click on ‘Change advanced power settings’ at the bottom.
Next, double-click on ‘Processor power management’ and then on ‘Maximum processor state’ under it. You will now find two options, ‘On battery’ and ‘Plugged in’ with the processor rate mentioned in case of each. Now, click on the percentage and increase them to ‘100%’ in both cases and click on ‘OK’ at the bottom to apply the changes and close the window.
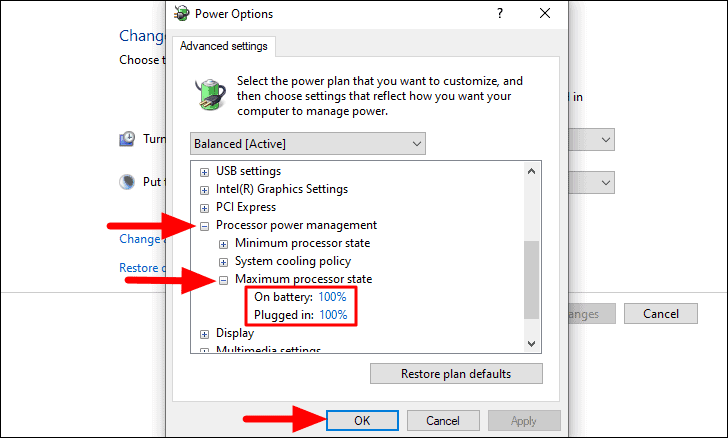
Restart your system and check whether the video player or playback error has been fixed and you are able to play the video without any hindrance.
3. Disable Hardware Acceleration
Hardware acceleration can also be the cause behind the video playback, both local and on the web browser.
You can easily disable hardware acceleration on the computer without much effort. Once you have disabled it, check whether the local playback error in the video player is resolved. The fix has proven effective for many users.
To fix playback issues for videos on the web browser, open the article and navigate to the last two sections that walk you through the steps to disable hardware acceleration and updating WideVine on Chrome, Firefox, Edge, and Opera. Once done check whether the error is fixed.
4. Update Video Player
This is one of the common issues that lead to problems playing videos on ‘Video Player’. Whether you are using the built-in video player on Windows or other third-party apps, manually checking for updates when you encounter an issue is a must.
Most of the players have a built-in update option but if you are unable to find it, go to the website and check whether there is a newer version available. In case there is, update the video player and the playback issue will be fixed.
5. Update Display Drivers
Outdated drivers can also lead to issues with video playback. Although Windows looks for and updates your drivers, you must check manually for driver updates. To update the driver, you can either let the Windows search for the one best on your system or manually choose one from the system install it. The drivers can be found on the manufacturer’s website.
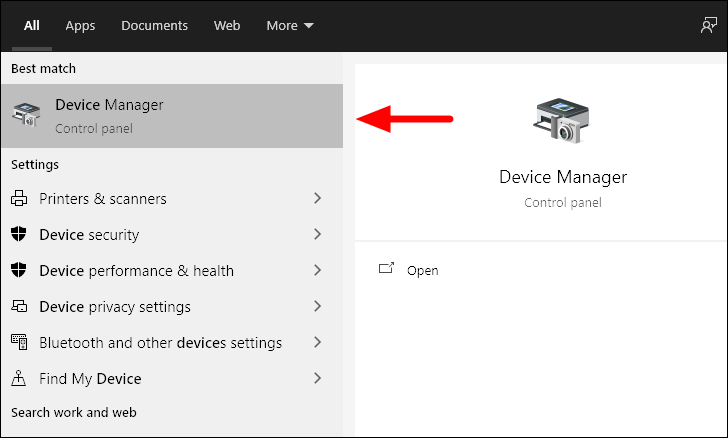
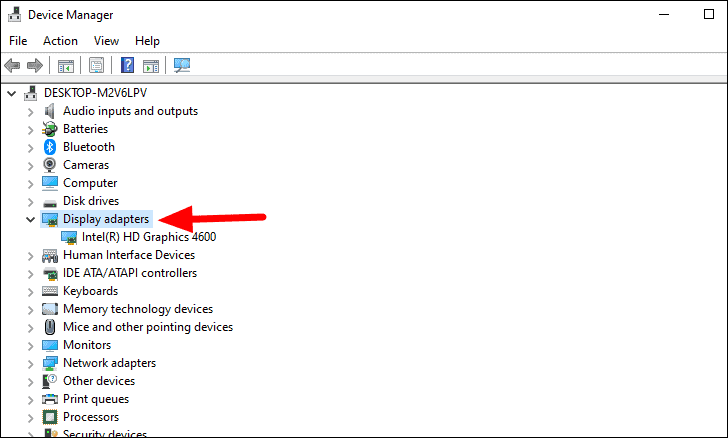
To update the display driver, search for ‘Device Manager’ in the ‘Start Menu’ and then launch it by clicking the search result.
In the ‘Device Manager’ window, double-click on the ‘Display adapters’ option.
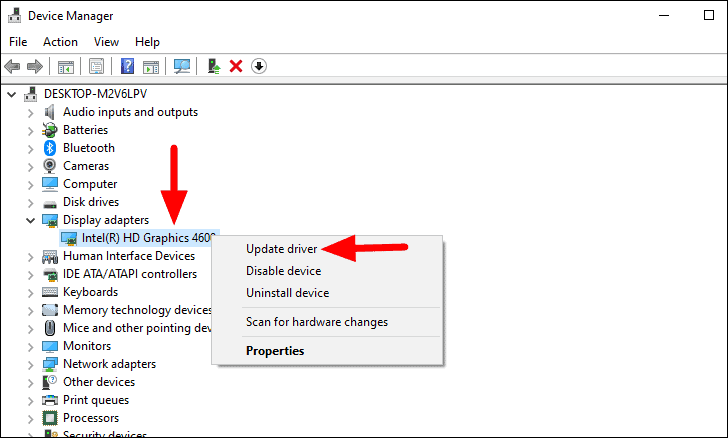
Next, right-click on the driver under it and select the ‘Update driver’ option from the context menu.
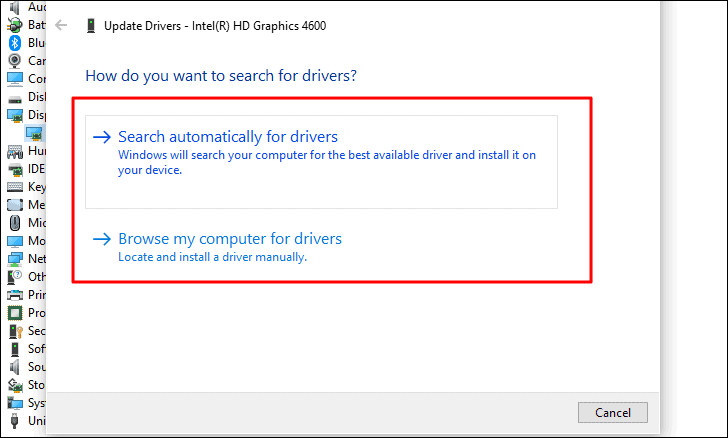
The Update Drivers window will open. You can now select whether you want to let Windows search the computer for the best available driver or install them manually. However, it’s recommended that you let Windows search for the driver. If you chose the second option, locate the driver file on your computer and install it.
Once the driver is updated, check whether the video player or playback error is fixed. If not, move to the next fix.
6. Convert Video Format
There is a possibility that the video you are trying to play is not supported by the player. If the video player does not support the format, you can convert the video into a format that is supported.
There are various third-party apps on the web that allow easy conversion from one format to another. We recommend using ‘VLC Media Player’ as it’s quick, effective, and has a user-friendly interface.
To convert the video format, go to the ‘FIX: Video Lagging or Stuttering Issues on Windows 10‘ article and follow the instructions under ‘Fix 3’ of the subheading ‘Fixing Lagging and Stuttering for Videos with VLC Media Player’.
7. Adjust Audio Playback
Many a time, adjusting the audio playback may also help fix the video player or playback error. All you have to do is lower the bitrate of the audio playback.
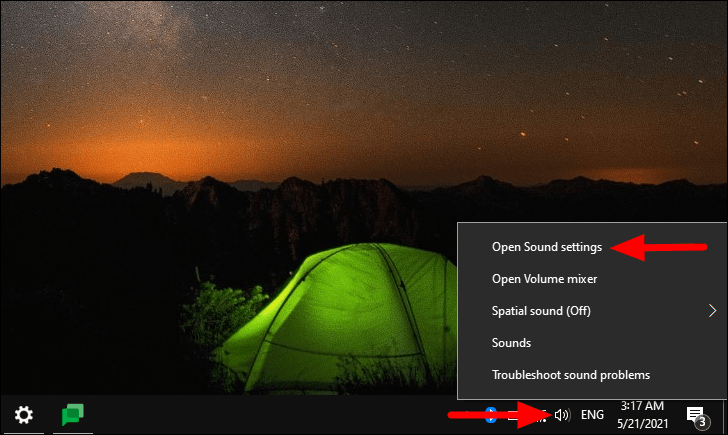
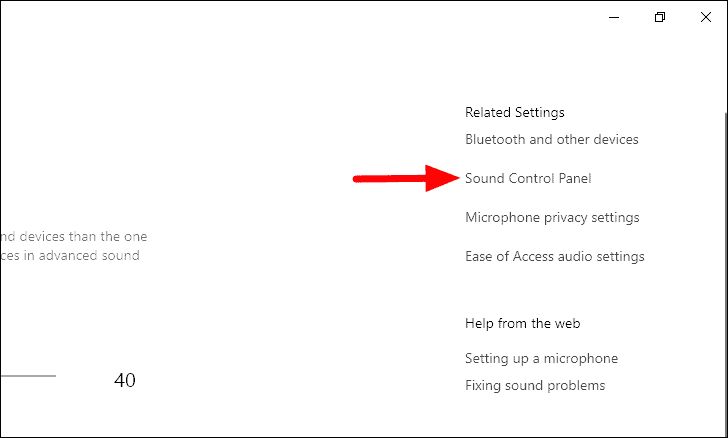
To adjust the audio playback, right-click on the ‘Speaker’ icon at the right of the taskbar and then select ‘Open Sound settings’ from the menu.
In the ‘Settings’ window, click on ‘Sound Control Panel’ under ‘Related Settings’ near the top-right.
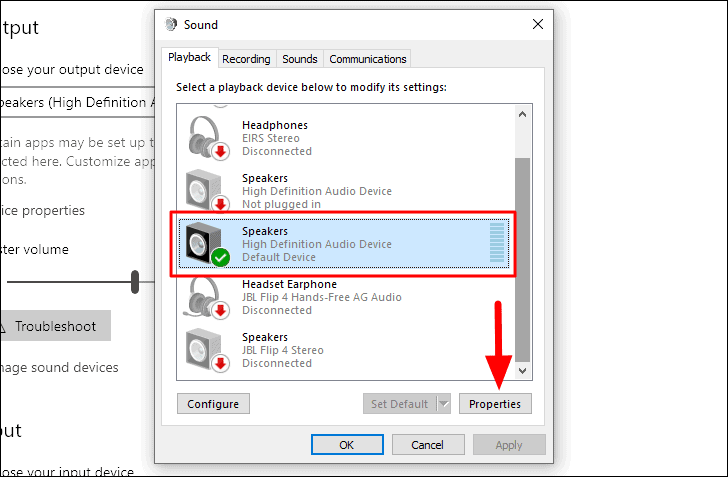
In the ‘Sound’ box, select the current playback device and then click on ‘Properties’ at the bottom.
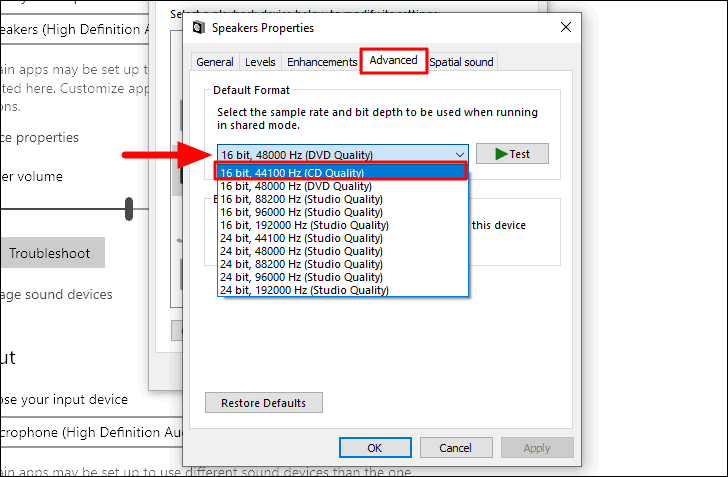
The ‘Speakers Properties’ box will open. Navigate to the ‘Advanced’ tab, click on the box and then select the first option from the drop-down menu.
After you have selected the first option, click on ‘OK’ at the bottom to apply the changes.
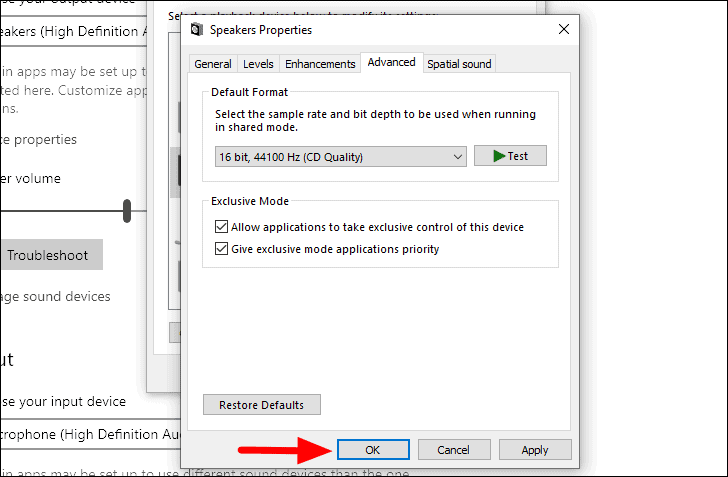
Now, play the video and check if the issues you were earlier facing have been resolved or not.
8. Download Media Codecs Pack
One of the common issues that lead to a video player or playback issue is the absence of specific codecs. Therefore, download a codec pack to fix the incompatibility issues. To download, either go to microsoft.com/en-us and get the pack from there or go for a trusted third-party source.
After you have downloaded the file, launch it and then follow the on-screen instructions to complete the installation process. Once the installation is complete, check whether you are able to view the video without any error.
9. Run System Restore
If you started encountering the error after an update or making some changes in the settings, you restore the Windows to an earlier point. System Restore reverts the Windows to an earlier point. Windows automatically creates a restore point before you make any major changes or install an update so that if something goes wrong, you can always revert to the stage where things worked fine. You can also create a restore point manually.
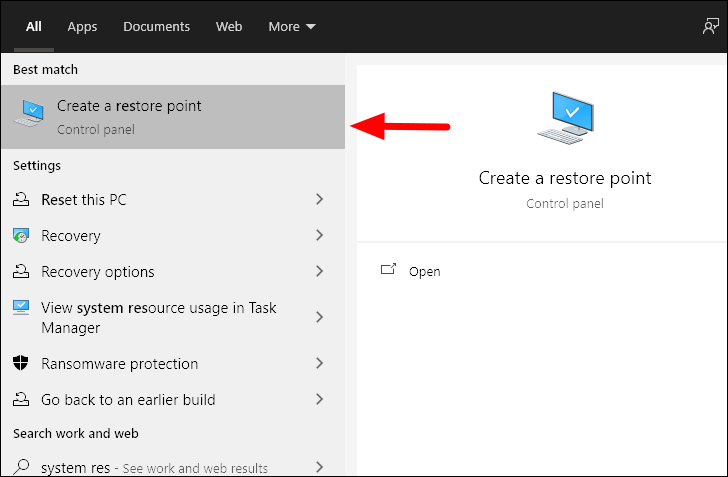
To restore the Windows, search for ‘System Restore’ in the ‘Start Menu’ and click on the ‘Create a Restore Point’ option from the search results.
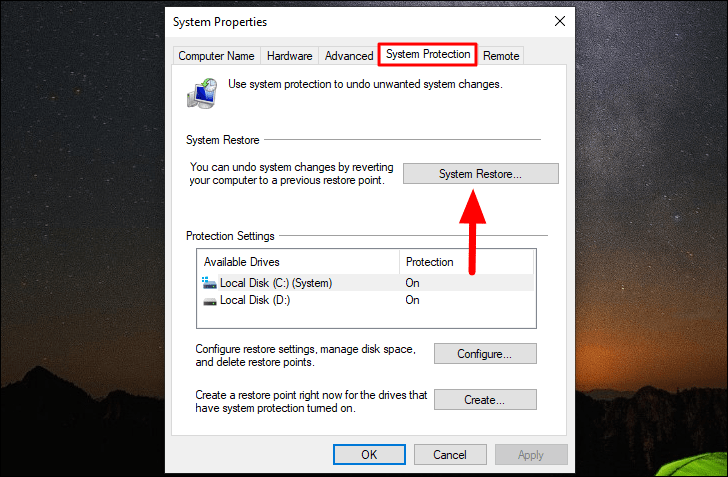
Next, click on ‘System Restore’ under the ‘System Protection’ tab.
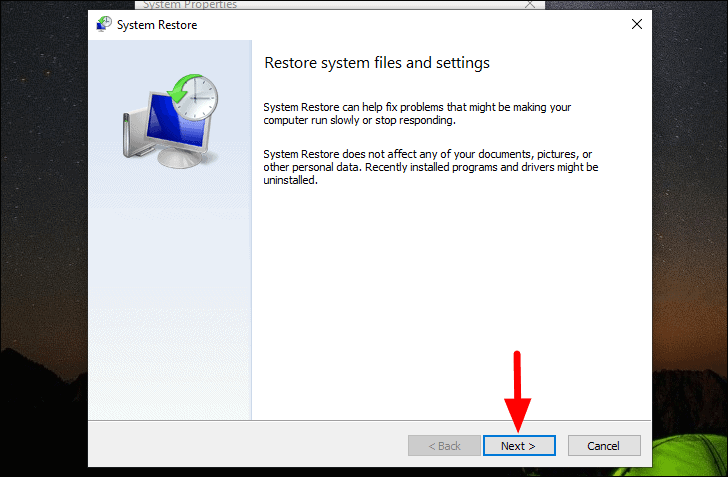
The ‘System Restore’ window will now open. Click on ‘Next’ at the bottom to proceed.
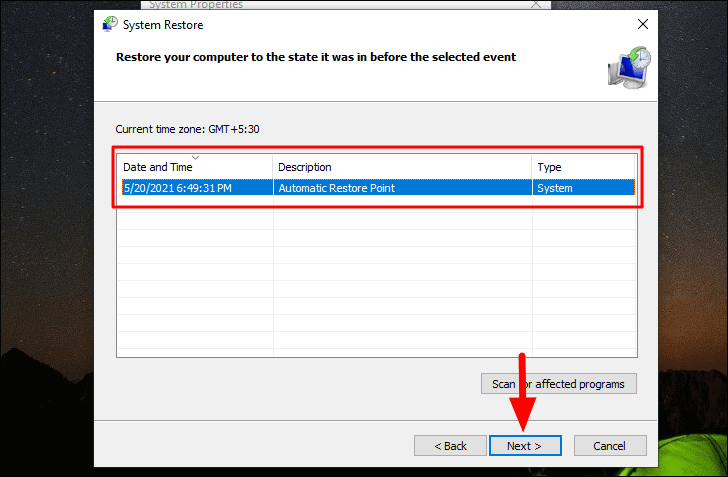
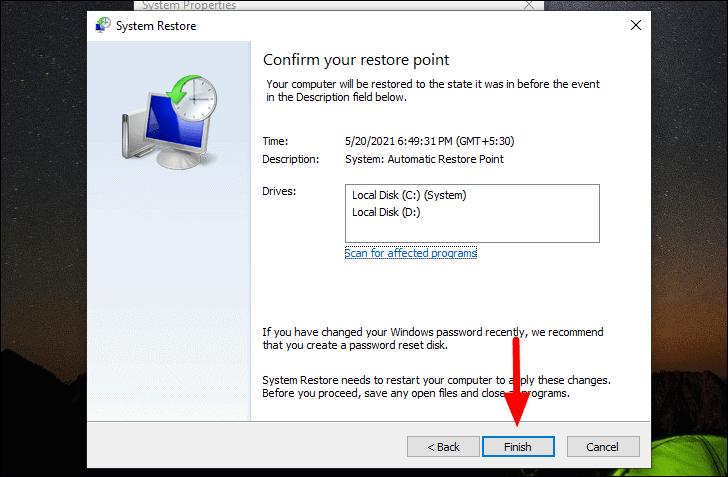
Next, select a restore point from the ones listed on the screen and click on ‘Next’ at the bottom.
Verify the details mentioned at the top and then click on ‘Finish’ at the bottom to start the restore process.
The system will restart for the process to complete, therefore save any open files to avoid data loss. Also, system restore does not affect any files from your system but restores settings and removes programs that have been installed lately.
After the system is restored, your video player will work perfectly and the playback issues would be eliminated.
Playing videos would once again be fun on Windows 10 after the video player and playback issue is resolved. Also, remember that most of the errors on Windows are easily fixable and you need not fret about them.


