The Creeper Candle is a Special Artifact in Minecraft Dungeons 2 that sets off a wide, fiery explosion around the player. One candle is a decent burst skill. Two candles equipped together, backed by gear that inflates your soul pool and refills it quickly, become a near-constant stream of detonations. This Halloween-themed loadout is built around that idea, and every other slot exists to feed the candles, shorten their cooldowns, or keep the player healthy enough to keep a damage bonus switched on.
Quick answer: Each Creeper Candle costs 25 souls with a 5-second cooldown. The build equips two of them and stacks Soul capacity, soul gain and artifact cooldown reduction so both can be fired back to back.
Creeper Candle stats and why two copies matter
Both candles in the loadout share the same base numbers. They differ only in their rolled effects and item power, which is why the second copy is not redundant. Each one adds its own Soul capacity, cooldown reduction and artifact damage, and in Minecraft Dungeons 2 rolls of the same effect add together.
| Stat | Candle 1 (IP 150) | Candle 2 (IP 152) |
|---|---|---|
| Soul cost | 25 | 25 |
| Cooldown | 5 | 5 |
| Soul capacity | +30% | +35% |
| Artifact cooldown | -15% | -20% |
| Artifact damage | +15% | +20% |
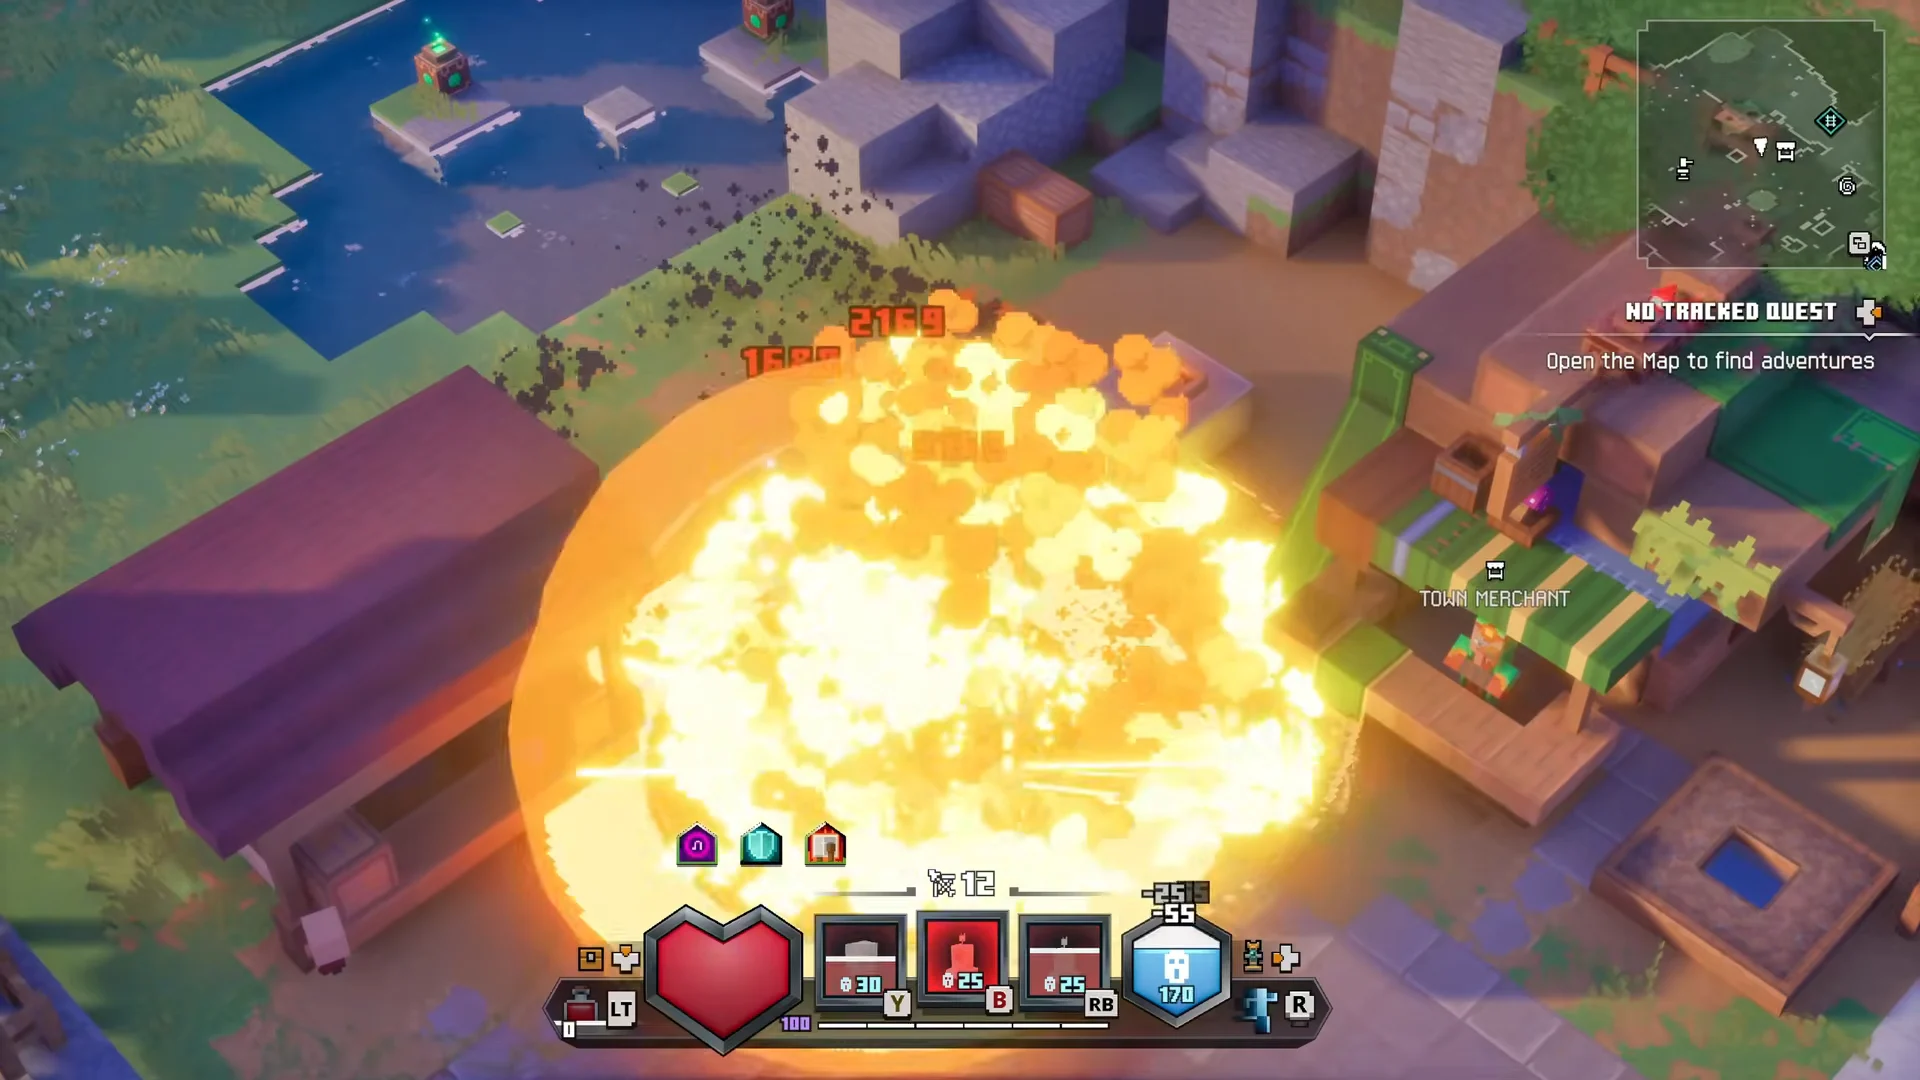
A 25-soul price is cheap. In the town hub, the candles go off one after another with barely a pause, which shows how little the soul bar drains per cast once capacity has been pushed up.
Soul economy: capacity, gain and cooldown
The build only works if souls never run dry. Three separate levers handle that. Capacity sets how many casts you can bank, soul gain sets how fast the bank refills during a fight, and cooldown reduction decides how soon each candle is ready again.
| Source | Soul capacity | Artifact cooldown |
|---|---|---|
| Creeper Candle (x2) | +30% / +35% | -15% / -20% |
| Monarch Sash | +50% | -15% |
| Monarch Talons | +35% | -20% |
| Twisted Tooth | — | — |
Added up, the four gear pieces put +150% Soul capacity on the character. Twisted Tooth, a Level 3 talisman, does not touch capacity but raises souls gained by 140%, so clearing ordinary mobs between bosses refills the bar fast. The Monarch Sash also carries Artifact Amplifier, which briefly improves artifact cooldown and damage for 3 seconds after any artifact use. With two candles, each cast tends to land inside the window opened by the previous one.

Damage layers on the candle explosions
Once the casting loop is solved, the rest of the loadout multiplies what each explosion does. Some bonuses apply only to artifact attacks, while others raise all damage under a condition.
- Monarch Sash adds 20% artifact attack damage on top of the candles’ own rolls.
- Grindstone (30 cooldown) adds 20% artifact damage, 15% soul damage and 20% lightning damage while active.
- Monarch Talons deal 50% more damage to enemies under a negative status.
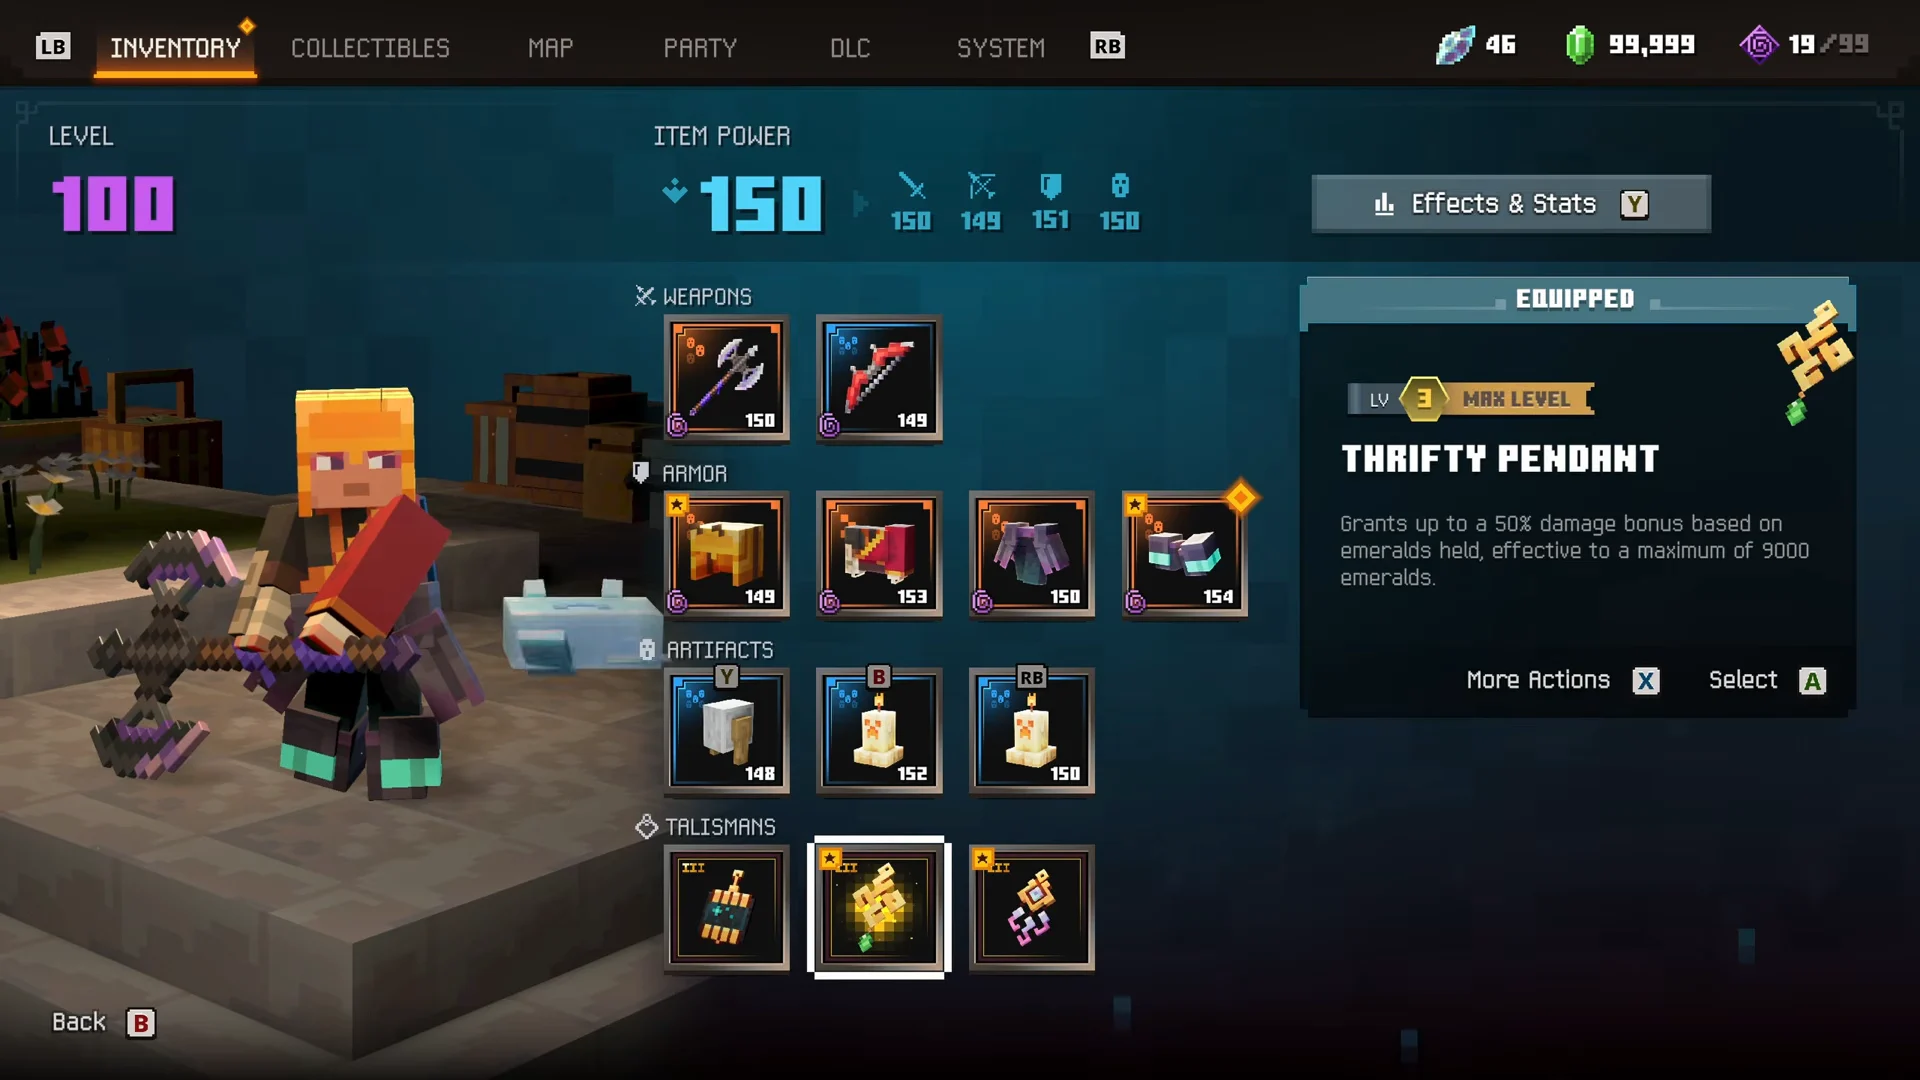
- Thrifty Pendant grants up to 50% damage based on emeralds held, capped at 5000 emeralds.
- Tendrils of the Sprout grants 40% more damage while health stays above 75%.
Grindstone is the third artifact slot, and it is a buff rather than an attack. Testing on training dummies in town shows a visible jump in Creeper Candle damage with Grindstone running compared with the same candles without it. Thrifty Pendant is effectively a fixed bonus here, since the character holds 99,999 emeralds, far past the 5000 cap.
Monarch Talons also contribute positioning. Their Gravity Pulse effect pulls every enemy within 8 blocks toward the player whenever an artifact is used. Because the candle blast is centered on you, each cast drags nearby mobs into the explosion radius instead of leaving them at its edge.
Hivemind Hardhat and status duration
The helmet slot goes to the Hivemind Hardhat (IP 149) over other unique helmets because it stretches both sides of the status game. Positive statuses you apply to yourself and allies last 70% longer, which extends buffs such as Grindstone’s. Negative statuses on enemies last 60% longer, which keeps foes inside the Monarch Talons and Awesomaxe damage condition for more of the fight.
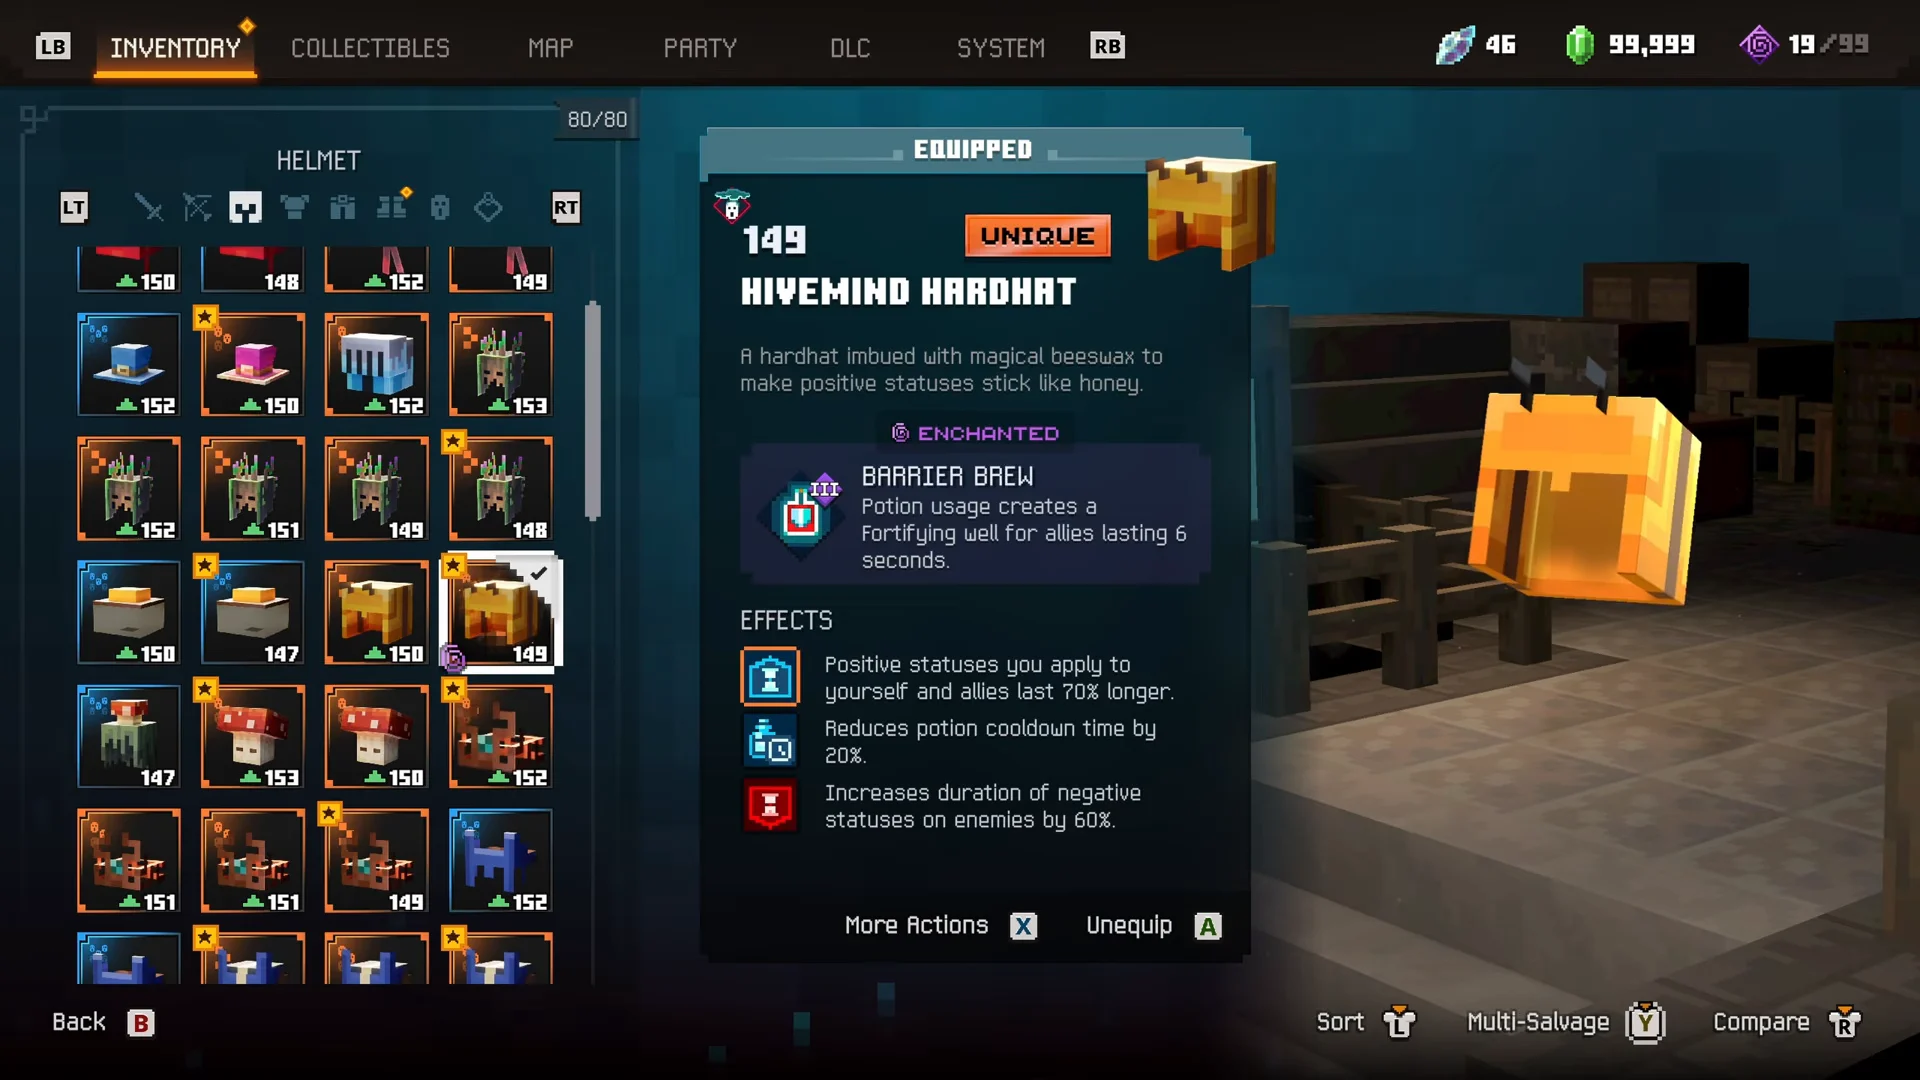
The Hardhat’s unique effect, Barrier Brew, creates a fortifying well for allies for 6 seconds whenever a potion is used, and the helmet also cuts potion cooldown by 20%. Both tie directly into the build’s health problem.
The 75% health threshold and Bottomless Brew III
Tendrils of the Sprout is a large damage bonus with a strict condition. The 40% increase applies only while health is above 75%, so any significant hit switches it off until you heal. The build therefore trades some raw damage for healing capacity.
That trade happens on the Sage Tunic (IP 153). At the Enchantsmith, its Ancient Alchemy III enchantment is swapped for Bottomless Brew III, which grants 3 additional health potions. More potions, combined with the Hardhat’s shorter potion cooldown, make it easier to climb back over 75% and reactivate the talisman. The reroll is paid in enchantment points, and the counter drops from 46 during the process.
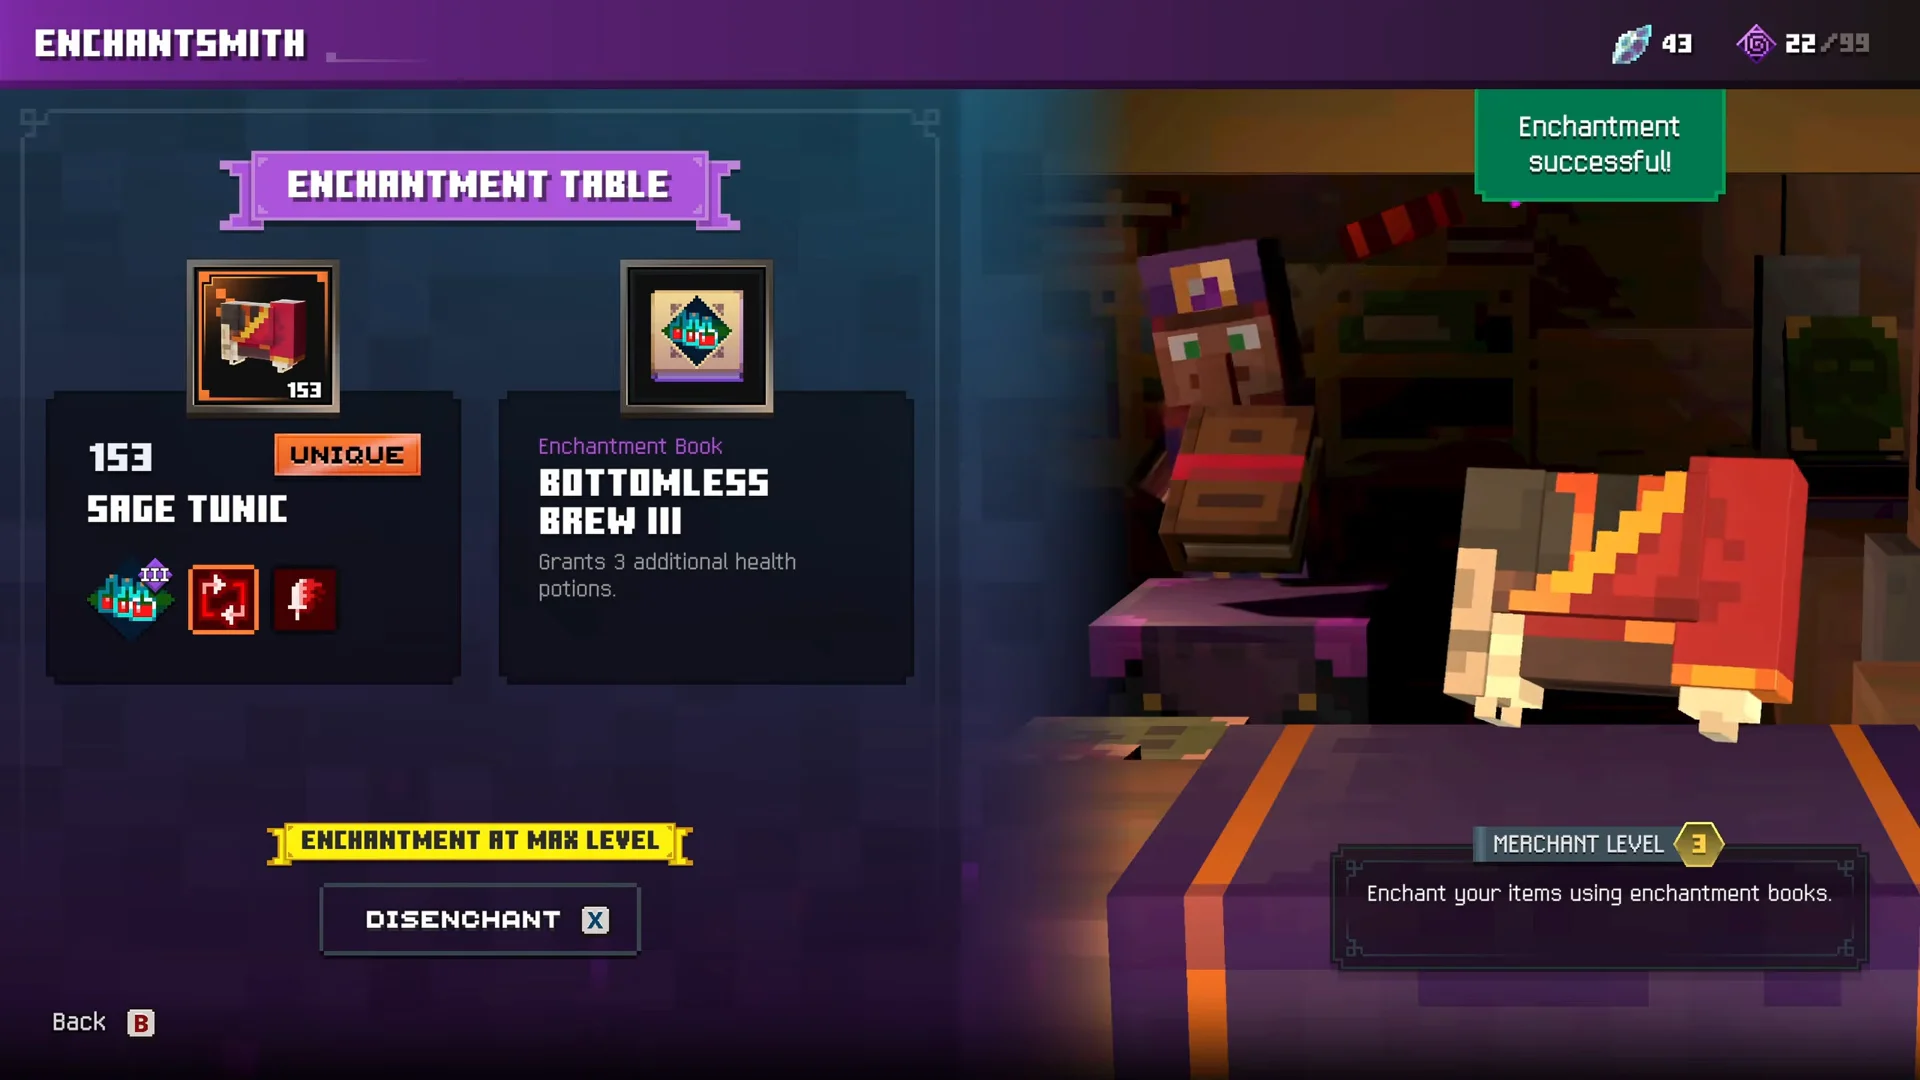
The tunic keeps its other effects either way. It deals 40% more damage to wounded enemies and raises melee attack speed by 20%.
Awesomaxe and Powerbow in a candle build
The weapons support the candles rather than carry the damage. Both reward hitting enemies that are already wounded or debuffed, which the explosions and longer statuses provide.
| Weapon | Type / IP | Unique effect | Key rolls |
|---|---|---|---|
| Awesomaxe | Unique melee, 150 | Lightning Surge | 70% Strength on hit; +25% vs wounded; +50% vs negative status |
| Powerbow | Special ranged, 149 (12 ammo) | Shielding Smite | +50% vs full health; +30% vs wounded; 40% extra loot |
Awesomaxe fires a wave for 90% of weapon damage that zaps mobs, leaving them weaker but faster. That zap counts toward Grindstone’s lightning bonus, and the frequent Strength procs benefit from the Hardhat’s 70% buff extension.
Powerbow has a 40% chance on kill to create a fortifying well for allies. The bow slot is the most flexible part of the loadout, and an alternative bow that rolls bonus movement speed on ranged hits fits the build just as well.
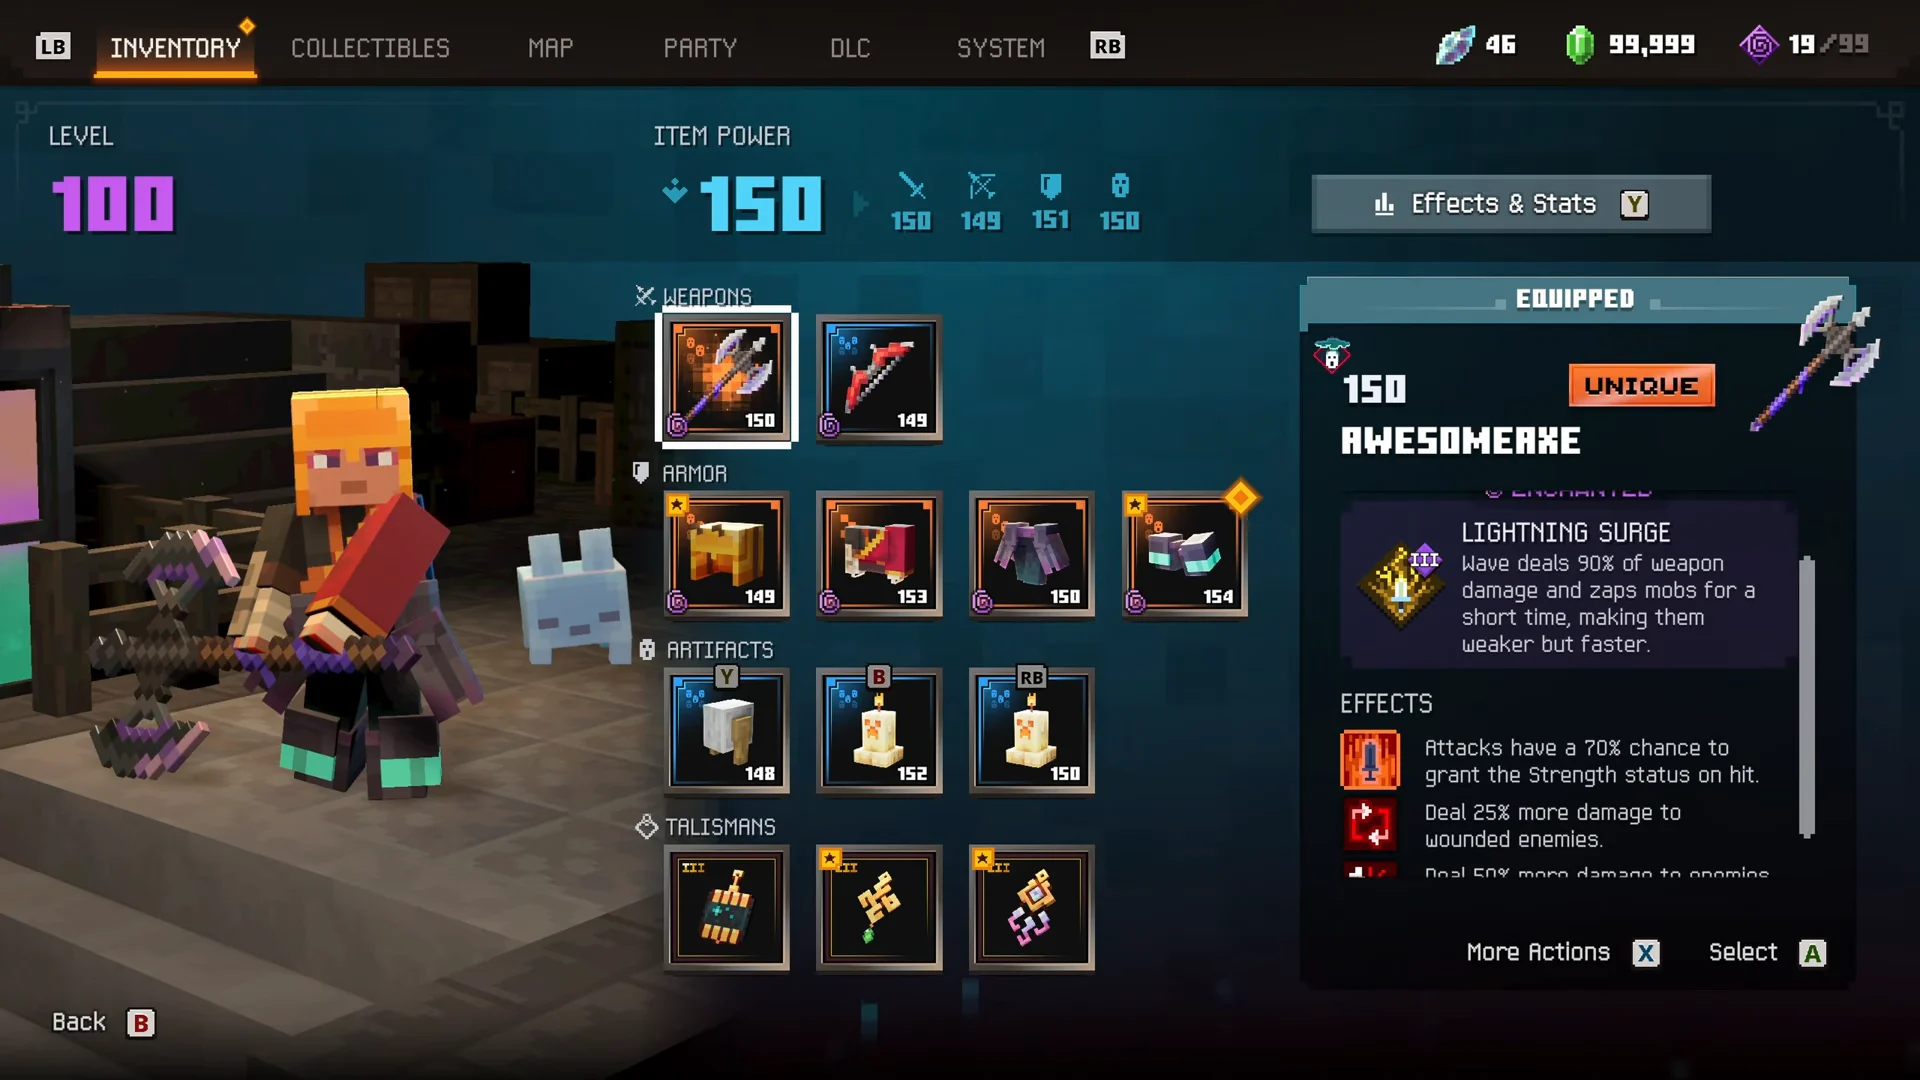
Full Creeper Candle loadout
| Slot | Item | Role in the build |
|---|---|---|
| Melee | Awesomaxe | Debuff and Strength procs |
| Ranged | Powerbow | Ranged damage, loot |
| Helmet | Hivemind Hardhat | Status duration, potions |
| Chest | Sage Tunic | Bottomless Brew III potions |
| Pants | Monarch Sash | Soul capacity, Artifact Amplifier |
| Gloves | Monarch Talons | Soul capacity, Gravity Pulse |
| Artifacts | Creeper Candle x2, Grindstone | Explosions and damage buff |
| Talismans | Twisted Tooth, Thrifty Pendant, Tendrils of the Sprout | Soul gain and flat damage |
All three talismans run at Level 3, and the gear sits between item power 148 and 154. In combat footage, the loadout clears Soul Storm encounters and takes down the revived Copper Monstrosity, with the candles doing most of the visible work. The design leaves room to grow, since nearly every piece has rolls that could be swapped for stronger soul or artifact effects as better drops arrive.