At the far end of the Holy Innocents’ Cemetery, Medusa waits in the Serpents’ Lair. The battle unfolds in a submerged stone ruin, where Rose can stand on small elevated platforms. Defeat Medusa to receive a new Arcana card, a spell, and one of the three keys required to open the Catacombs’ sealed door.
Route to the Serpents’ Lair from Holy Innocents’ Cemetery
The path runs through the cemetery and loops back on itself. Your map objective during the trip reads “UNLOCK THE GATE TO THE CATACOMBS”.
A spirit in the Roman Baths leaves the “Guardian’s Gaze” clue, a warning about her eyes. Keep that in mind for the eye beam below.
The arena and Medusa’s health bar
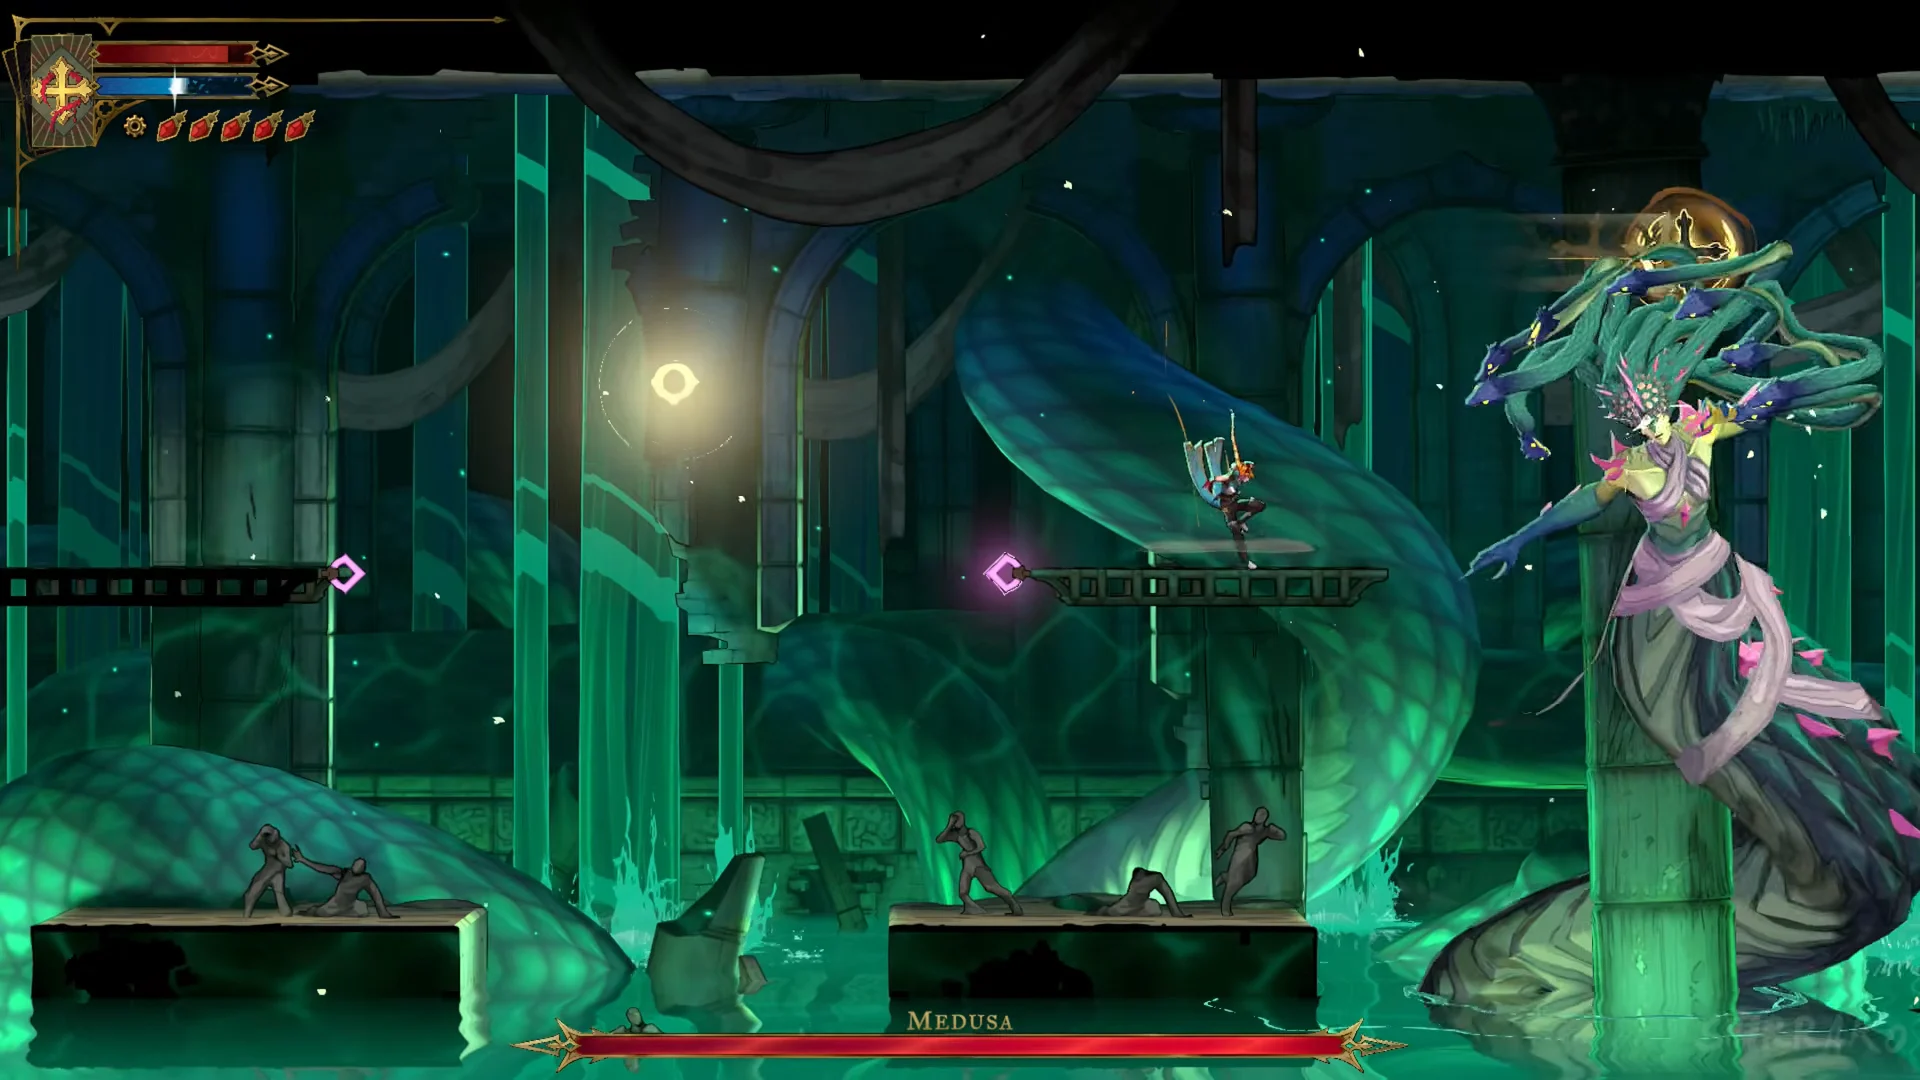
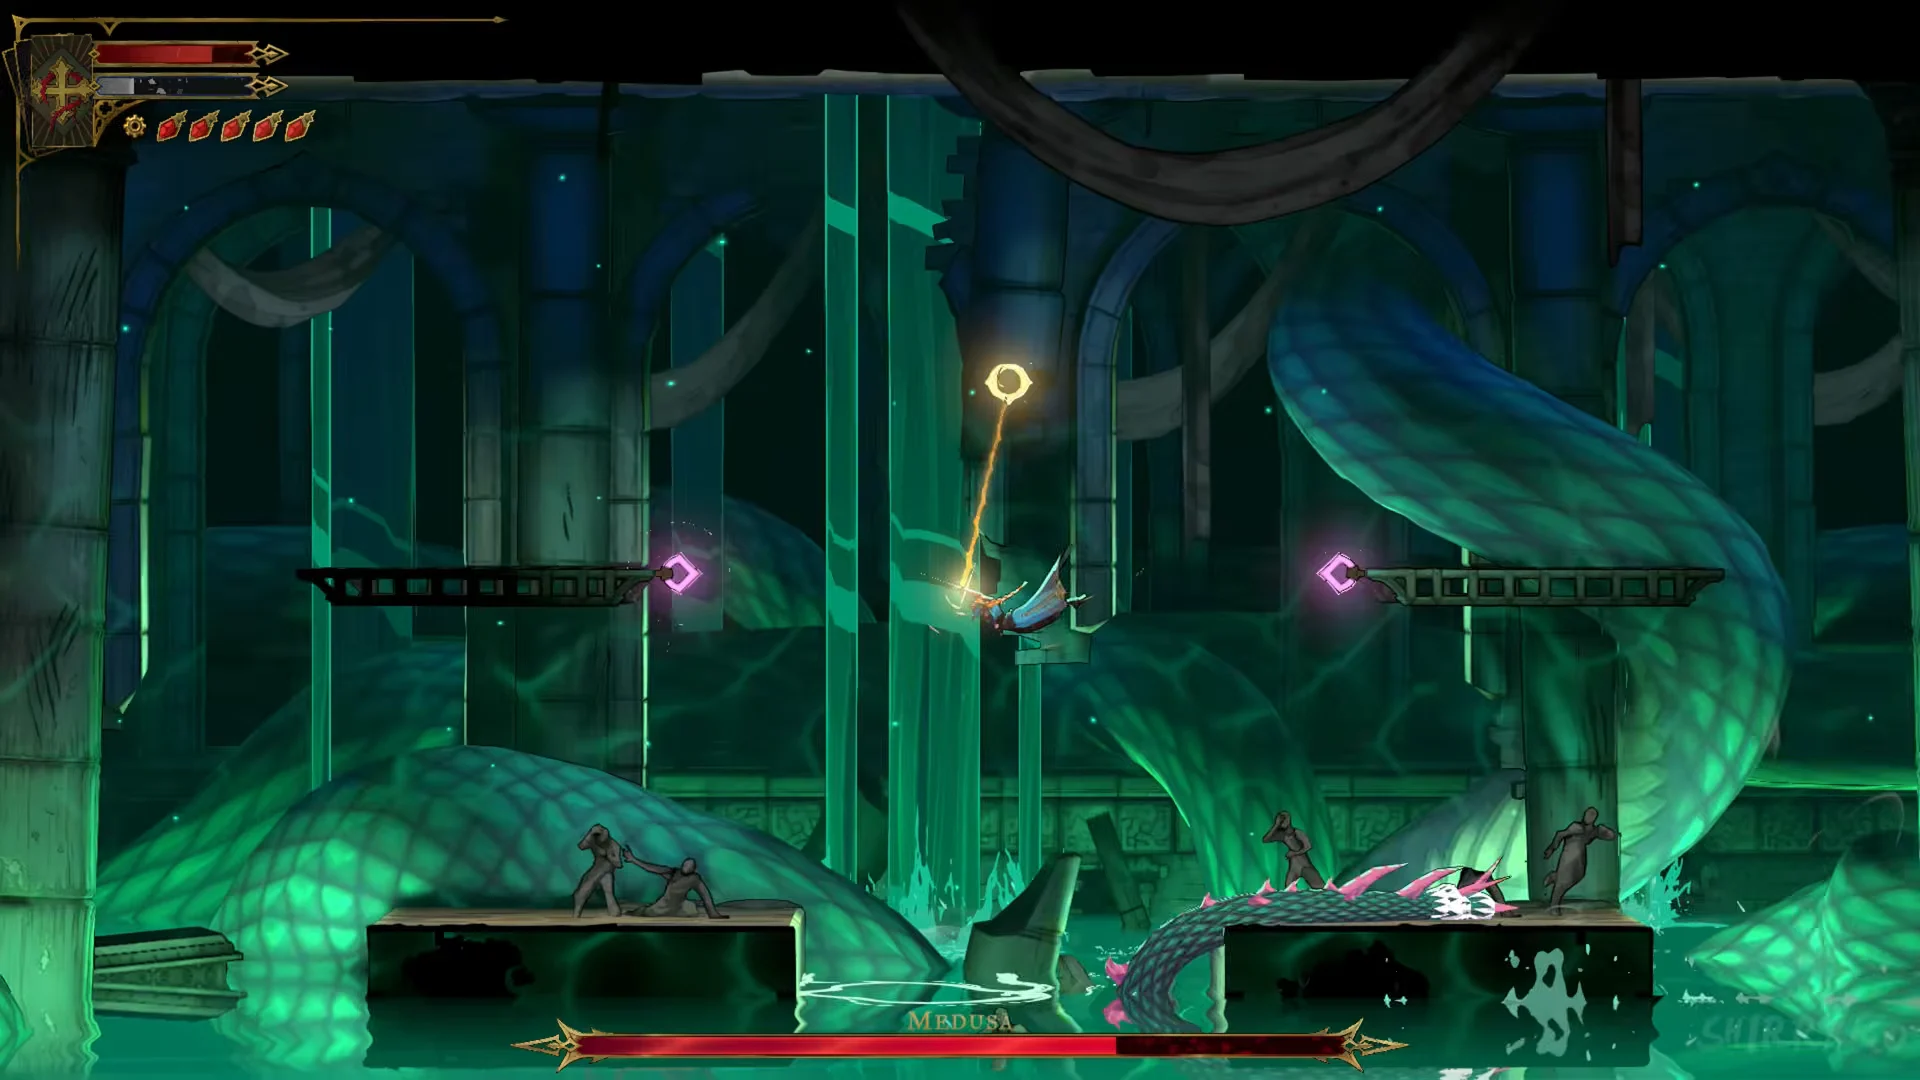
Medusa’s battle arena consists of flooded stone ruins encircled by enormous coils of her green body. Water covers the ground beneath Rose, who can stand on a raised platform on either side; purple grapple crystals sit beside the platforms, and a golden grapple ring hangs between them over the center. Medusa takes position on one of the two pillars, left or right.
She has one red bar labelled “MEDUSA” with no visible segments. It drains smoothly as you land hits, so there is no fixed checkpoint to watch for. Stay on the raised platforms unless an attack forces you down.
Medusa’s attacks, tells, and counters
Read the tell, get clear, then strike while she is open.
Swipe
Her hair curls as she draws one claw back; she then sweeps a blue crescent across the upper level. Evade by grappling to the opposite platform or jumping there.
Eye beam
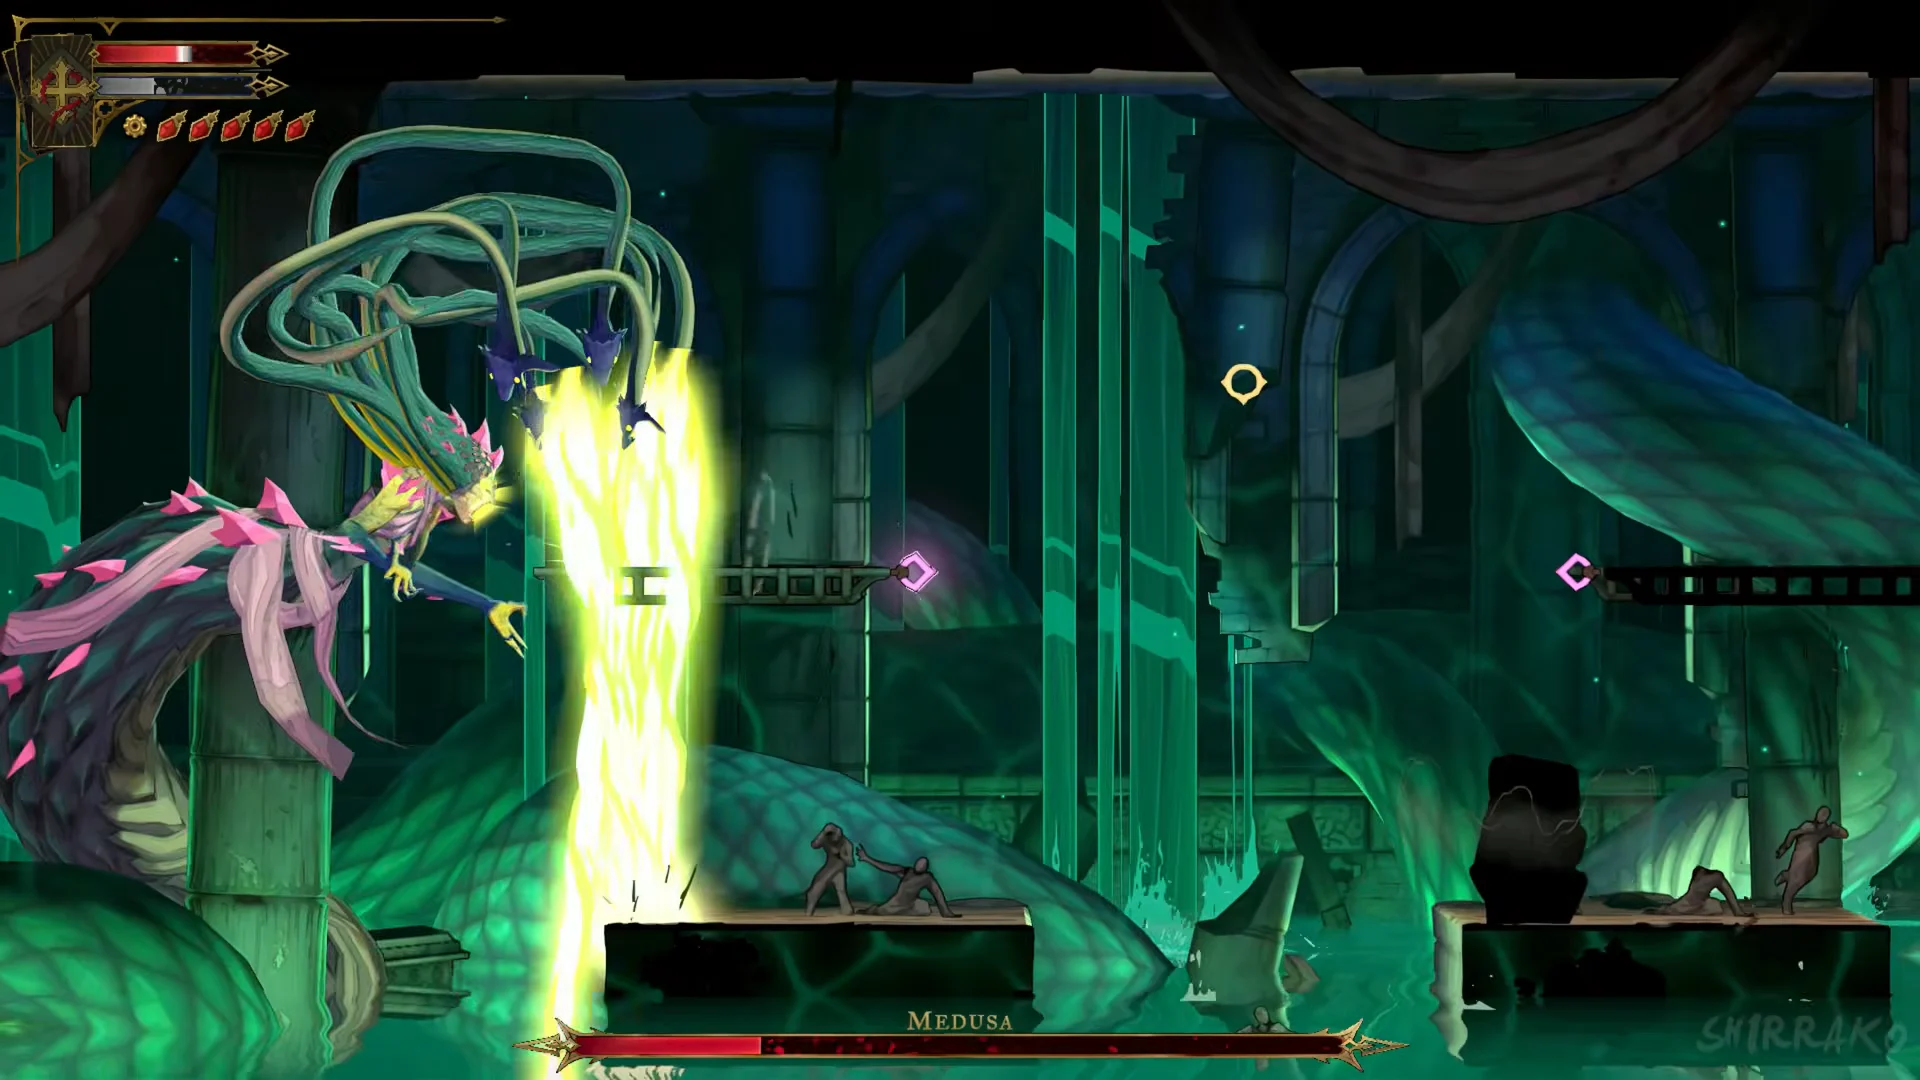
A yellow-green light builds in her face as she pitches forward, followed by a broad beam fired straight across the upper platform. Use the golden ring to grapple away, or drop below the beam’s path.
Water dive with tail sweeps
With a splash, she plunges underwater, then her body or spiked tail surges along the floor through the water. Get above it by standing on a raised platform or hanging from the golden ring; a dodge roll through the tail is another way to evade.
Lunge bite with hair snakes
She draws back while the snake heads coil forward, then charges across the top platform. Jump over her rush and strike her face while airborne.
Beam barrage
As the battle progresses, the snake heads spread out from her hair and turn yellow before unleashing several beams simultaneously. Find a clear space between the beams and grapple to the ring to leave their path along the floor.
Flying snake heads
Near the end of the fight, little snakes launch from her in your direction. Grapple across the room to avoid them, then move in again to attack.
When to strike back
After a swipe, bite, or dive, she leaves an opening. Use aerial whip combos against her head and body to deplete the bar quickly; a spell from a card ability can also hit her if cast in midair. Move between the pair of platforms and the golden ring to keep an escape option available, and attack during her openings. The final blow ends with a black-and-white slash finish.
Rewards and how to collect them
The bar empties and the trophy “Snakes speared in the ruins” pops with a “Trophy earned!” message. An absorption prompt then reads, “During the absorption phase, hold down R1 to absorb the power of the Arcana” — hold R1 to take it in.
- The Prophetess Arcana card, granting the spell Petrifying Gaze, described as “Petrify enemies in front of Rose.”
- To open the sealed door leading to the Catacombs, you need “THE PROPHETESS’S KEY” plus two additional keys.
- The trophy “Snakes speared in the ruins”.
The battle has ended once the key is added and the Arcana has been absorbed. Before continuing toward the Catacombs, pick up the Rusted Harpe and Aegis, a new weapon pair found in the next room.