
With online meetings gaining traction in recent years, a functioning webcam has become a necessity. Be it a work meeting or an online class, you are likely to be required to turn on the webcam. But, what if the webcam fails to function?
It can be the case with both integrated and external webcams. Fixing integrated webcams can be a lot trickier than external webcams, owing to the overwhelming number of specific fixes in case of the latter, some as simple as reconnecting the external webcam to plugging it into a different USB port.
Either it be an integrated webcam or an external one, we have listed some of the most effective fixes for both. Follow them in the sequence that they are mentioned for a quick troubleshooting process.
Note: Some fixes may be specific to a particular type, integrated or external webcams. Skip the ones that are not applicable in your case.
1. Inspect Webcam Connections
One of the first things you do when the webcam is not working is to inspect the connections. In the case of integrated webcams, there’s isn’t much you can do since the connections are all concealed.
For external webcams that are connected via USB, check if it’s properly connected. Often, there might be a problem with the USB port itself, which may be damaged or dead. In this case, try connecting it to another USB port and check if it fixes the issue.
For external webcams that are connected via Bluetooth, first, verify if they are connected. If not, establish a Bluetooth connection between the PC and the webcam. Turn the airplane mode on for a while and then turn it off. Now connect to the webcam and check if it starts to work. Forgetting the webcam from the Bluetooth settings and reconnecting to it is also an effective fix. For help troubleshooting issues with Bluetooth webcam, go to ‘9 Ways to Fix when Windows 11 Bluetooth is Not Working‘.
2. Check if the Webcam is Covered
Seems pretty obvious, right? But, many users prefer covering their webcam with a sticker or tape for privacy and often forget about it at the last moment. When the webcam is covered, a black screen would appear instead of the feed, thus giving the impression that the webcam is not working.
A simple glance over the webcam and you will be able to identify if the lens is covered. In the case of external webcams, ensure that there is no obstruction covering the lens.
3. Check if There’s a Physical Switch
Many PCs have a physical switch to enable/disable the webcam. Check if there’s one on your PC. You can refer to the manual that came along with the system or check the manufacturer’s website for more information on the same.
If there’s a switch, make sure it’s turned on and check if the webcam starts working.
4. Restart the PC
It’s probably the oldest fix for most trivial issues and still works like a charm. Simply restarting the PC can fix issues that prevent your webcam from functioning. When you restart the system, the OS is reloaded, thus eliminating any bug or program causing the webcam to malfunction. This fix would work for both integrated and external webcams.
5. Check Camera Privacy Settings
Misconfigured settings are another prominent reason behind issues pertaining to the webcam. You may have at some point, knowing or unknowingly, disabled the webcam from the ‘Privacy’ settings. Before we move to the other intricate fixes, let’s first check the camera ‘Privacy’ settings.
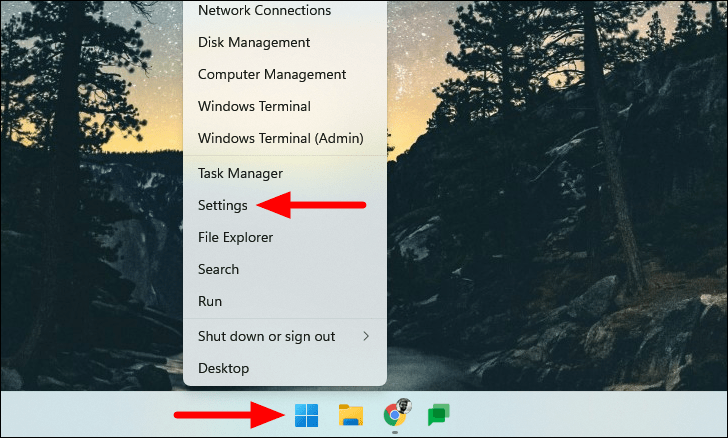
To check the camera ‘Privacy’ settings, either right-click on the ‘Start’ icon in the Taskbar or press WINDOWS + X to launch the Quick Access menu, and select ‘Settings’. Alternatively, you can press WINDOWS + I to directly launch the ‘Settings’ app.
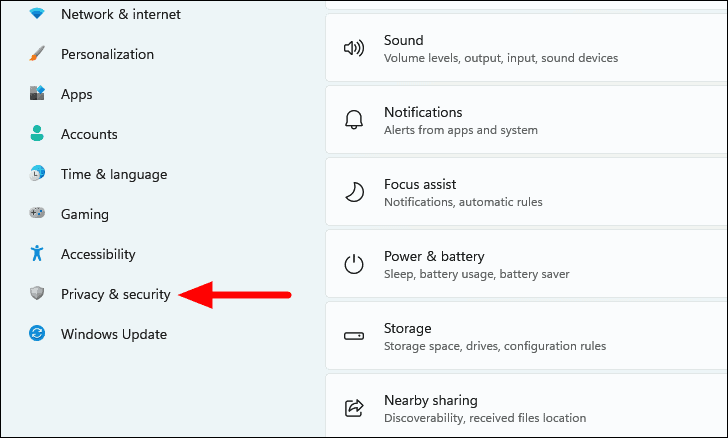
In Settings, you will find several tabs listed on the left, select ‘Privacy & security’.
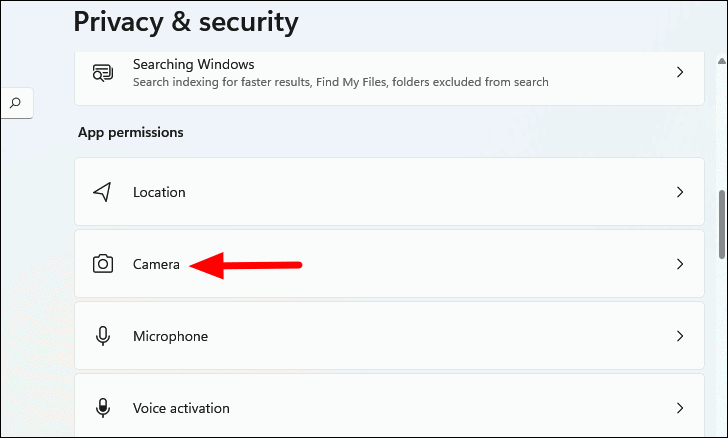
Next, locate and select ‘Camera’ under ‘App permissions’.
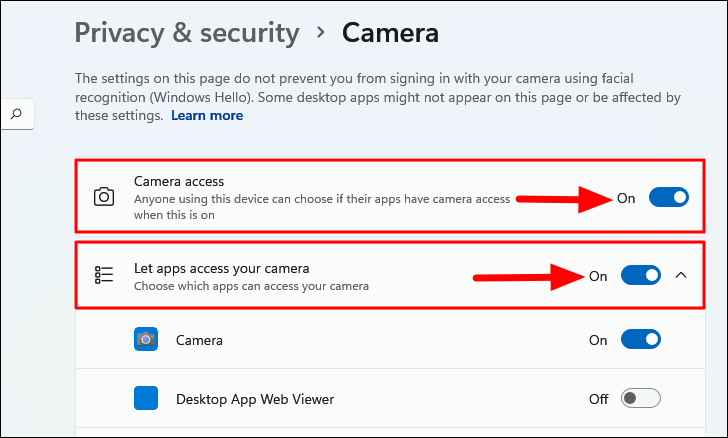
In the ‘Camera’ privacy settings, ensure that the toggle for ‘Camera access’ and ‘Let apps access your camera’ is turned on. Also, check if the apps that you facing trouble with are listed here and turn on the toggle for them individually.
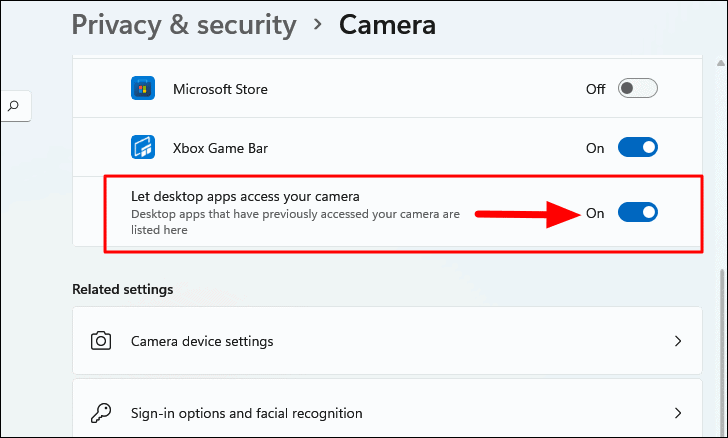
Next, scroll down and turn on the toggle for ‘Let desktop apps access your camera’.
After configuring the ‘Camera’ privacy settings, check if the webcam starts to work. If you are still facing trouble with it, move to the next fix.
6. Check if Webcam is Disabled in Device Manager
The webcam can also be disabled in the Device Manager. If you have previously disabled it, re-enable it. Also, even if you don’t remember making any such changes, there’s no harm in verifying.
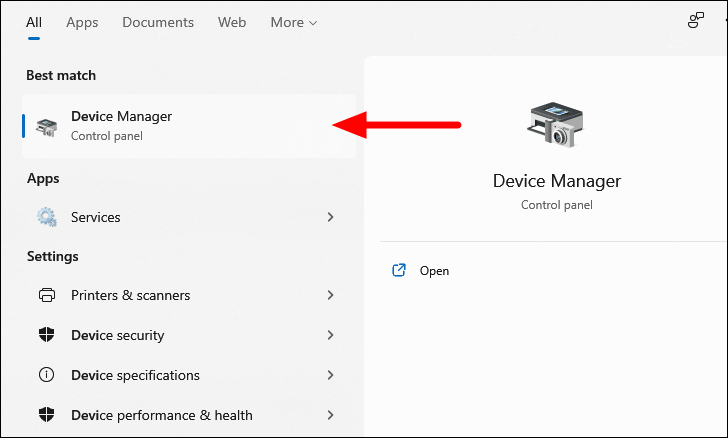
To check if the webcam is disabled in Device Manager, press WINDOWS + S to launch the ‘Search’ menu, type ‘Device Manager’ in the text field at the top, and click on the relevant search result to launch it.
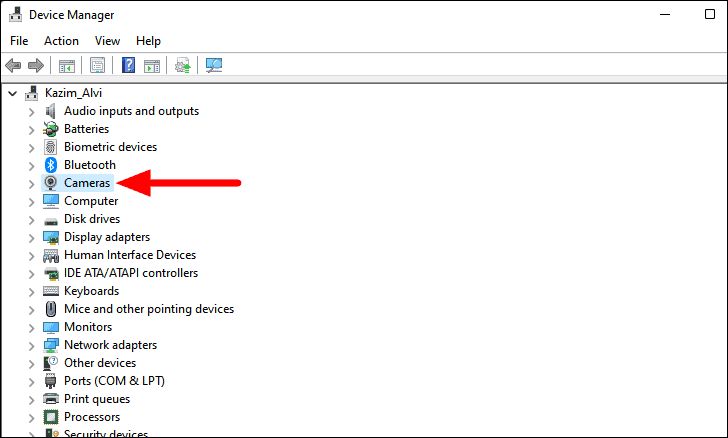
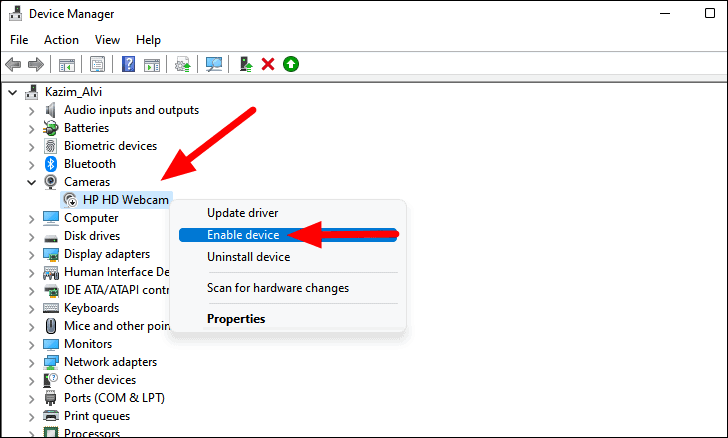
In the Device Manager, you will see all the devices clubbed under different categories. Locate and double-click on the ‘Cameras’ option.
If you have multiple webcams connected, they will all be displayed here. Right-click on the one that’s not working, and check if there’s an option for ‘Enable device’. In case there’s one, click on it.
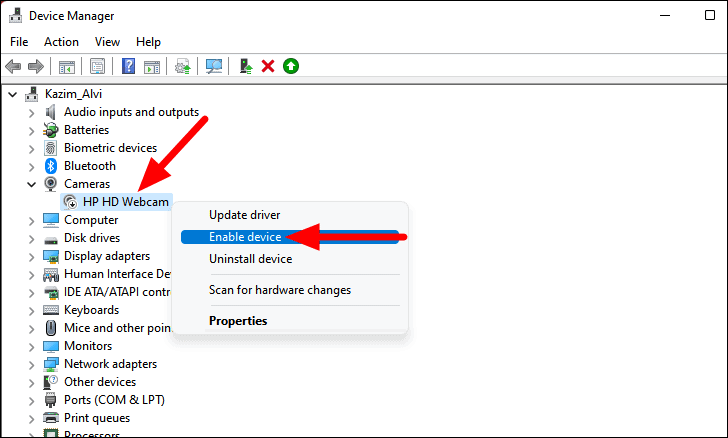
Your webcam should now start working.
7. Check for Windows Updates
Running an older version of Windows can also lead to problems with the webcam. It could be due to a bug in the current version, which in all likelihood would be fixed in the subsequent versions. Therefore, updating the Windows would work as an effective fix.
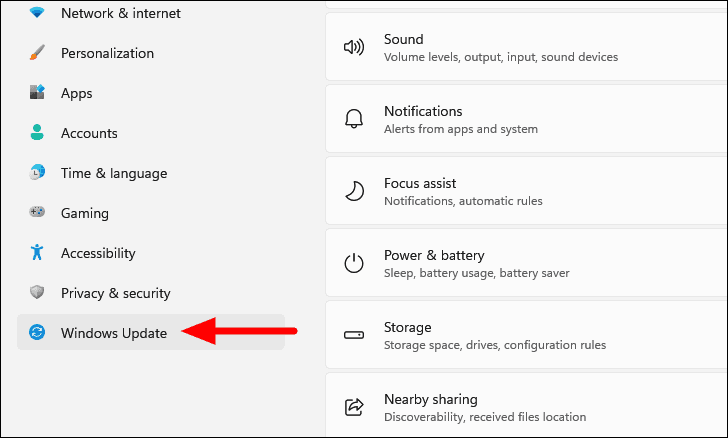
To check for Windows updates, launch the ‘Settings’ app as discussed earlier, and select ‘Windows Update’ from the list of tabs on the left.

Next, click on ‘Check for updates’, and Windows will look for any available updates.
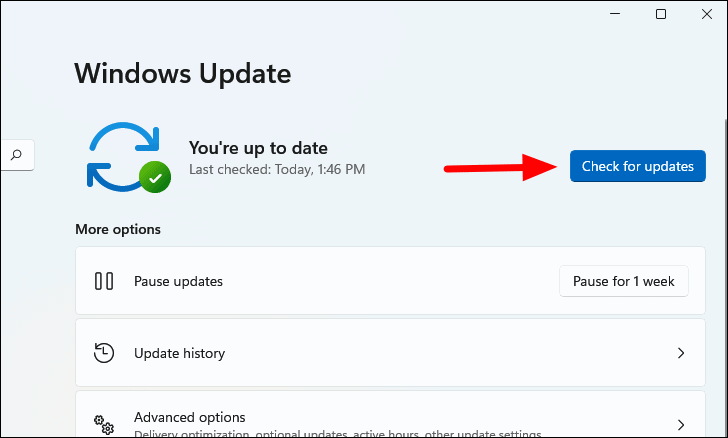
If there are any updates available, they will be downloaded and installed on the system.
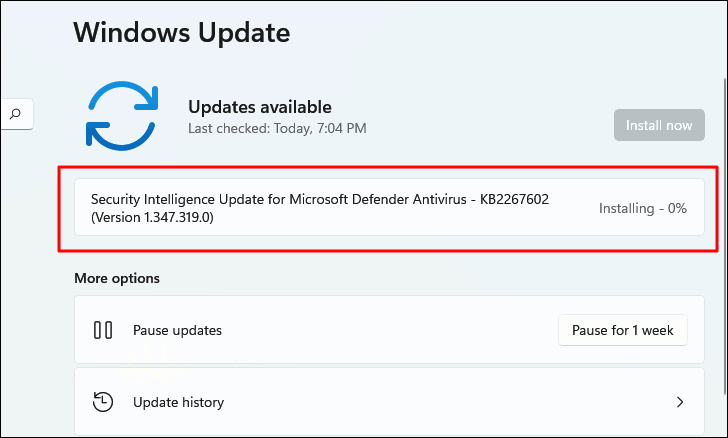
Now, check if you are able to use the webcam. If not, move to the next fix.
8. Check for Driver Updates
Device manufacturers regularly release driver updates for the effective functioning of the device and the efficient relay of commands between the OS and the device. Windows generally look up for driver updates and install them without you even having to spare a thought, but that’s not always the case.
Sometimes, device manufacturers upload the driver update on their official website instead of submitting them to Microsoft. If that’s the case, you wouldn’t be able to download it via the Device Manager or Windows Update, rather would have to manually search for them and then proceed to the download and installation.
Let’s look at all the ways you can install a driver update.
Update Driver from Device Manager
This method will only install a driver update if it exists on the system. Even if you haven’t manually downloaded one, this method is still worth a shot.
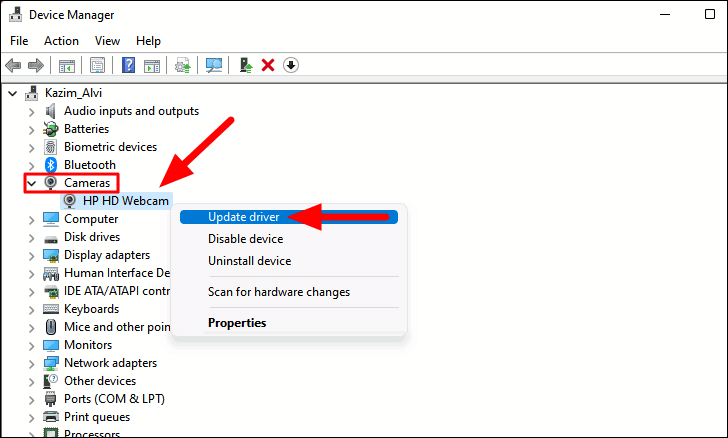
To install a driver update via the Device Manager, search for ‘Device Manager’ in the ‘Search’ menu, and click on the relevant search result to launch it.

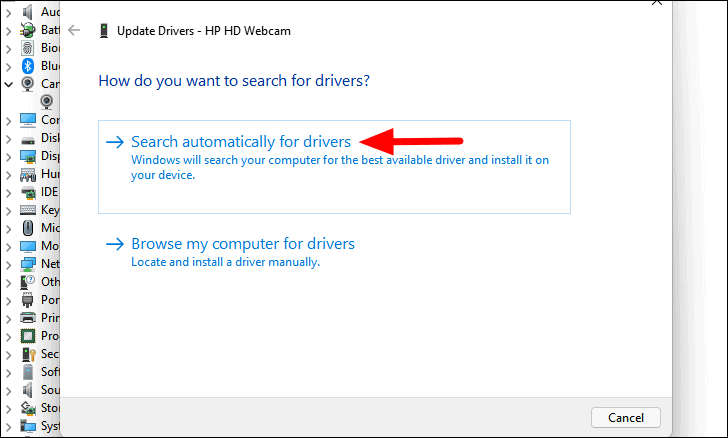
Next, double-click on ‘Cameras’ to view the devices under it, right-click on the malfunctioning webcam, and select ‘Update driver’ from the context menu.
A new ‘Update Drivers’ window will launch where you will be presented with two options, either to let Windows search for the best available driver on the computer or locate and install one manually. It’s recommended that you select the first option and let Windows do the job.
If there’s an update available on the system, it will be installed. If you encounter a window reading ‘The best drivers for your device are already installed’, proceed to the next method.
Update Drivers from Windows Update
You can also check for driver updates via the Windows Update section.
To search for driver updates and install them, launch the ‘Settings’ app and select ‘Windows update’ from the left.
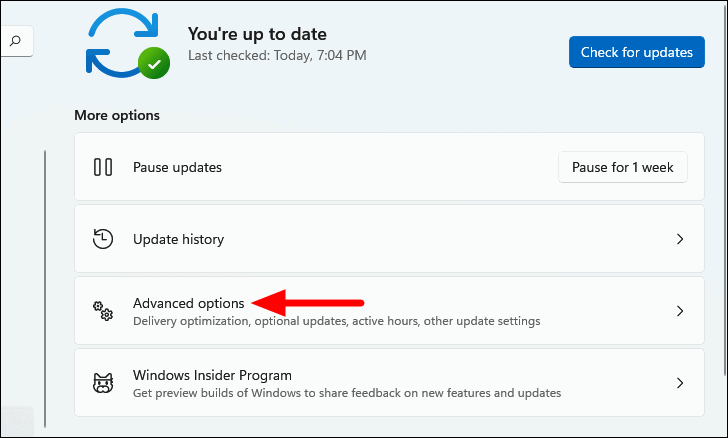
Next, click on ‘Advanced options’ on the right.
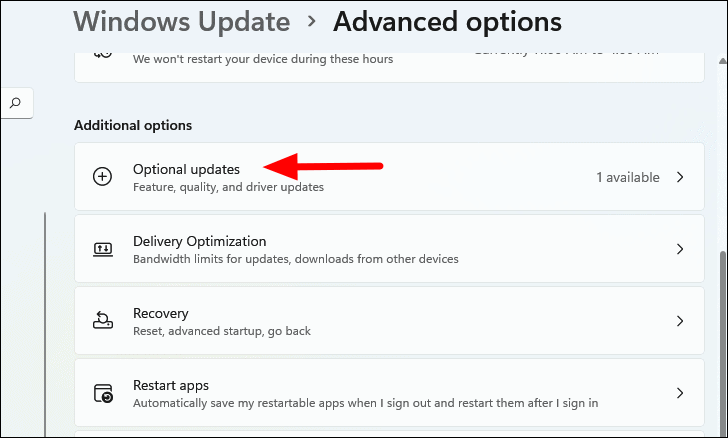
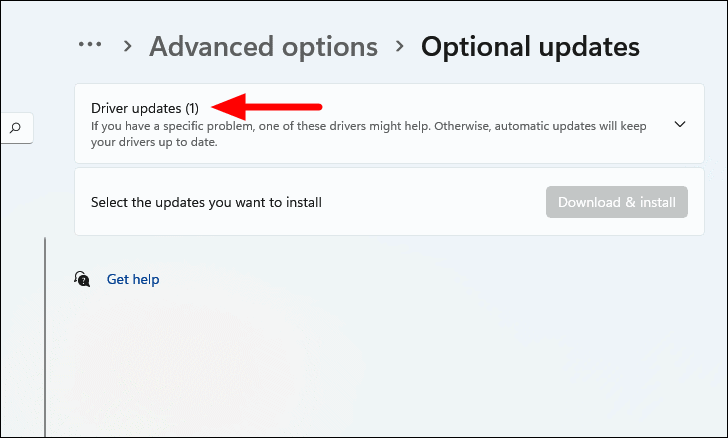
You will now find several options listed here. Locate and click on ‘Optional updates’ under ‘Addtional options’.
If there’s a driver update available, it will be listed here. Click on ‘Driver updates’ to the available ones.
If you find an update for the Webcam driver, tick the checkbox for it, and then click on ‘Download & install’.
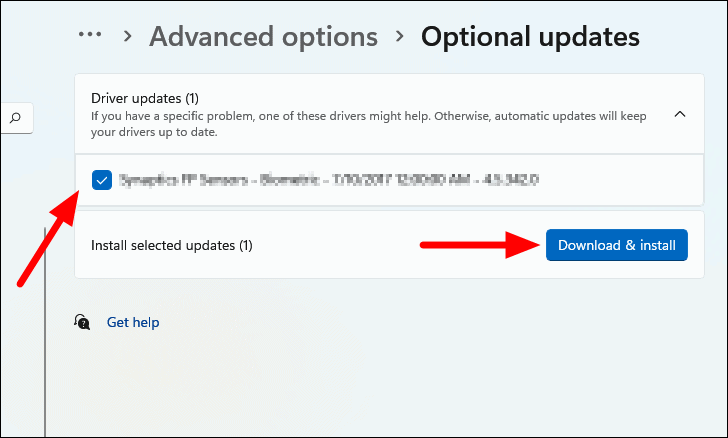
Windows will now download and install the driver updated on your PC. You may be required to restart the computer for the changes to come into effect.
Manually Download and Install Driver Updates
If you couldn’t find a driver update, with either of the two methods discussed earlier, don’t lose hope. An updated version might still be available on the manufacturer’s official website.
Go to Google, and use ‘Device Manufacturer’, ‘Driver Name’, and ‘OS’ as the keywords for the search. From the search results, locate and click on the manufacturer’s official website, and download the driver.
Note: In some cases, the driver update may be available on a third-party website. In this case, first, verify if the site is reliable and then only proceed to the download.
After downloading the driver update, navigate to the folder where the downloaded file is stored, double-click on the file to launch the installer, and follow the on-screen instructions to complete the installation process.
After installing the update, check if the webcam now works fine.
9. Re-enable Webcam Device
Re-enabling the webcam is also an effective fix. It resolves many underlying issues that prevent the webcam from working. You can re-enable it via the ‘Device Manager’.
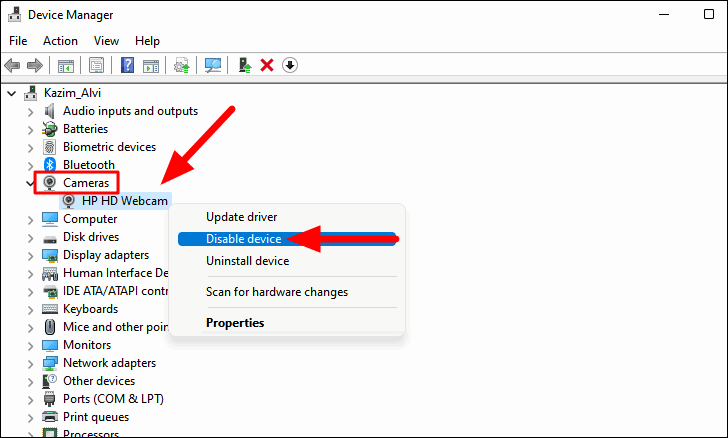
To re-enable the webcam, launch the ‘Device Manager’ as discussed earlier, double-click on the ‘Cameras’ option to expand and view the devices under it. Now, right-click on the webcam and select ‘Disable device’ from the context menu.
Next, click ‘Yes’ on the confirmation box that appears.
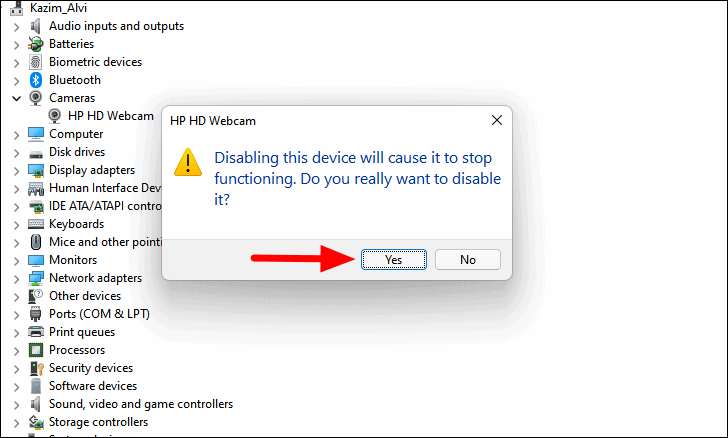
After you have disabled the webcam, again right-click on it and this time select ‘Enable device’ from the context menu.
Check if this fixes the issue with the webcam.
10. Check the Camera App
If the above fixes have not resolved the issue, it could be an app-specific problem. You can easily verify this with the built-in ‘Camera’ app in Windows.
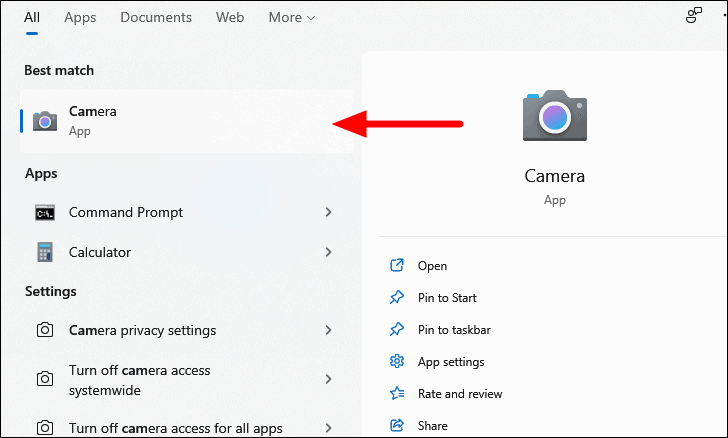
To verify if it’s an app-specific problem, press WINDOWS + S to launch the ‘Search’ menu, enter ‘Camera’ in the text field at the top, and click on the relevant search result to launch the app.
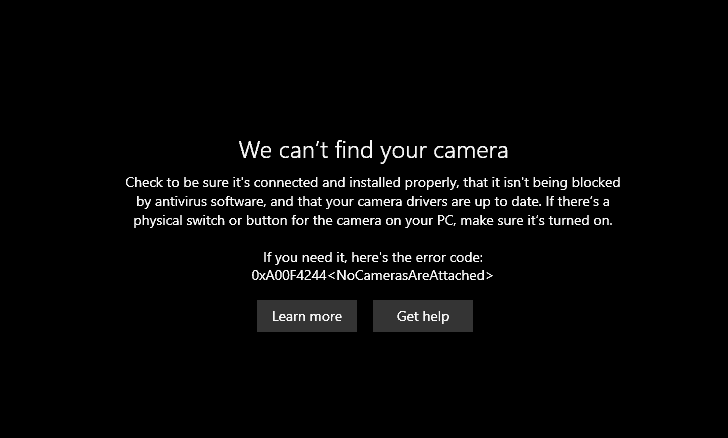
If you see the following screen, and the above fixes have not worked either, you must seek professional help. It could be external damage that’s preventing the webcam from working or a malfunctioning component.
If the webcam works perfectly in the Camera app, there’s an issue with the app. Check if the webcam works fine in other apps. If it does, there are a few troubleshooting tips that might be of help.
- If you haven’t updated the app in a while, check if there is any update available. Most apps have a built-in section to check for updates. If it doesn’t have one, go to the official website.
- If there’s no update available and you are already on the latest version, reinstalling the app might work. Sometimes, errors might crop in while installation and lead to such issues. After reinstalling, check if the webcam starts to work.

With the above fixes, you would easily be able to get your webcam up and running, either it be an integrated or external one. If the fixes don’t work and the camera app doesn’t display the webcam feed, you can either get it repaired or replaced, as you deem suitable.


Member discussion