

Credits are tight in Star Wars Zero Company, and the Den will happily eat every one of them. The base splits its upgrades across Facilities, Crew, and Weapons, and only a handful of them pay you back across the whole campaign. The rest are either playstyle-dependent or flat-out premature in the first dozen hours.
Quick answer: Unlock the Black Market first, then Black Market Quality I, then the first Medbay bed upgrade. After that, push Zone Dorn influence to Tier 3 for the third facility upgrade slot, and pick up Teamwork III, Combat Readiness I, and the Additional Weapon Mod Slot before you touch individual weapon stats.
Den upgrades tier list (Facilities, Crew, and Weapons)
| Upgrade | Tier | What it gives you |
|---|---|---|
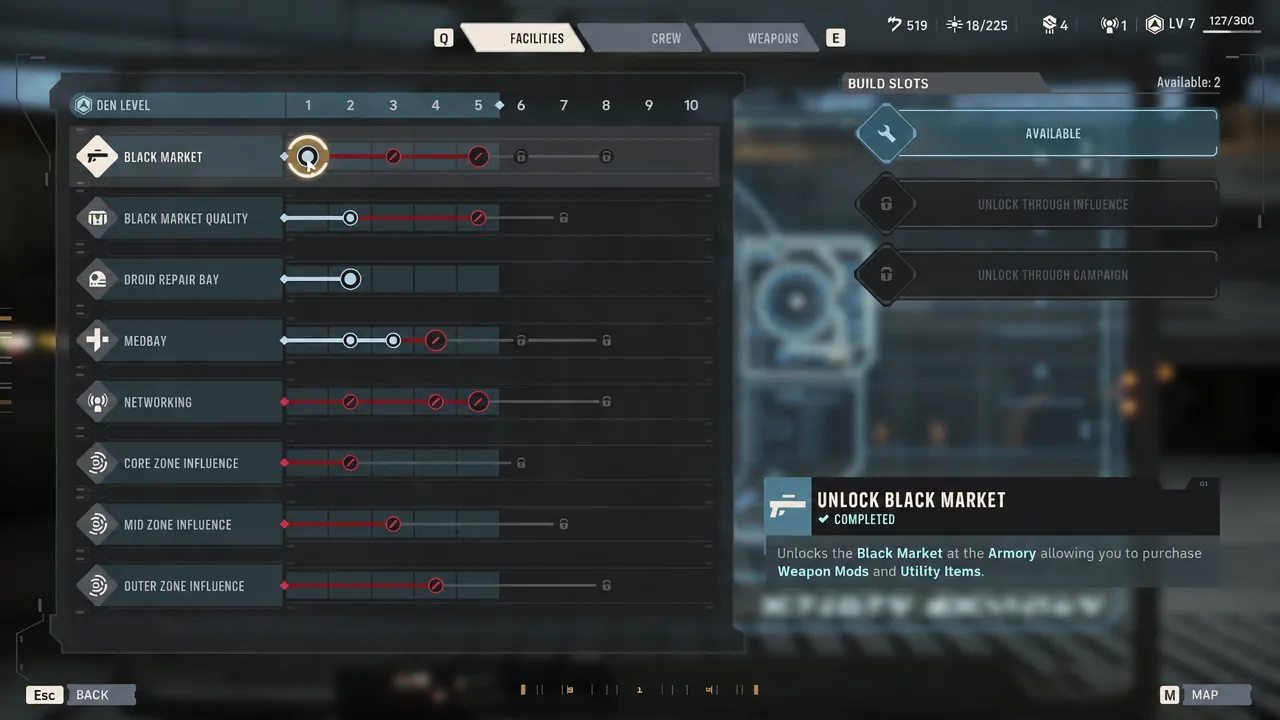
| Black Market | S | Opens purchases of weapon mods and utility items such as grenades. Available at Den Level 1. |
| Black Market Quality — Quality Goods I | S | Raises stock from Basic to Superior, including higher-grade items like thermal detonators. The second node cuts prices by 15 percent. |
| Medbay — Medical Bed II | S | More beds for clearing injuries, which keeps key operators deployable and makes risky Operations survivable. |
| Zone Dorn influence (Tier 3) | S | A third facility upgrade slot, so you can build more than one thing per cycle. |
| Droid Repair Bay | A | Recruiting and repairing astromechs. Worthless if you never field a droid. |
| Networking | A | +2 influence every time you send out a contact. |
| Teamwork III | A | Unlocks the Lounge, which feeds Bond XP to operators sitting out missions. |
| Combat Readiness I | A | +1 Advantage at the start of every encounter. |
| Weapon Mods — Additional Weapon Mod Slot | A | An extra mod slot on every operator’s blaster. |
| Utility Items slots | B | More grenades and consumables carried into the field. |
| Medbay Level 3 (Cheaper Medical Supplies I) | B | Cuts 150 Credits off the cost of assigning an operator to a bed or Bacta Tank. |
| Pistol / Rifle Movement Distance | B | More repositioning, available at Level 2. Only worth it if multiple squadmates share the weapon type. |
| Weapon Damage upgrades | B | Base damage at Level 3 for every weapon except the Longarm. |
| Crew Quarters | C | A larger hireable roster. |
| Critical Chance upgrades | C | Only pays off if you are already stacking crit through skills, gear, and Bonds. |
| Range and Overwatch | C | Value swings with your difficulty setting, since effective range is tied to it. |
Buy the Black Market before anything else
The Black Market is the single upgrade that changes what your squad walks onto the map with. It is available at Den Level 1 and it is the main place to buy weapon mods and utility items, so leaving it locked means your operators are stuck with whatever missions happen to drop.
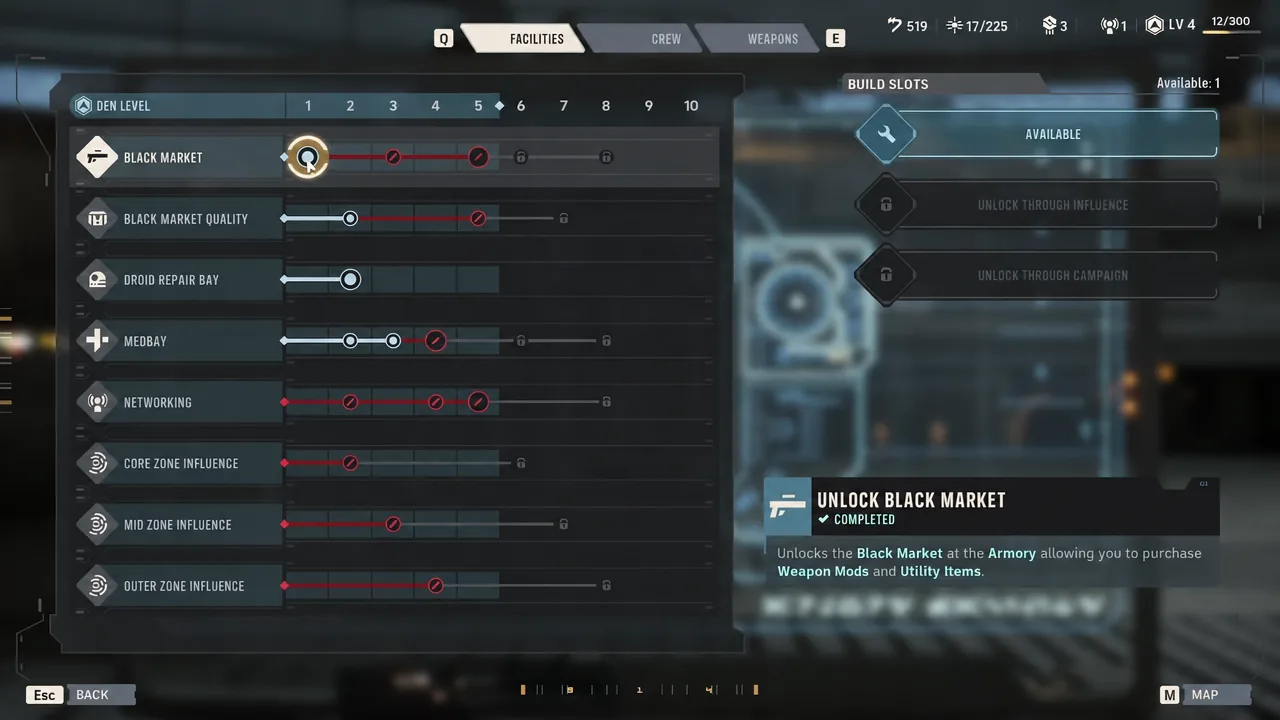
Follow it with Quality Goods I as soon as Den Level 2 lets you. That node pushes the shop’s stock from Basic to Superior, which is a straight stat increase on every mod and item you buy from then on, and it puts higher-grade gear like thermal detonators on the shelf. The second quality node knocks 15 percent off prices, which matters more than it sounds once you are shopping every cycle.
Tip: Upgrading the shop beats upgrading one weapon. A better Black Market improves the gear pipeline for the entire roster, while a single weapon upgrade usually helps one or two operators.
Medbay: how far to actually take it
The Medbay is the only place injuries come off your operators, and injuries are what quietly wreck a campaign. Medical Bed II is the early pickup, because it lets you treat more than one casualty at a time. That is exactly the situation Operations create — you assign operators to intel work, someone gets hurt, and you need them back on their feet before the next cycle.
Medbay Level 3 unlocks Cheaper Medical Supplies I, which shaves 150 Credits off the cost of putting someone in a bed or a Bacta Tank. On Hard or Expert, where you are treating people constantly, that discount compounds. If your missions are going cleanly and nobody is coming home hurt, the deeper Medbay tiers can wait.
Zone influence is a Den upgrade in disguise
Influence rewards feed straight back into the Den, which is why the middle zones outrank raw mission payouts when you are choosing operations. You start with one facility upgrade slot per cycle, the campaign hands you a second, and Zone Dorn at Tier 3 gives you a third. That is the reward that makes every later purchase arrive faster, so it should be your first influence target.
| Zone | Reward worth chasing |
|---|---|
| Dorn | Tier 3 grants an extra facility upgrade slot. |
| Leth | Tier 2 adds 250 Credits per mission; Tier 3 improves Black Market gear quality. |
| Forn | Tier 3 grants a Weapon Mod Slot to every operator. |
| Esk | Tier 3 permanently raises operator health. |
| Isk | Helps push your Den level early. |
| Herf | Node rewards including Jogan Fruit Pie, 30 Global Bond XP, and capacitors. |
Networking is the upgrade that accelerates all of this. It adds +2 influence per contact you send out, and since you can send several contacts to the same zone in a single cycle, idle contacts are wasted progress. Buy Networking while you are actively pushing Dorn or Leth, not after you have already capped them.
Crew upgrades that change how fights play out
Once the Facilities basics are in, the Crew tab is where credits start showing up on the battlefield. Teamwork III is the standout, since it opens the Lounge and gives Bond XP to operators who stay home. Bonds drive stat growth and cross-training, so passive progression stops your bench from falling permanently behind the four people you keep deploying.
Combat Readiness I hands you +1 Advantage at the opening of each encounter. Advantage abilities swing fights hard, and getting to them a turn earlier is the difference between opening with a strong play and eating one. The Additional Weapon Mod Slot is the other broad pick, because it upgrades every blaster in the company at once rather than one operator’s kit.
Crew Quarters is the divisive one. Increased Crew Quarters I lets you hire more operators, which helps if you want an astromech, a medic, and a dedicated boss-killer all on the payroll. But a small, well-developed team clears content perfectly well, and a wide roster spreads Bond XP thin. If credits are scarce, this is the easiest Crew upgrade to defer.
When weapon upgrades are worth the credits
Weapon upgrades are the most conditional category in the Den because they only apply to the blaster type they name. Buying Rifle upgrades when one operator carries a rifle is how early campaigns run dry. Check your actual deployed loadouts before spending here.
If two or more squadmates share a weapon, Pistol Movement Distance or Rifle Movement Distance at Level 2 gives you real board control. Base Damage nodes open at Level 3 for every weapon except the Longarm, and they are the reliable, unglamorous choice. Critical Chance is only competitive if you are already leaning into crit through skills, gear, and Bond upgrades. Range and Overwatch depend on your difficulty setting, since that determines effective weapon range, so play a few missions and see whether you are actually being outranged before investing.
Den upgrades to skip early
- The Droid Repair Bay if you never recruit astromechs — it is strong, but only for droid users.
- Deeper Black Market nodes beyond the first quality upgrade, unless you are sitting on spare credits.
- Late Medbay tiers while your squad is coming home uninjured.
- Individual weapon nodes for a blaster only one operator uses.
- Zone influence pushes into regions whose rewards you do not specifically need.
The through-line is simple enough. Spend on the things that improve every operator or every cycle first — the shop, the beds, the extra build slot, the shared mod slot — and treat anything that helps a single blaster or a single body as a later purchase. Rotate your squad while you do it so Bonds spread across the roster, and the Den’s compounding upgrades will carry you into the harder half of the campaign without a credit crisis.





