Equivalent Exchange is the amber you want for the moment your Nephtoglobin bar hits zero. Normally, an empty bar ends your infused shots and plague powers. With this amber equipped, you can keep going by paying for them with Health instead. The game places only one copy, and it isn’t in a chest. You have to take it from an elite enemy waiting on a ledge inside a cave in Chapter 5.
Quick answer: From the Wolfsbane Field Lantern in Vale of Wrath, cross the village and the broken docks, enter the cave, grapple to the ledge on the right, and kill the Risen Sapeur.
Equivalent Exchange amber location in Vale of Wrath
The amber drops from a Risen Sapeur in Vale of Wrath, the Chapter 5 region. The route starts at the Wolfsbane Field Lantern, which is the first Lantern you reach in the chapter. It passes through the waterside area where the story has you destroy a growth node, then goes into a cave. The fight takes place on a raised rock ledge that you can only reach with the grapple hook.
The amber can’t be missed. You can still get it after the story ends, so you don’t need to grab it on your first pass through the chapter.
Route from the Wolfsbane Field Lantern to the Risen Sapeur


Confirming the pickup and equipping Equivalent Exchange
When the Risen Sapeur dies, a notification for Equivalent Exchange appears on screen. To double-check, open the Inventory and go to the AMBERS tab. The amber should be listed there along with its effect. Ambers don’t do anything while they sit in your inventory, so go back to a Lantern and equip it there in an open amber slot.
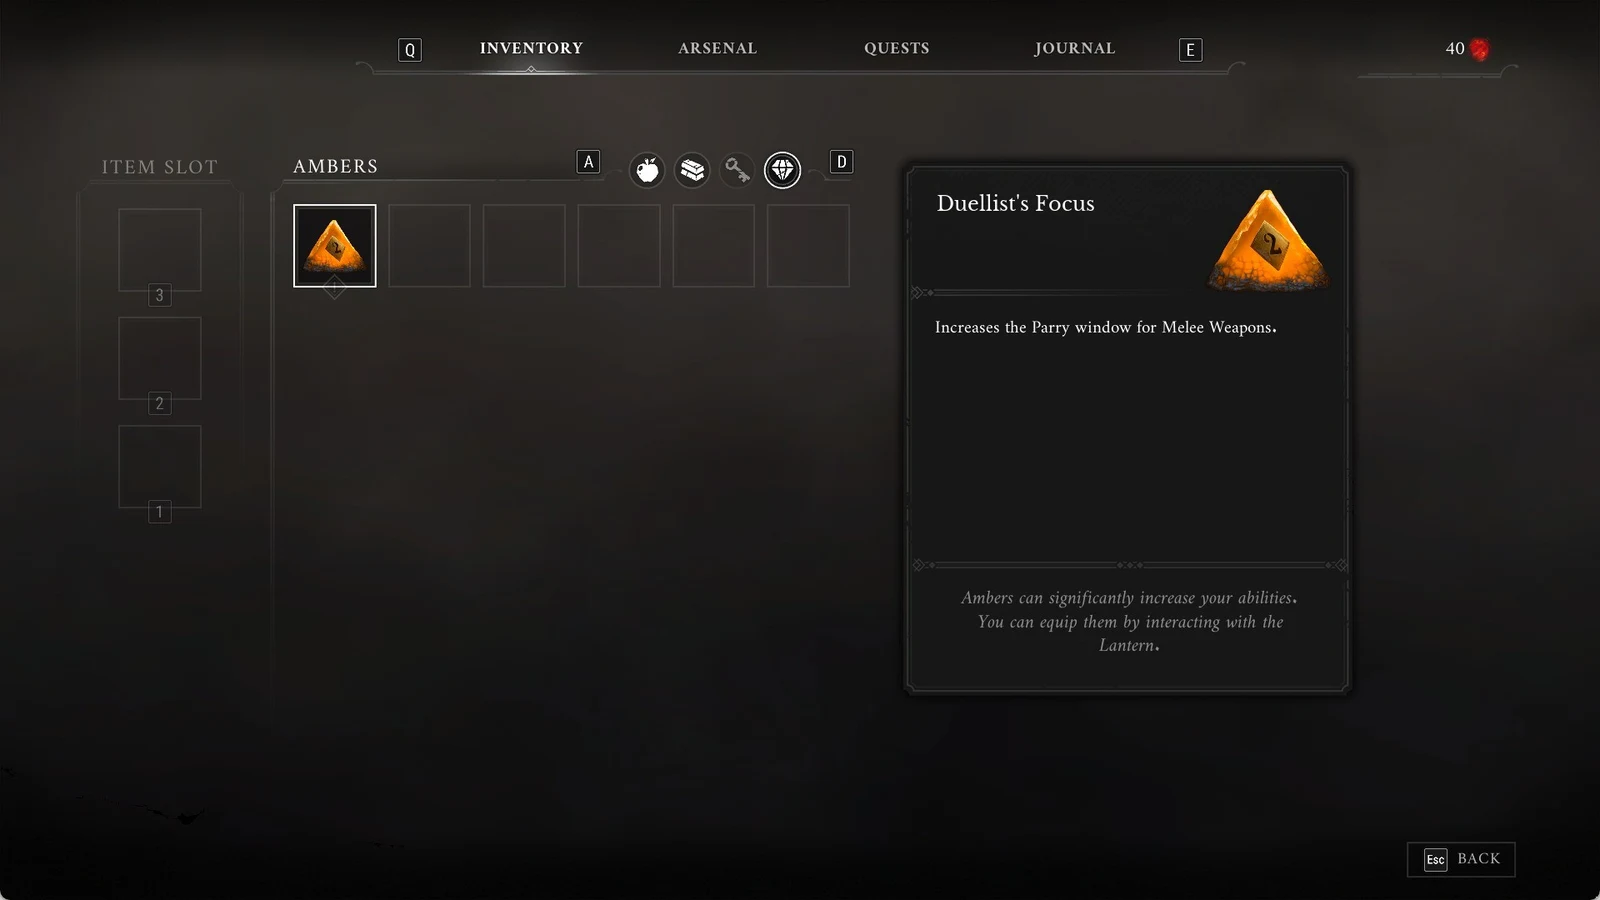
Equivalent Exchange is one of the 29 different ambers needed for the Ambersmith gold trophy. You only need one copy of each amber for that trophy.
Equivalent Exchange stats and Health cost
| Field | Value |
|---|---|
| Type | Amber |
| Source |  Risen Sapeur (Vale of Wrath) |
| Copies placed | 1 |
| Max rank | 1 |
| Health spent per Nephtoglobin point | 1.1 |
The amber only takes effect once your Nephtoglobin is fully drained. After that, every point of Nephtoglobin you would normally spend costs you 1.1 Health instead. Because the game places just one copy and its max rank is 1, that rate never improves. Other ambers can be upgraded by finding duplicates, but this one can’t.
Nephtoglobin costs Equivalent Exchange can cover
Each firearm’s Nephtoglobin infusion is something you’d be paying for in Health once the bar runs dry. You hold Reload to load an infusion. The Musket and Blunderbuss infusions also use up Ammunition.
| Infusion | Weapon | Unlocks at | Damage (lv 1 / lv 10) |
|---|---|---|---|
| Bullet (Posture-breaking) |  Pistol | Weapon level 2 | — |
| Cannon (explosive round) |  Musket | Weapon level 5 | 100 / 190 |
| Grenade (Stasis) |  Blunderbuss | Weapon level 8 | 60 / 180 |
The Cannon infusion gains 10 damage with each weapon level. The Grenade infusion also gains 10 per level until level 9, then jumps from 140 to 180 at level 10. The Blunderbuss reaches level 8, where its Grenade infusion unlocks, after three upgrades that use Superior Firearm Parts and one that uses an Exquisite Firearm Parts.
Refilling Nephtoglobin without spending Health
Nephtoglobin Vials refill the bar so you don’t have to pay in Health. You can carry up to 3 at once.
| Source | Details |
|---|---|
| Louis’s Laboratoire | Sold from the start, 200 each |
| Lucjan | Later in the story, 2 in stock |
 Abomination | 8% drop |
 Carrion | 3-4% drop |
 Spewer | 3-4% drop |
| Sell price | 100 |
Vials can also be found lying in the world. The Battlefield has 7, Cursed Hollow 6, Valley of Ashes 5, The Outskirts 5, Caverns 4, University 3, Fallen Village 2 and Fortress 2. More can be found in Vale of Wrath and City of Orphans.
Since Equivalent Exchange spends Health, it works well alongside Health-restoring ambers. Bountiful Harvest, dropped by Volunteers in City of Orphans, restores 3%, 4% or 5% Health each time you pick up a Nephtoglobin Remnant, depending on its rank. Tomorrow’s Promise turns the Ferrofluid Flask into 10 seconds of Health regeneration, with a healing factor of 1.1, 1.2 or 1.3 by rank. Avoid Butcher’s Carnage in this setup. It heals you on melee hits, but it also stops you from using Ferrofluid Flasks to heal.