Gaming Guide

Visual Kei Dress To Impress: 2 Outfit Ideas (Red and Black Rocker, Black and Purple Gothic Gown)

Two free Visual Kei DTI looks built step by step: a red and black rocker with a lace mini skirt, belted jacket and choppy red and black hair, and a black and purple Silk gothic gown with platform boots and long black hair with bangs.

Two free Visual Kei DTI looks built step by step: a red and black rocker with a lace mini skirt, belted jacket and choppy red and black hair, and a black and purple Silk gothic gown…

Visual Kei is a Japanese rock style built on dramatic hair, dark makeup, black lace, belts and boots. The two visual kei DTI outfits below were built in Freeplay Mode from free pieces only, with a picture after each step. For other themes, see the Dress To Impress themes list.

Quick answer: Wear black with one strong accent color, either red or purple. Add pale skin, the dark clown-style face card, black boots, and either choppy red and black hair or long black hair with bangs.


Where to find Visual Kei pieces in Dress To Impress

Dress To Impress doesn’t show item names, so every piece below is identified by where it sits, what it looks like and its color. Both looks use pieces from four spots.

What you needWhere it isHow to open it
Clothes and shoesDressing RoomTeleport pin (top left) → “Dressing Room”
HairLana’s Salon, hair chairs under the hood dryersPress E to sit
Face cardsLana’s Salon, vanity seats with round mirrors on the rightPress E, Feminine tab
Skin toneBeneath the “Skin Tones” sign, find the curtained booths next to the shoe shelf.Skin tab
RunwayFreeplay RunwayTeleport pin → “Freeplay Runway”

The Hairstyles panel at the hair chair has tabs for Feminine, Masculine, Bangs, Curly, Straight, Wavy, Updo, Locs, Braids and Afro. Both the hair chair and the vanity show a 3:00 countdown while you’re seated, so pick your card before it runs out.


How recoloring works in Dress To Impress

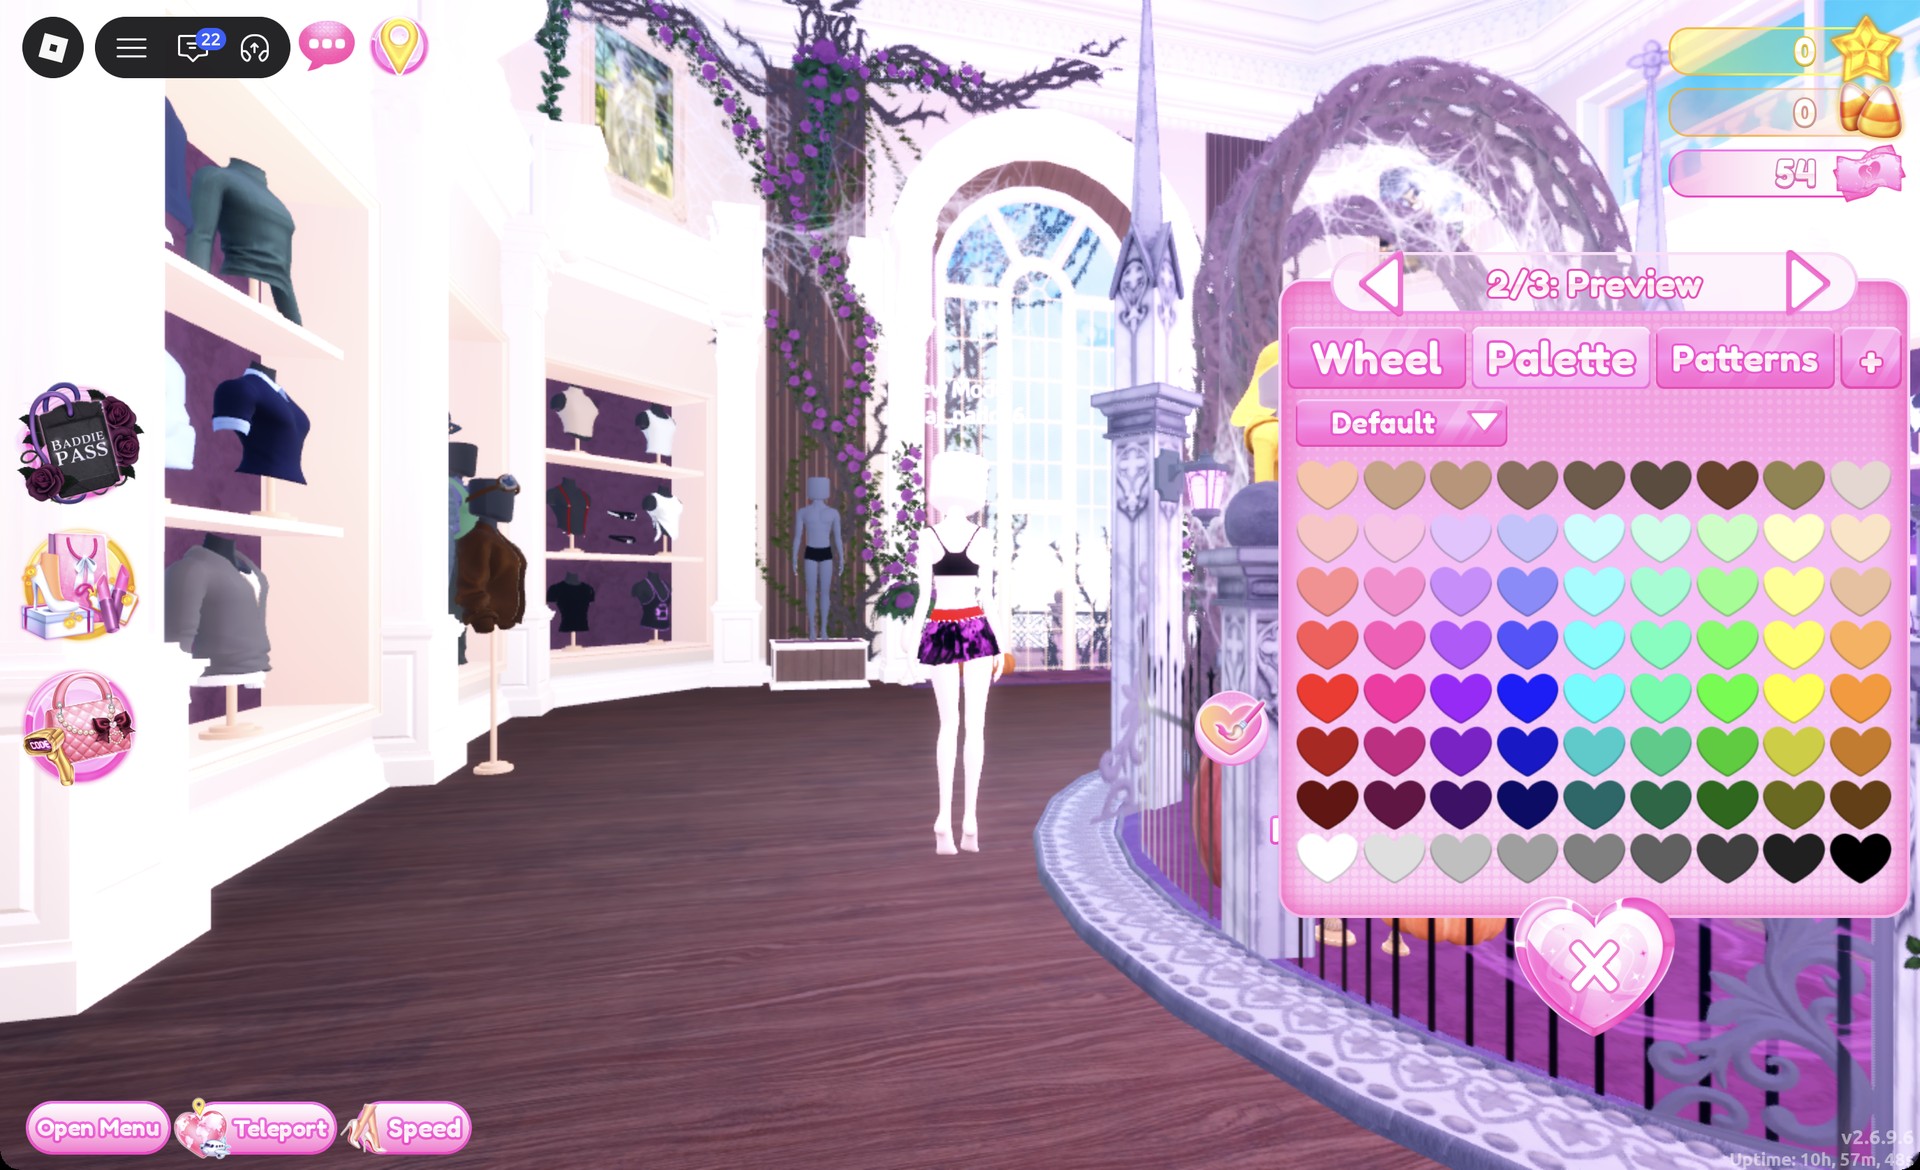
Colors below refer to the Default palette on the Palette tab. “Column” counts from the left and “row” counts from the top. Row 8 runs from white to black, and its last heart is pure black.

Click a piece to preview it. The panel labels each recolorable part, such as “1/3: Preview” or “2/4: Belts”.
Use the arrows to move to the part you want to change. Each part takes its own color.
Pick a color on the Palette tab, a tile on the Patterns tab, or a material on the “+” tab. Silk is free. Materials with a gold star lock, including Sequins, Rhinestone, Sparkly, Lace, Latex and Knit, are locked, so stick with Silk.
Press Put On, the heart-and-tick button to the left of the panel. The piece then appears in your Wearing panel.

To recolor something you already have on, open the Wearing panel with the hanger button on the right and click the piece’s picture.


Pale skin for both Visual Kei looks

Visual kei makeup reads pale, so start with skin. In the Skin Tones booth, open the Skin tab and choose the second swatch in the first row, a very pale tone. Both outfits below use it.
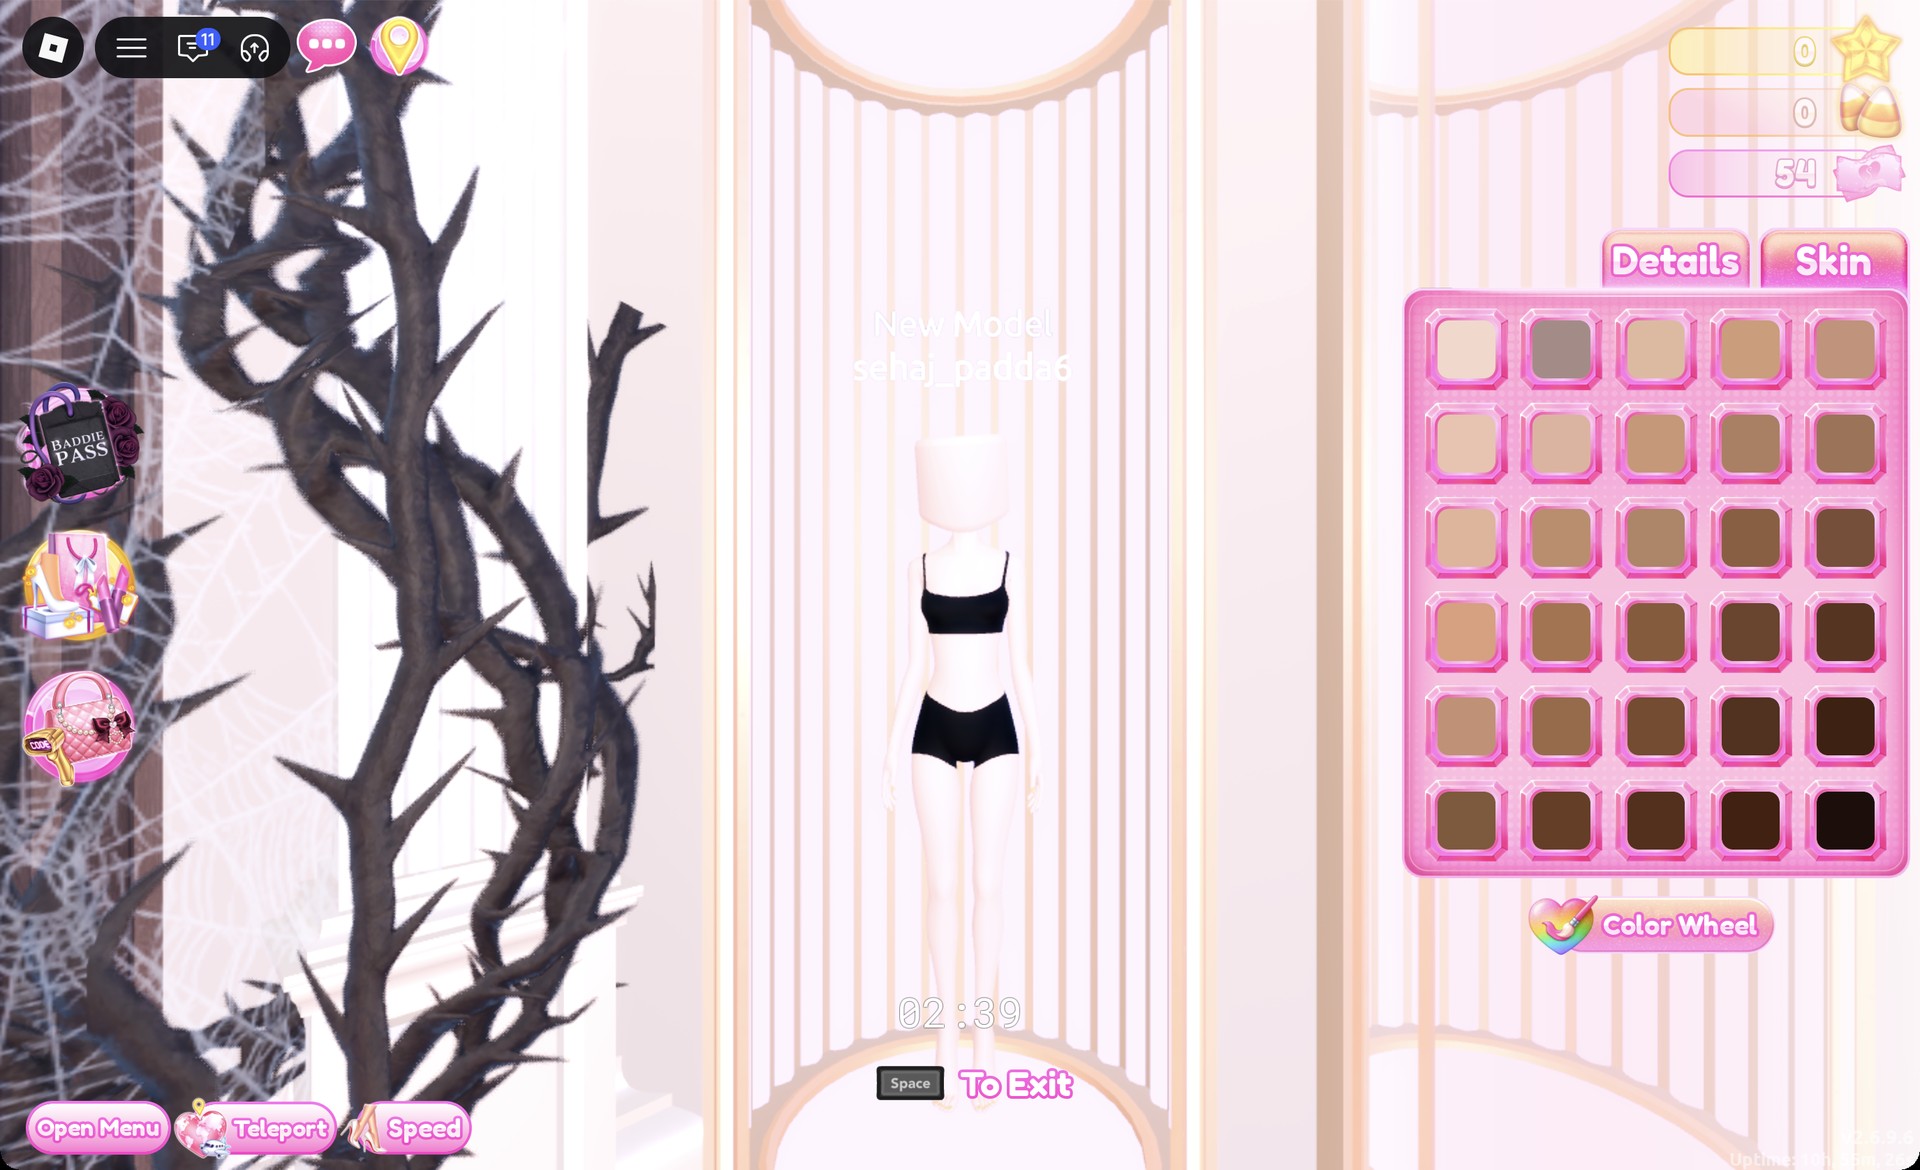
Skin Tones booth in Dress To Impress with the pale skin swatch
The Skin tab: the second swatch in the first row gives the pale skin.

Outfit 1: Red and black rocker

For this outfit, use the round Halloween display at the center of the Dressing Room. It holds a black pleated mini skirt with a chain belt.
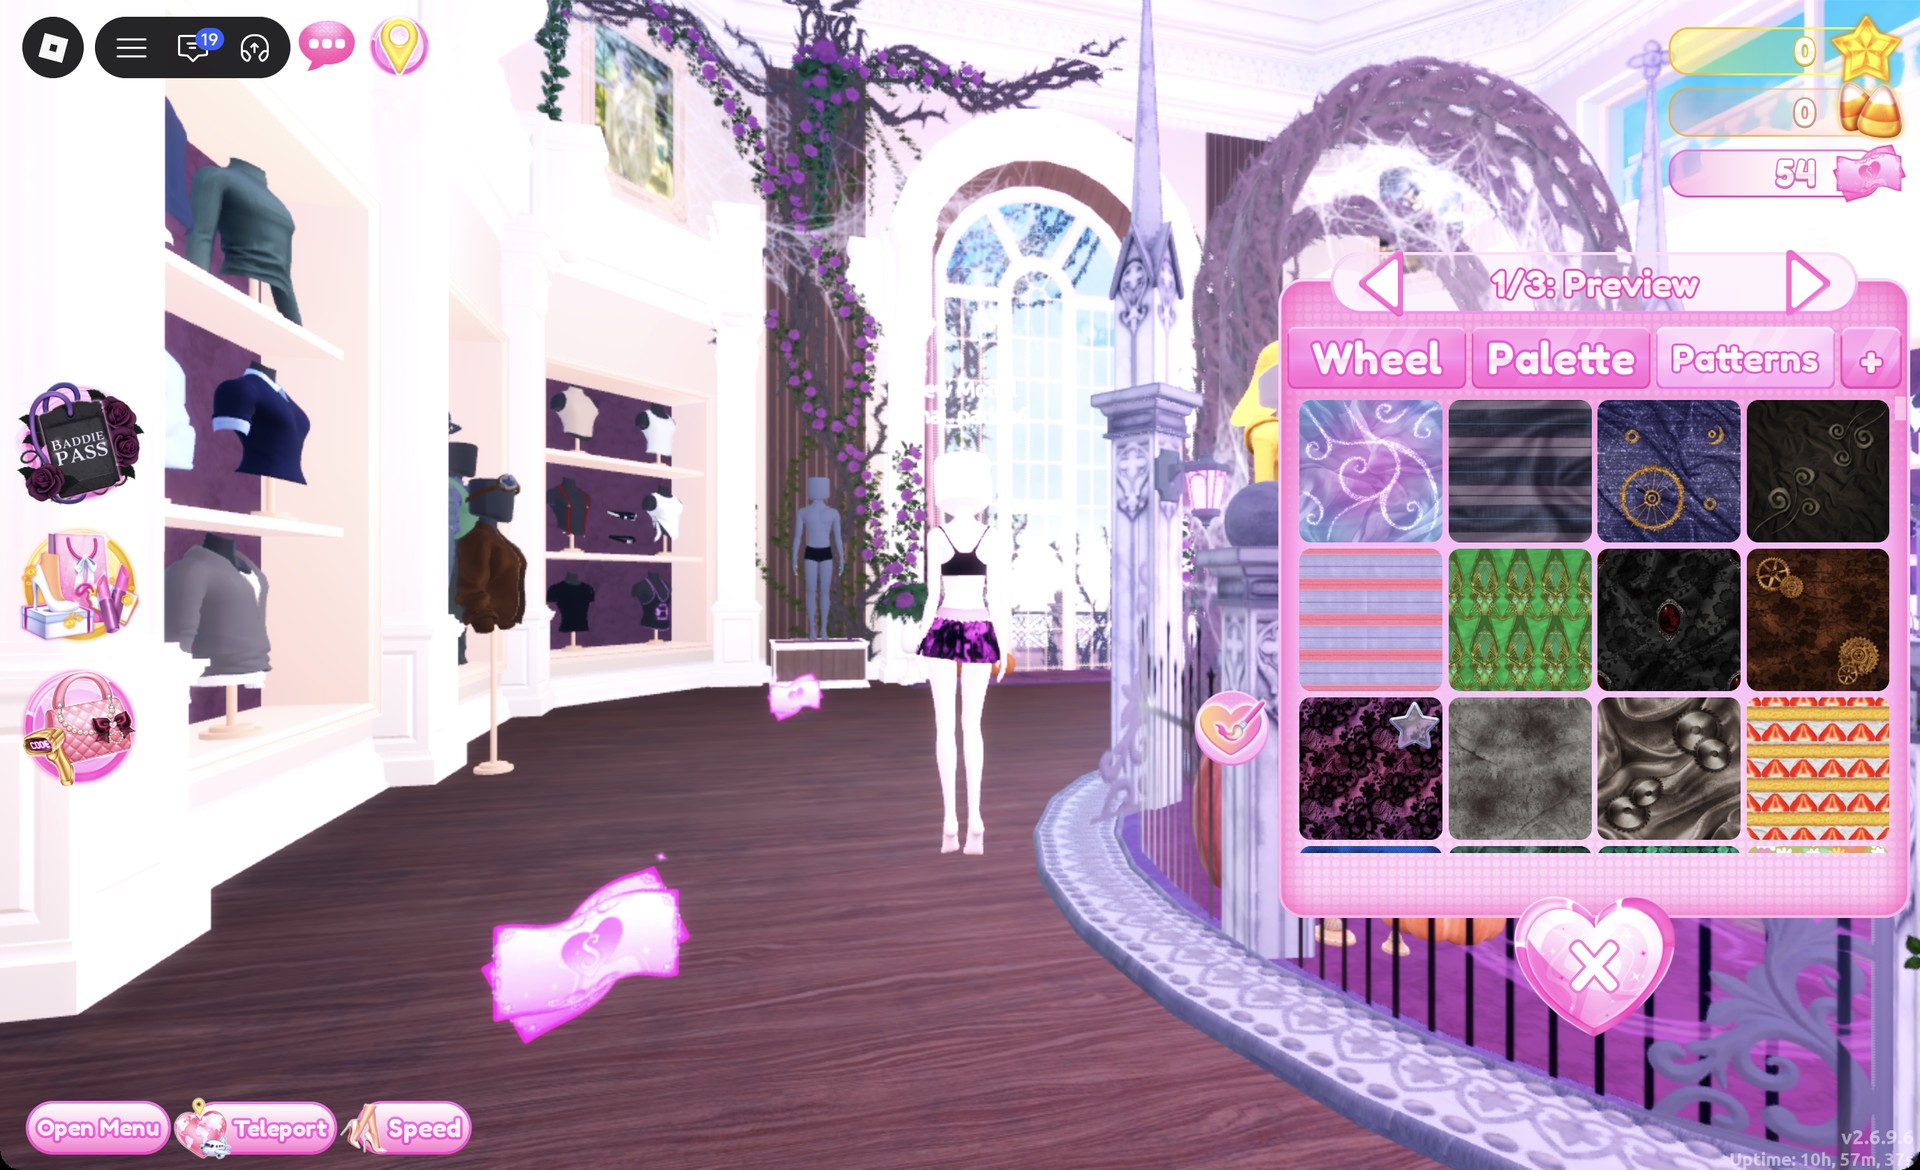
Click the pleated mini skirt. Its panel opens on “1/3: Preview”, with black, pink and white parts by default.
For part 1, open the Patterns tab and pick the first tile in the third row, a black lace print. On the pleats it reads as purple and black lace.
Patterns tab with the lace tile on the pleated skirt in Dress To Impress
Patterns tab, third row first tile: the pleats turn purple and black lace.
Set part 2 to Palette column 1, row 6 for a red waistband. Set part 3 to black (row 8, last heart), then press Put On.
Pleated skirt part 2 set to red in Dress To Impress
Part 2 of the skirt set to red (column 1, row 6): the waistband turns red.
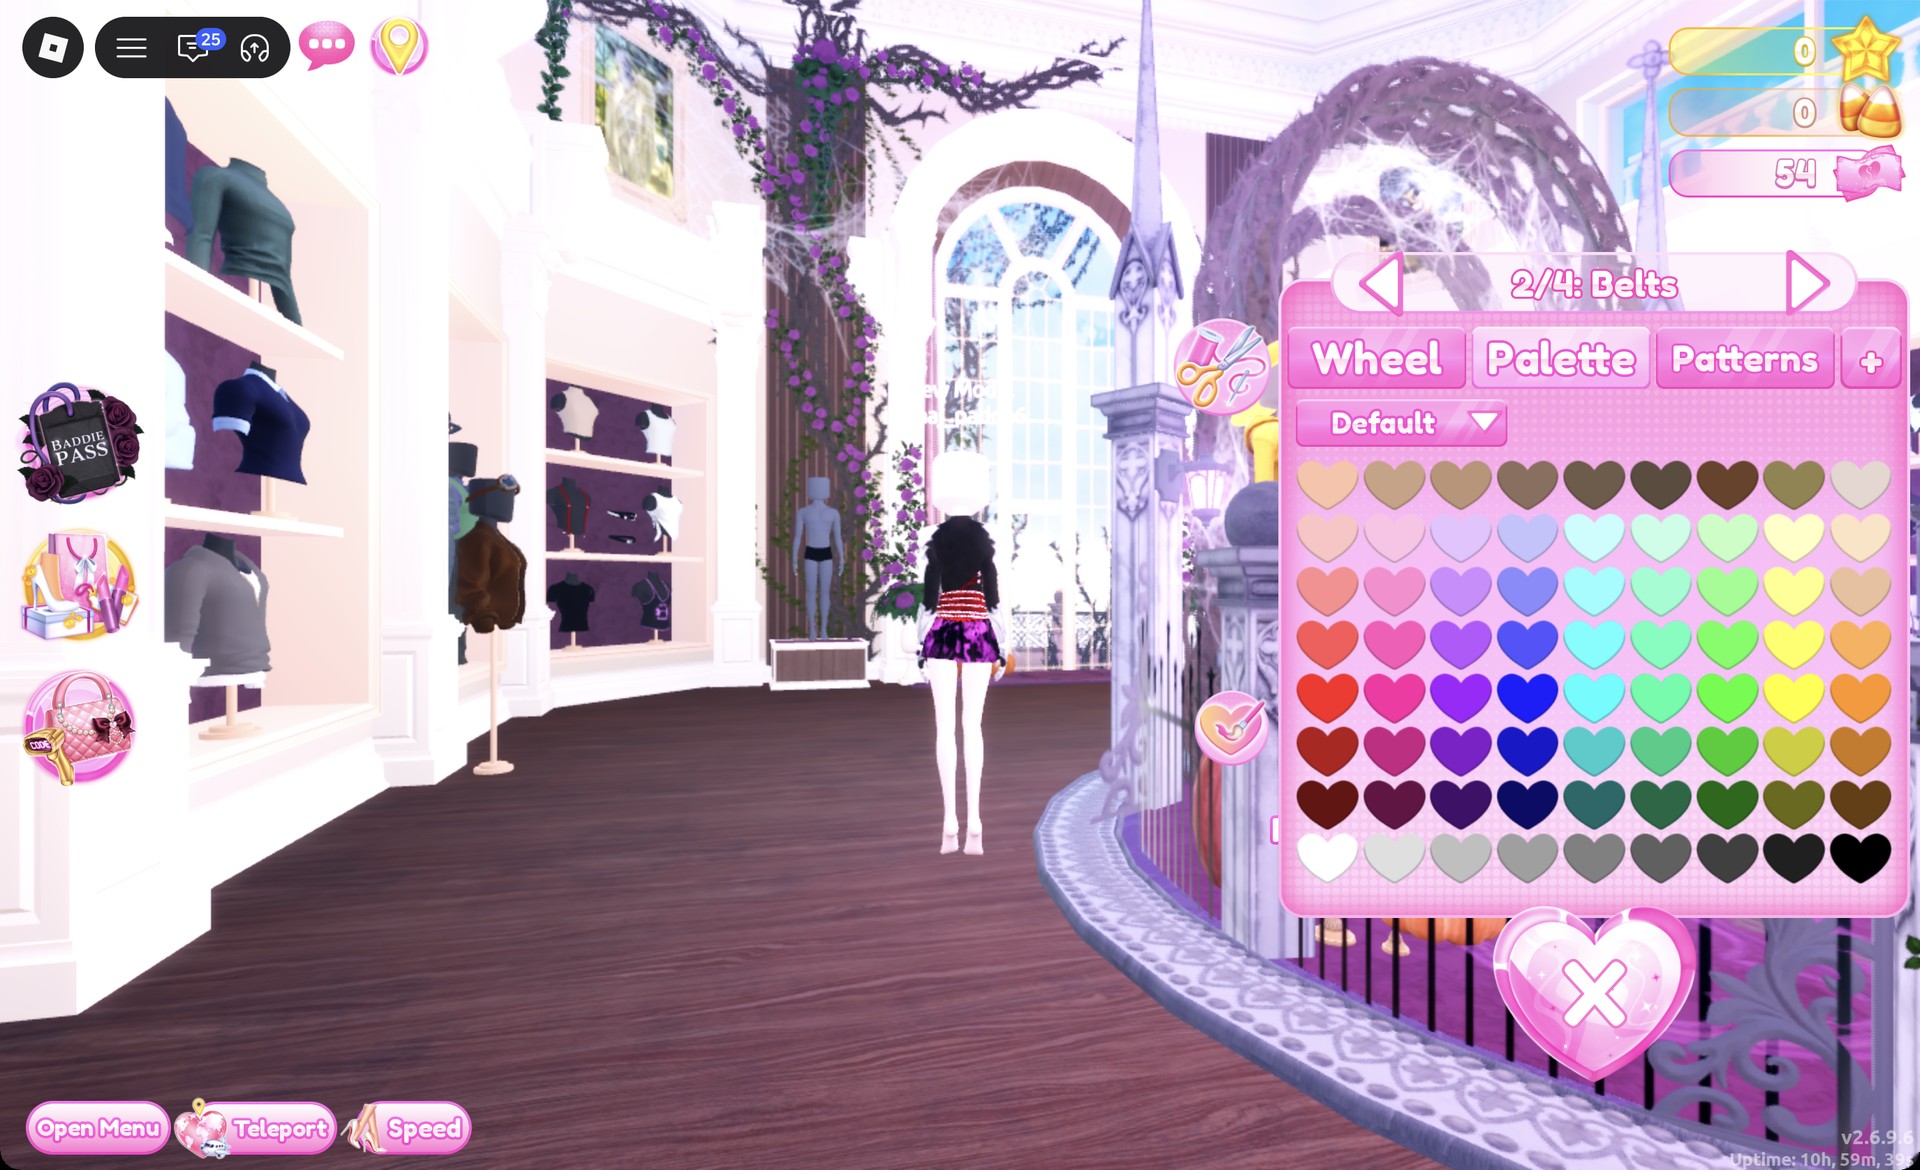
Select the black long-sleeved jacket covered in rows of straps from that display. Its sections are “1/4: Base”, “2/4: Belts”, “3/4: Belts Details” and “4/4: Metals”.
Leave the base color black, then choose Palette column 1, row 6 for “2/4: Belts”. This produces a black jacket featuring red buckled belts across its front and white trim. Press Put On.
Black jacket part 2/4: Belts set to red in Dress To Impress
"2/4: Belts" set to red on the black strapped jacket.
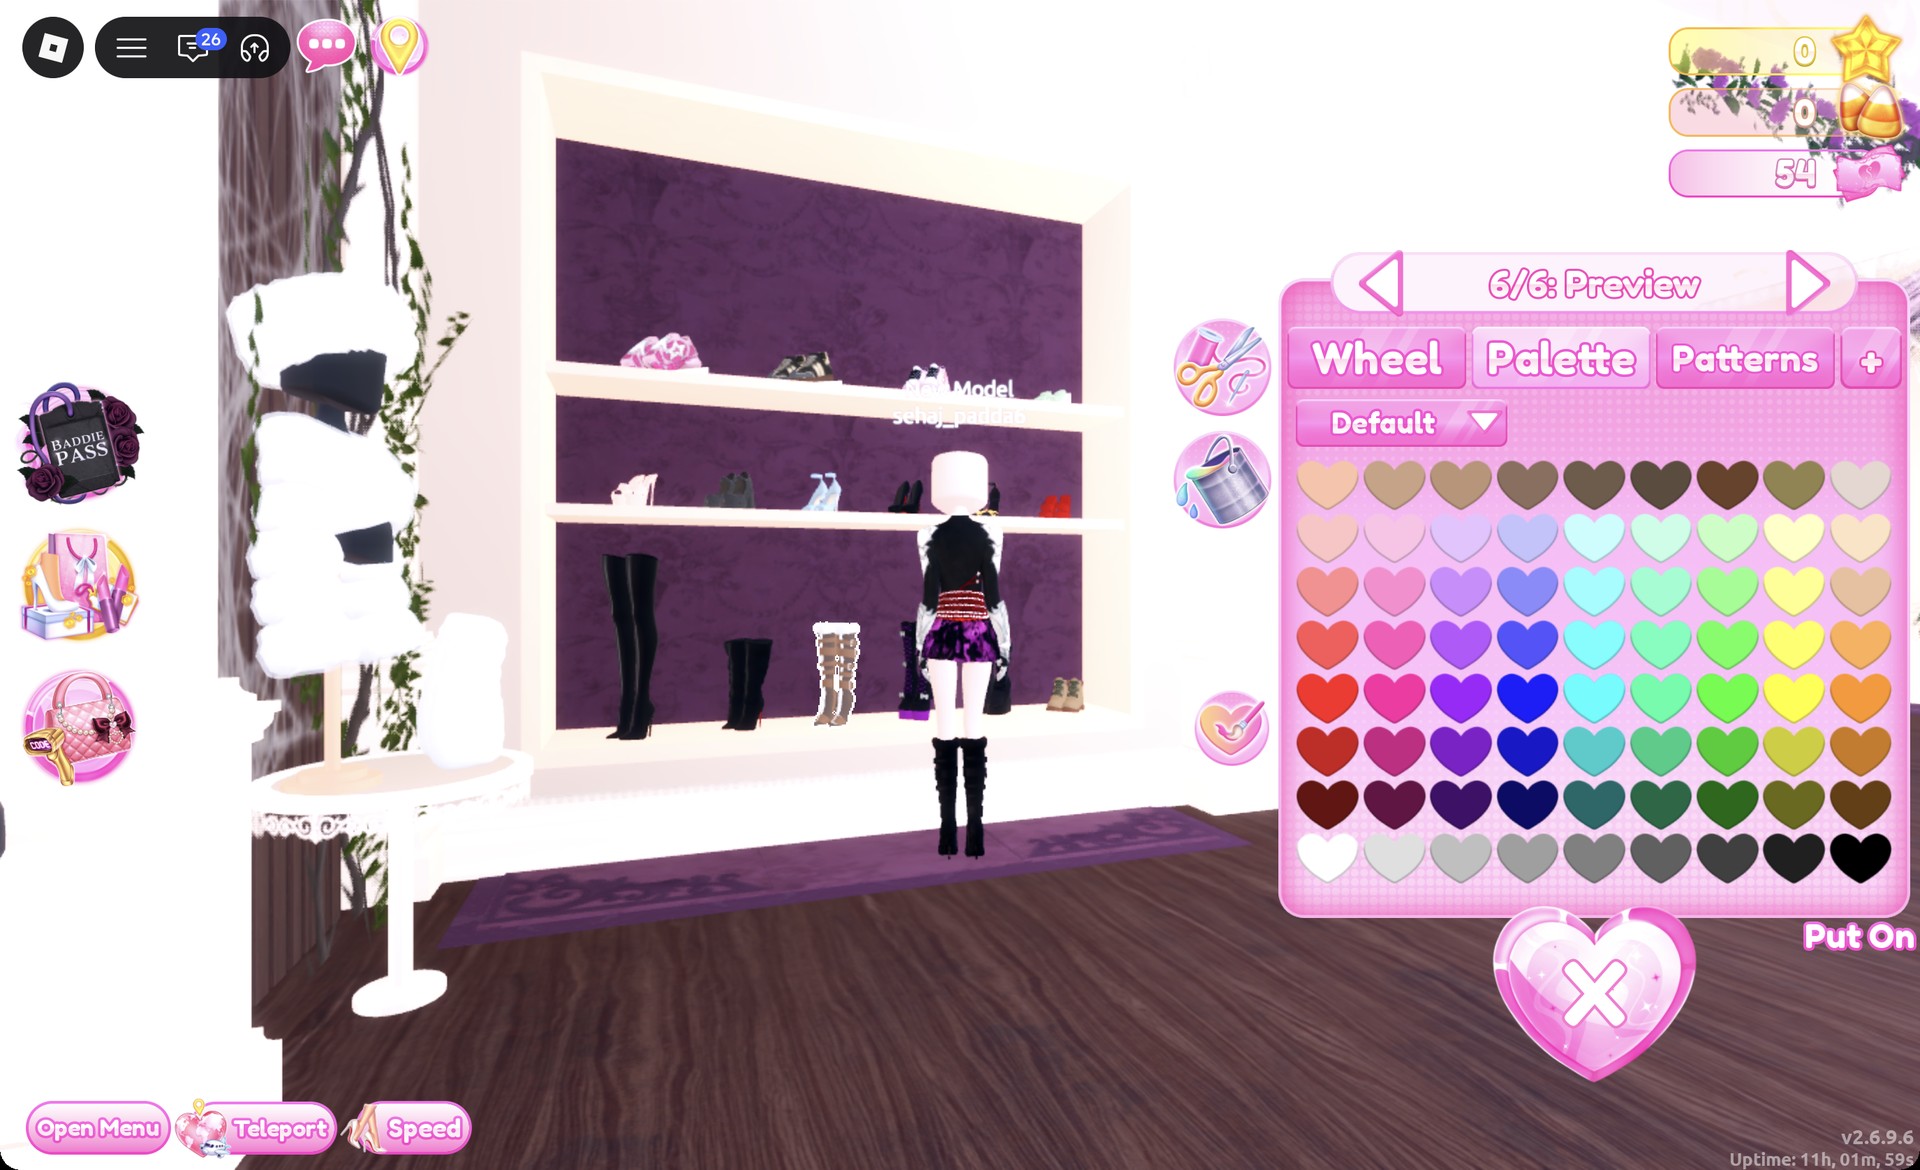
Go to the shoe shelf, the wall of shoes near the Skin Tones booths. On the bottom row, pick the tall lace-up buckle boots, which are grey and tan by default.
Step through “1/6: Preview” to “6/6: Preview” and set every part to black. That gives you black lace-up knee boots. Press the heart-and-tick button.
Lace-up buckle boots recolored black in Dress To Impress
All six boot parts set to black: black lace-up knee boots.
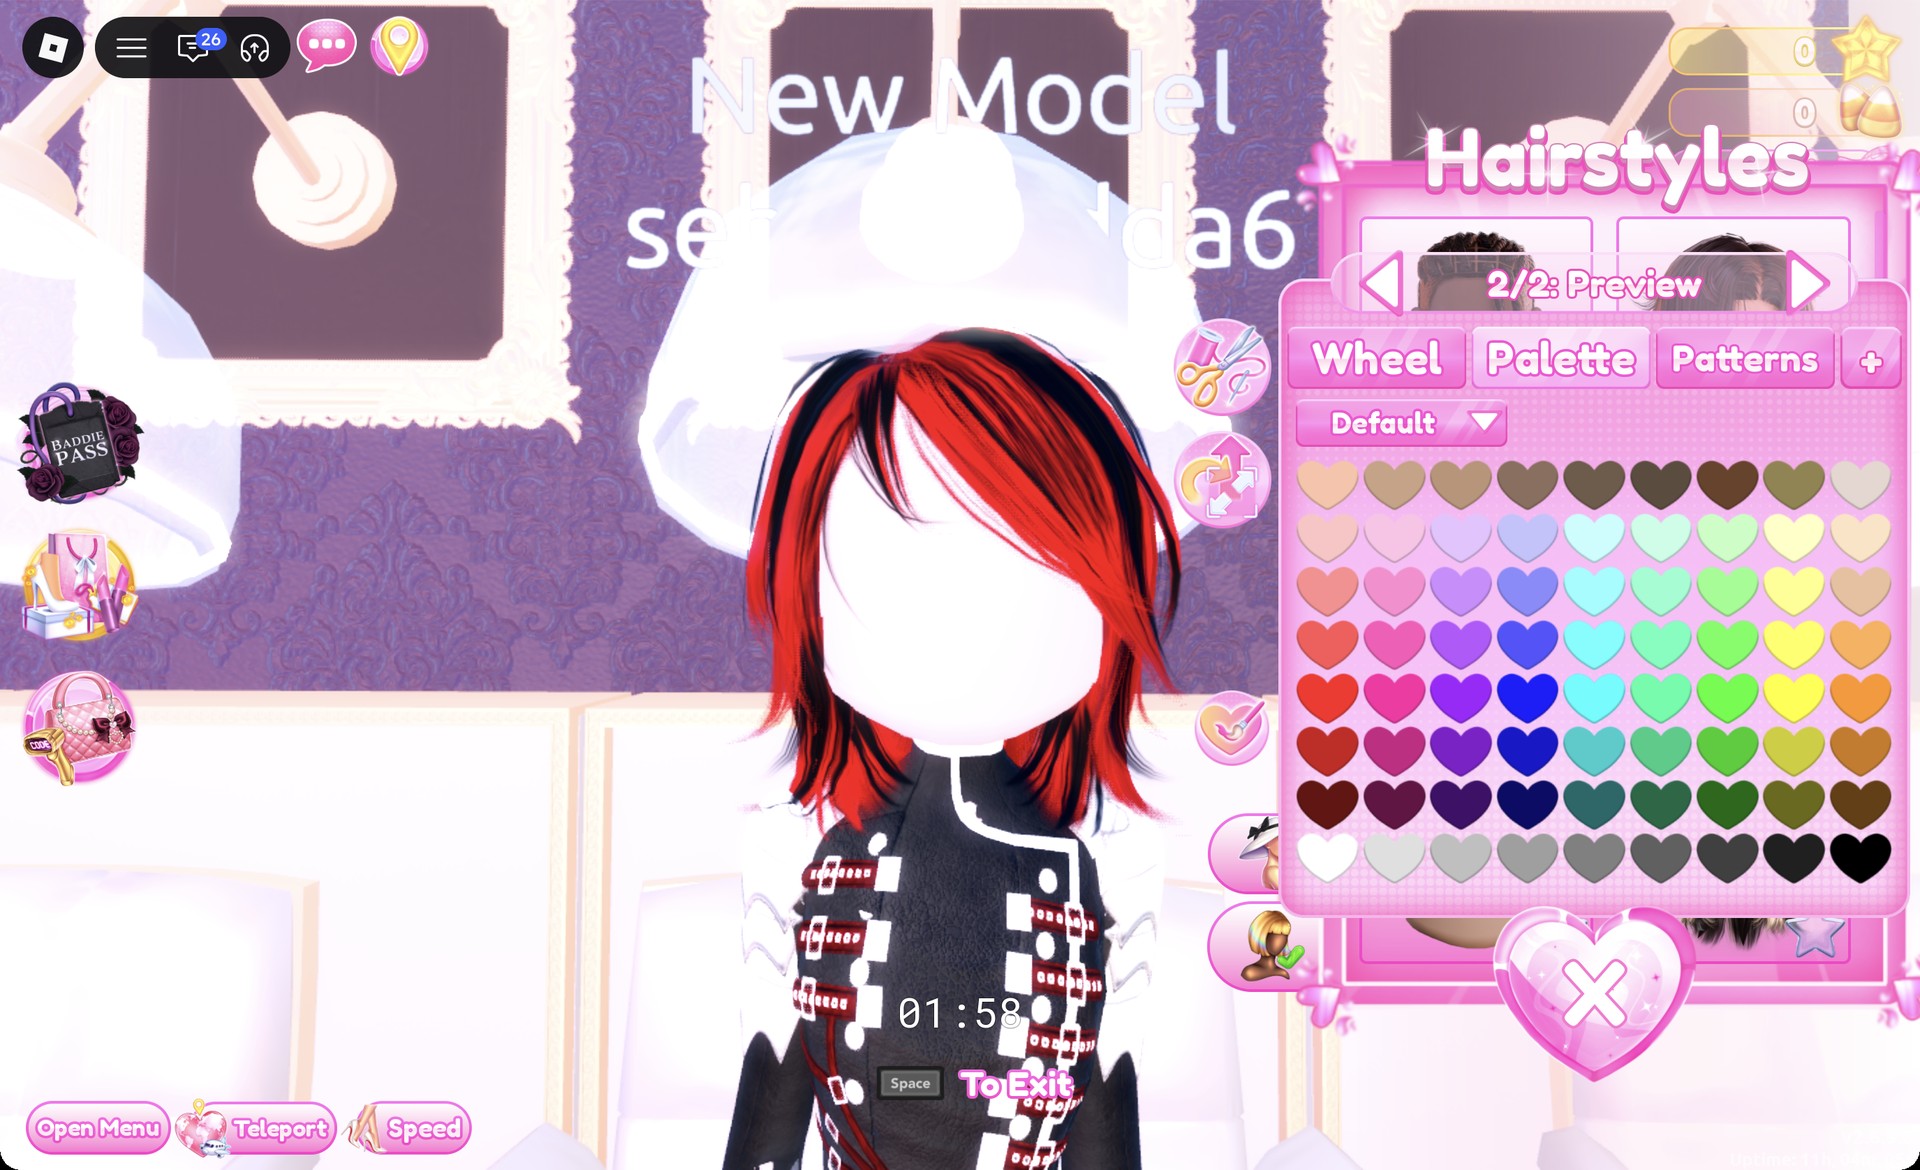
At a hair chair, open the Masculine tab and pick the right card in the third row, a choppy, layered shag cut. Set “1/2” to Palette column 1, row 6 and “2/2” to black for red hair with black streaks.
Choppy shag cut recolored red and black in Dress To Impress
The Masculine tab shag cut with part 1 red and part 2 black.
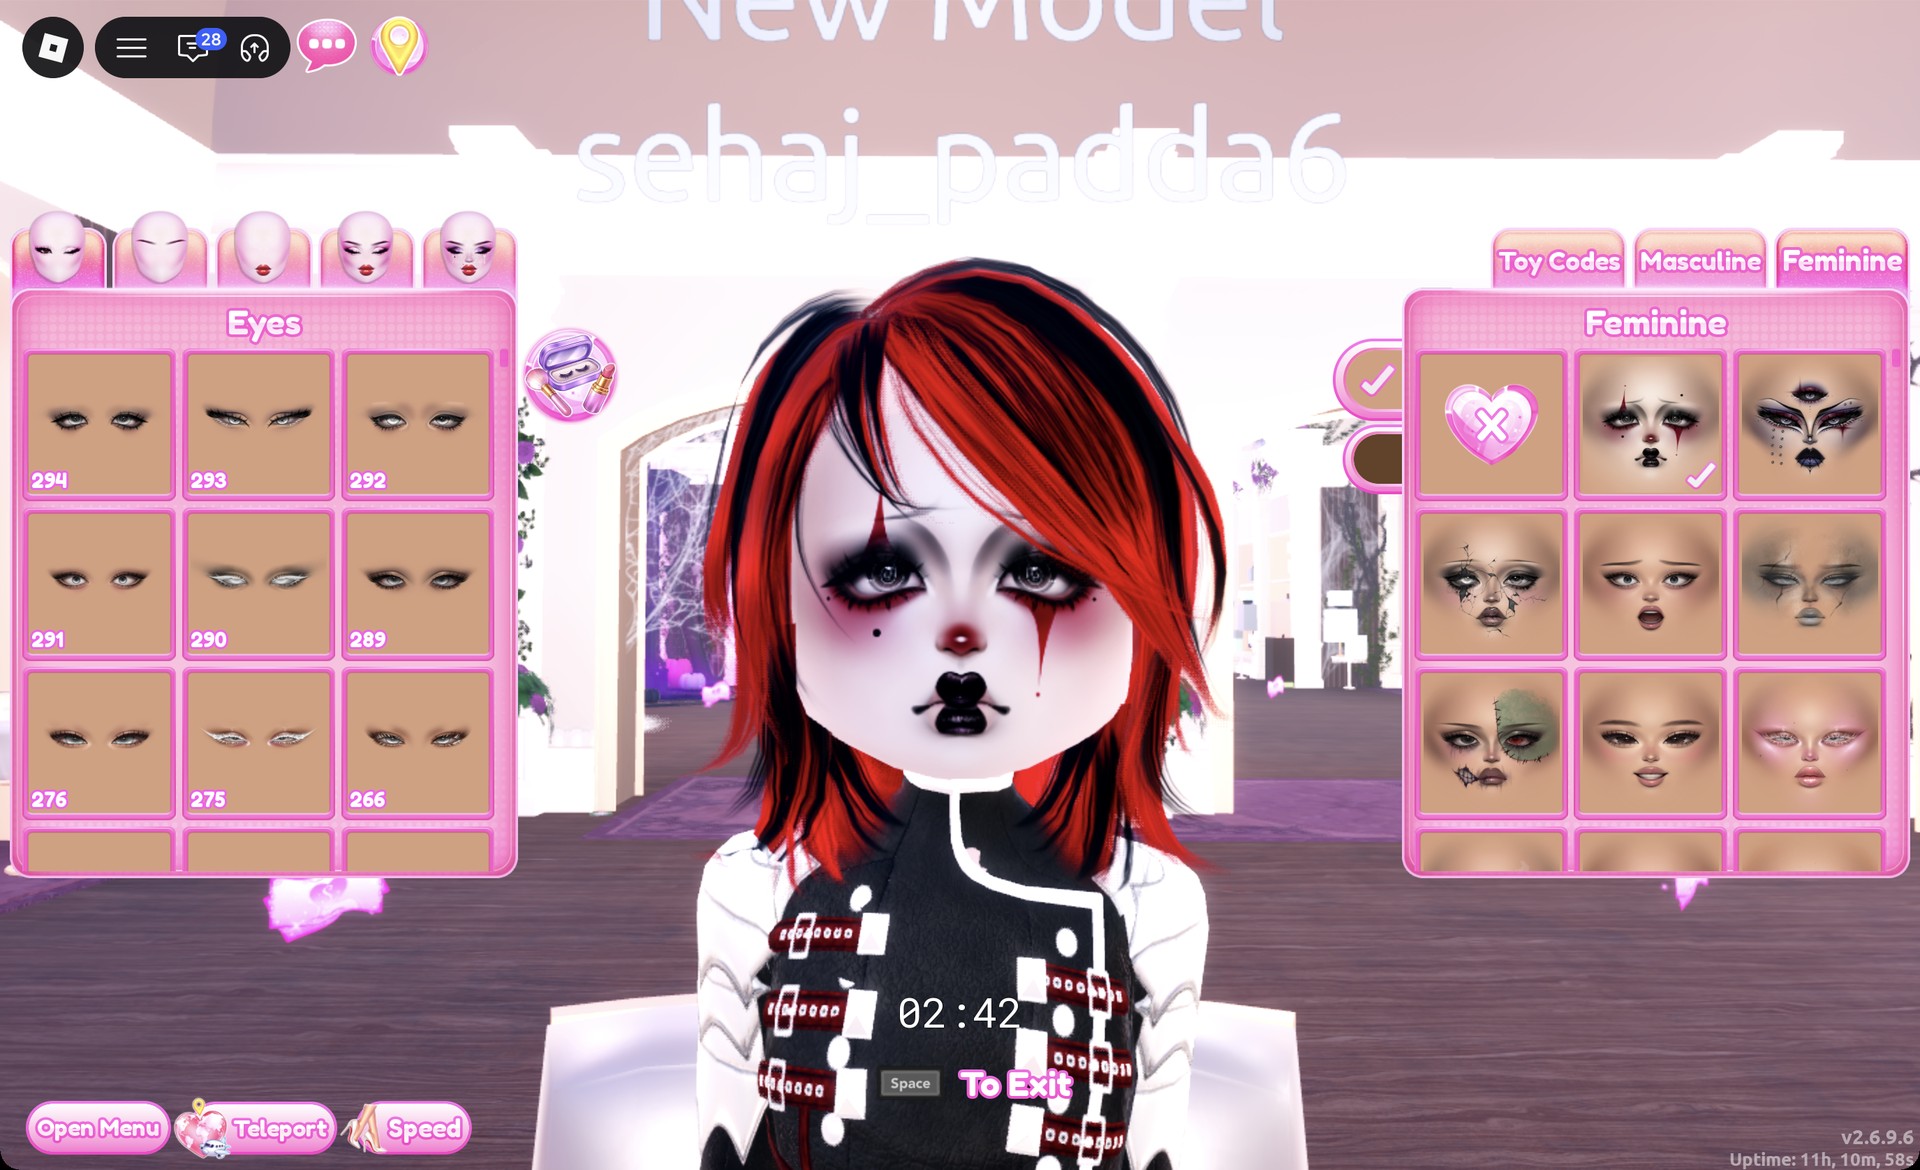
At a vanity, open the Feminine tab and pick the middle card in the first row. It’s a dark clown-style face, pale with black-rimmed eyes, a red tear line down one cheek, a red nose dot and black heart lips. Confirm with the tick.
Dark clown-style face card in Dress To Impress
The dark clown-style face card from the first row of the Feminine tab.

Open the Wearing panel to check the result. It should list the skirt, jacket, boots and hair.
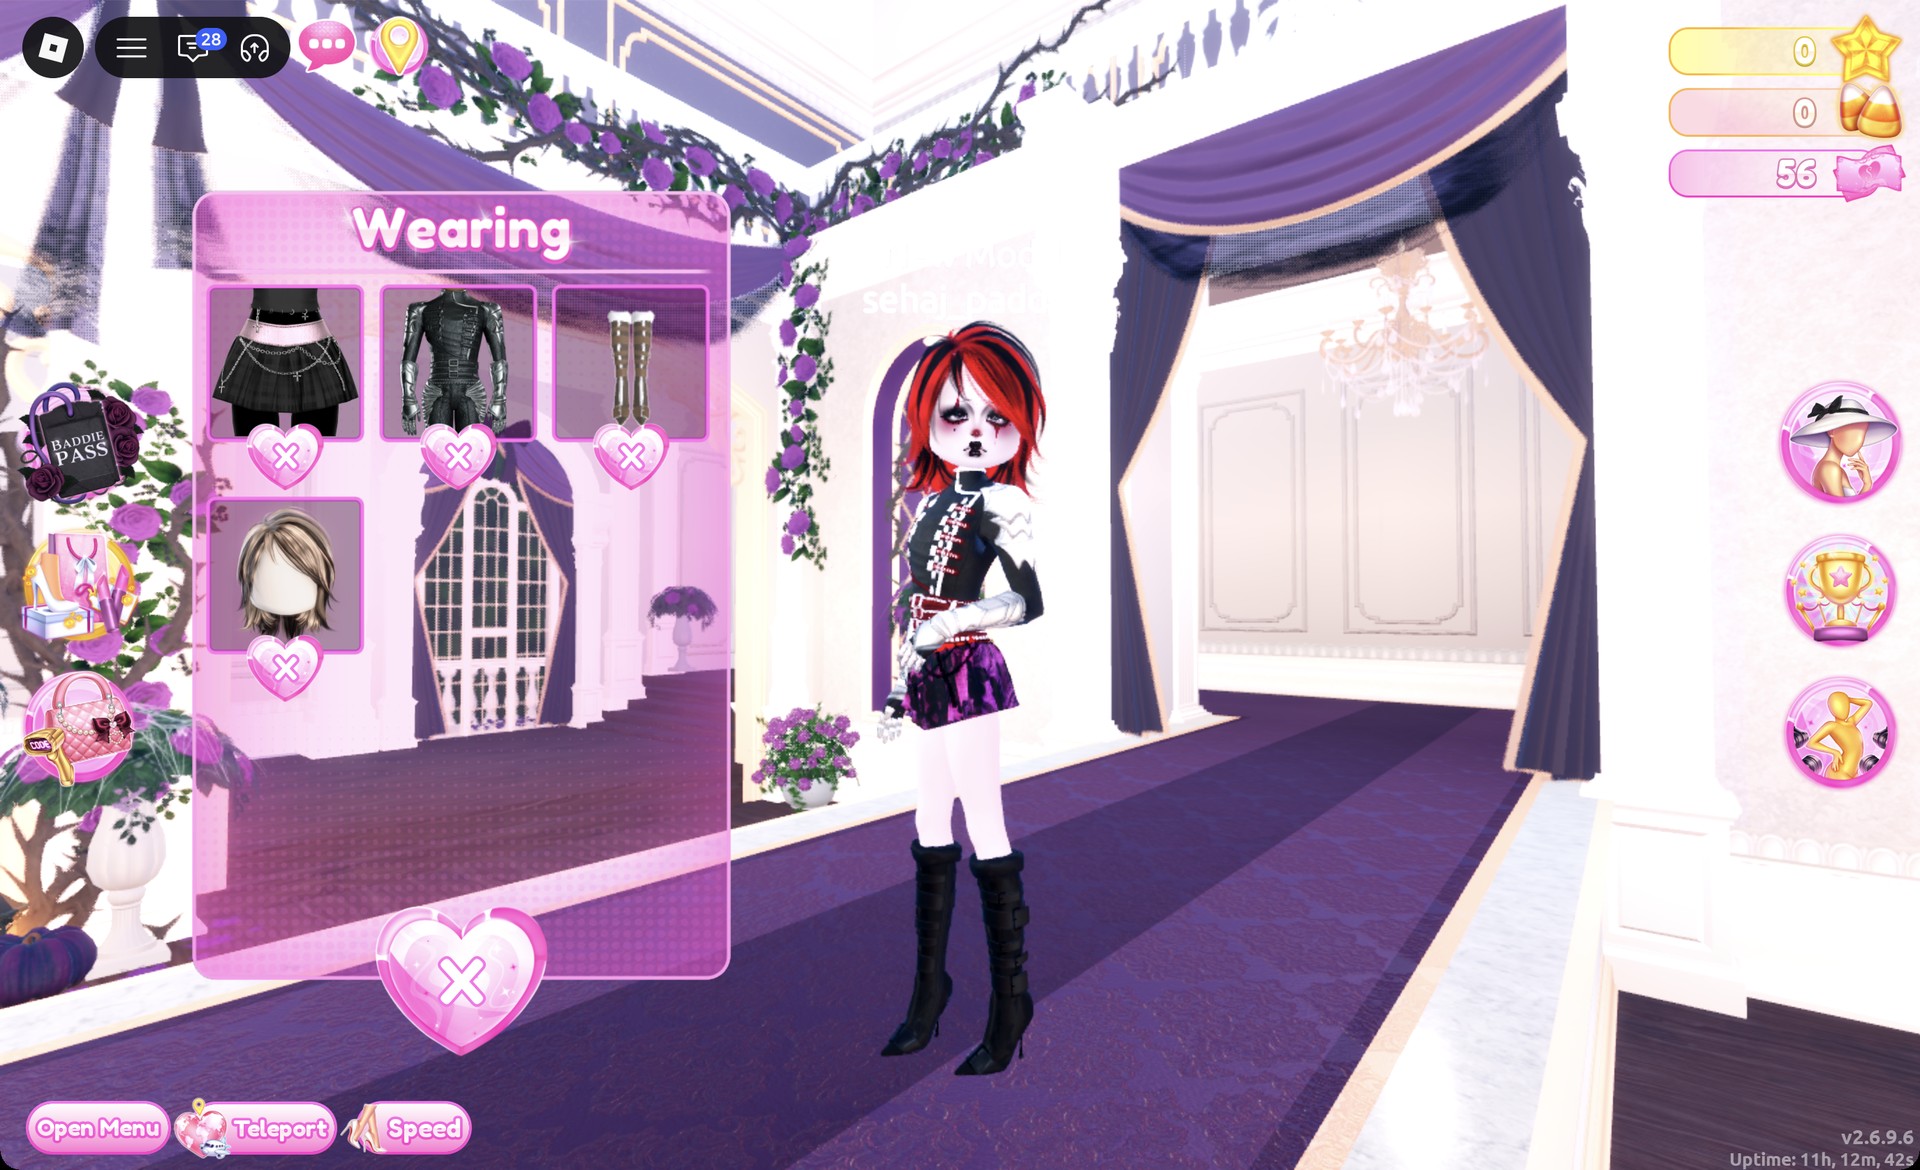
Wearing panel for the red and black Visual Kei look
The Wearing panel with the skirt, jacket, boots and hair.

On the Freeplay Runway, the front view shows the lace skirt, the red waistband and the belted jacket together.
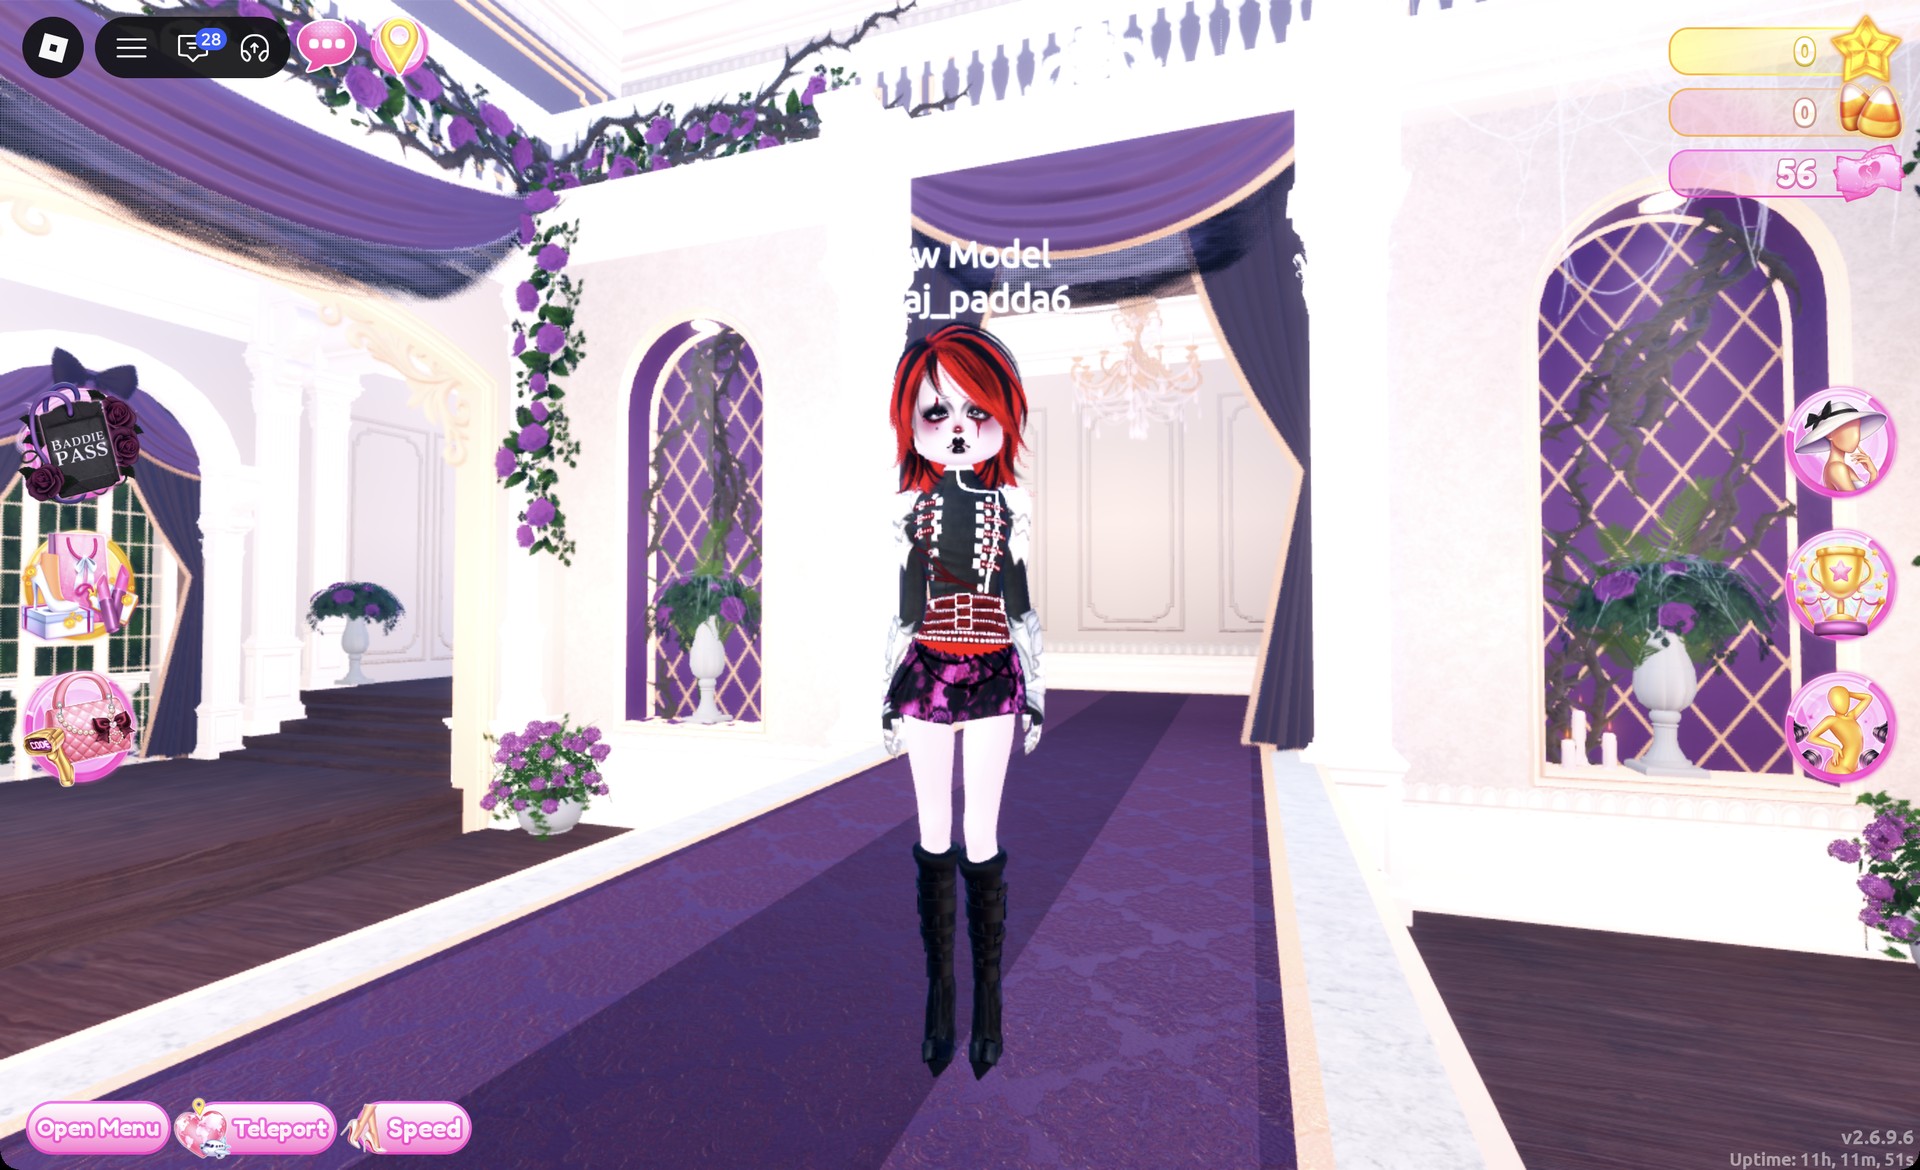
Red and black Visual Kei outfit front view on the Freeplay Runway
The red and black rocker look on the Freeplay Runway.

The back view shows off the red and black hair and the red belts.
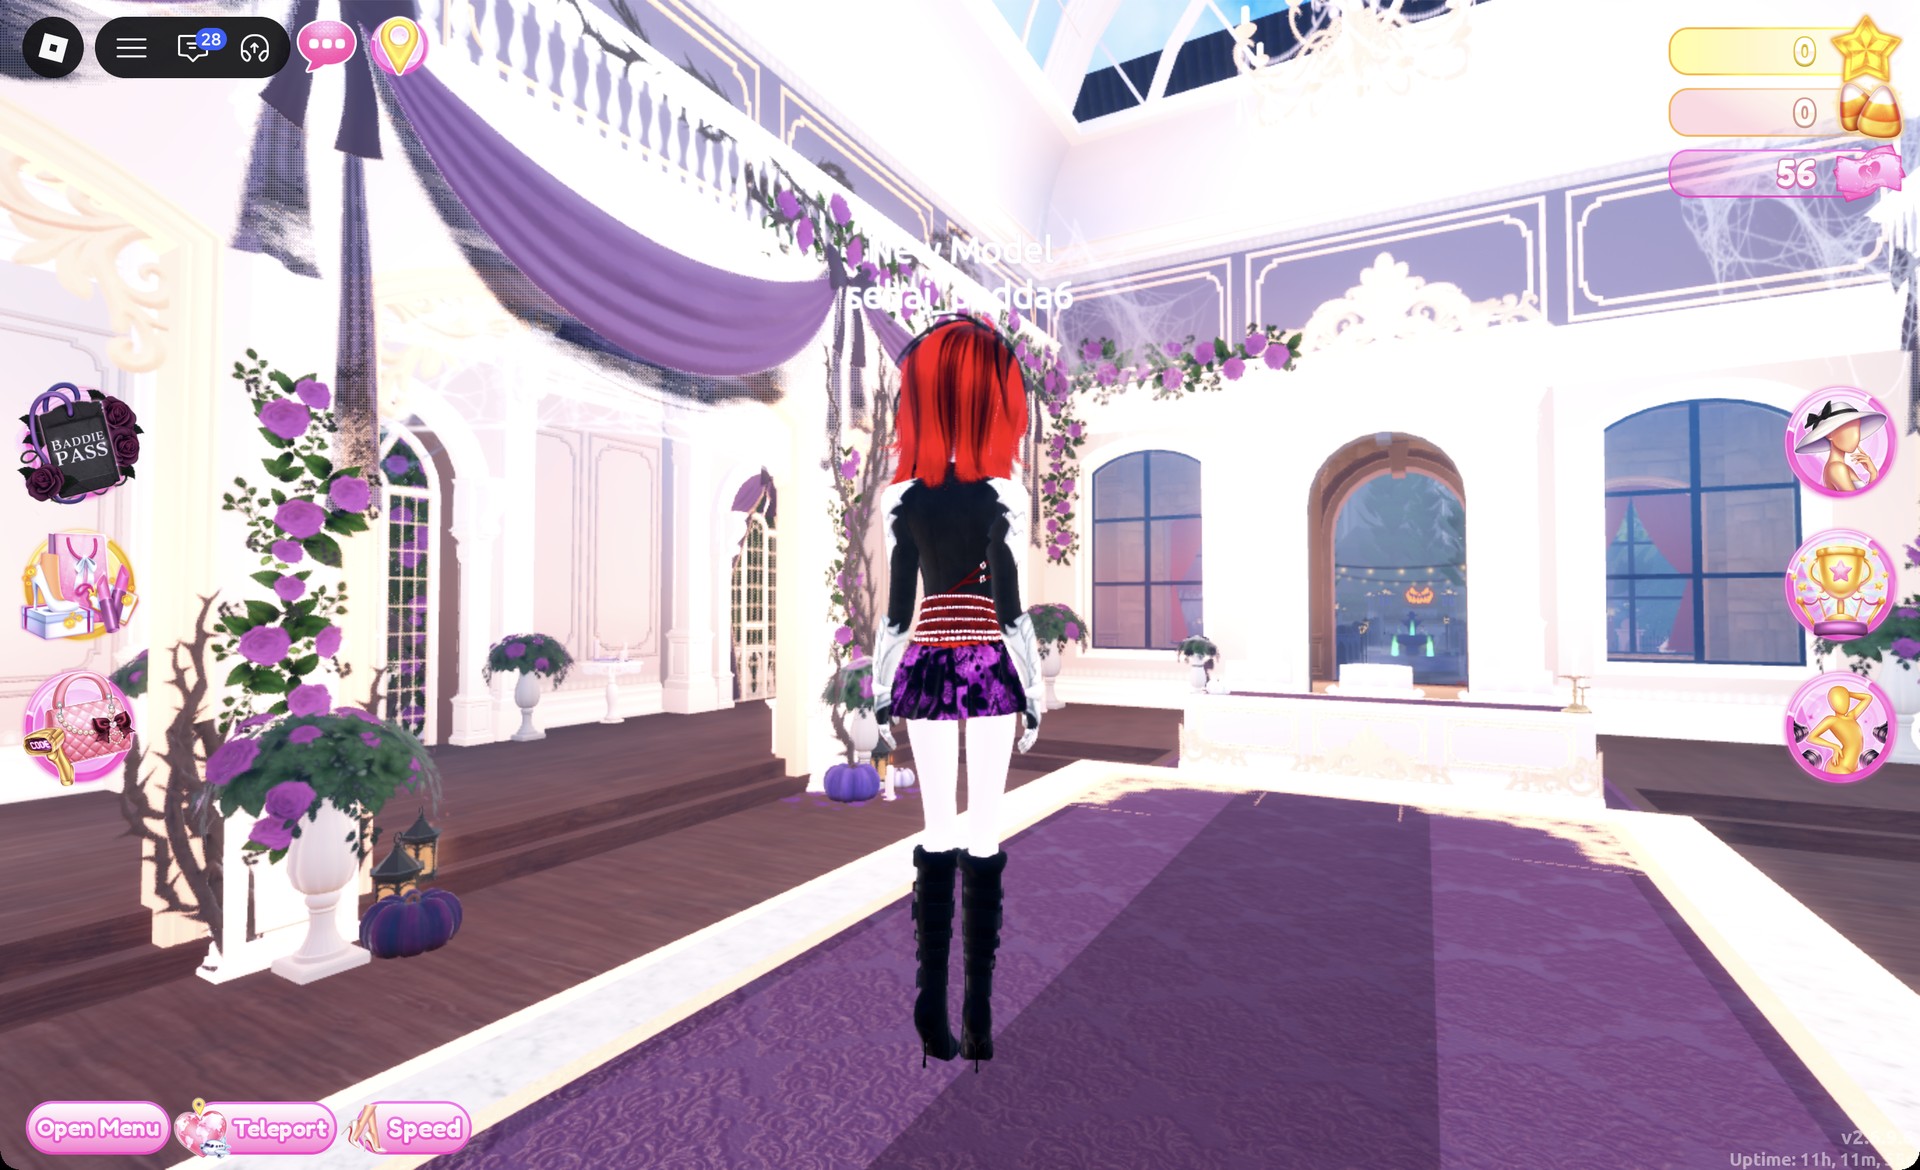
Red and black Visual Kei outfit back view in Dress To Impress
From behind: the red and black hair and the red belts.

The Dazzle pose suits the look.
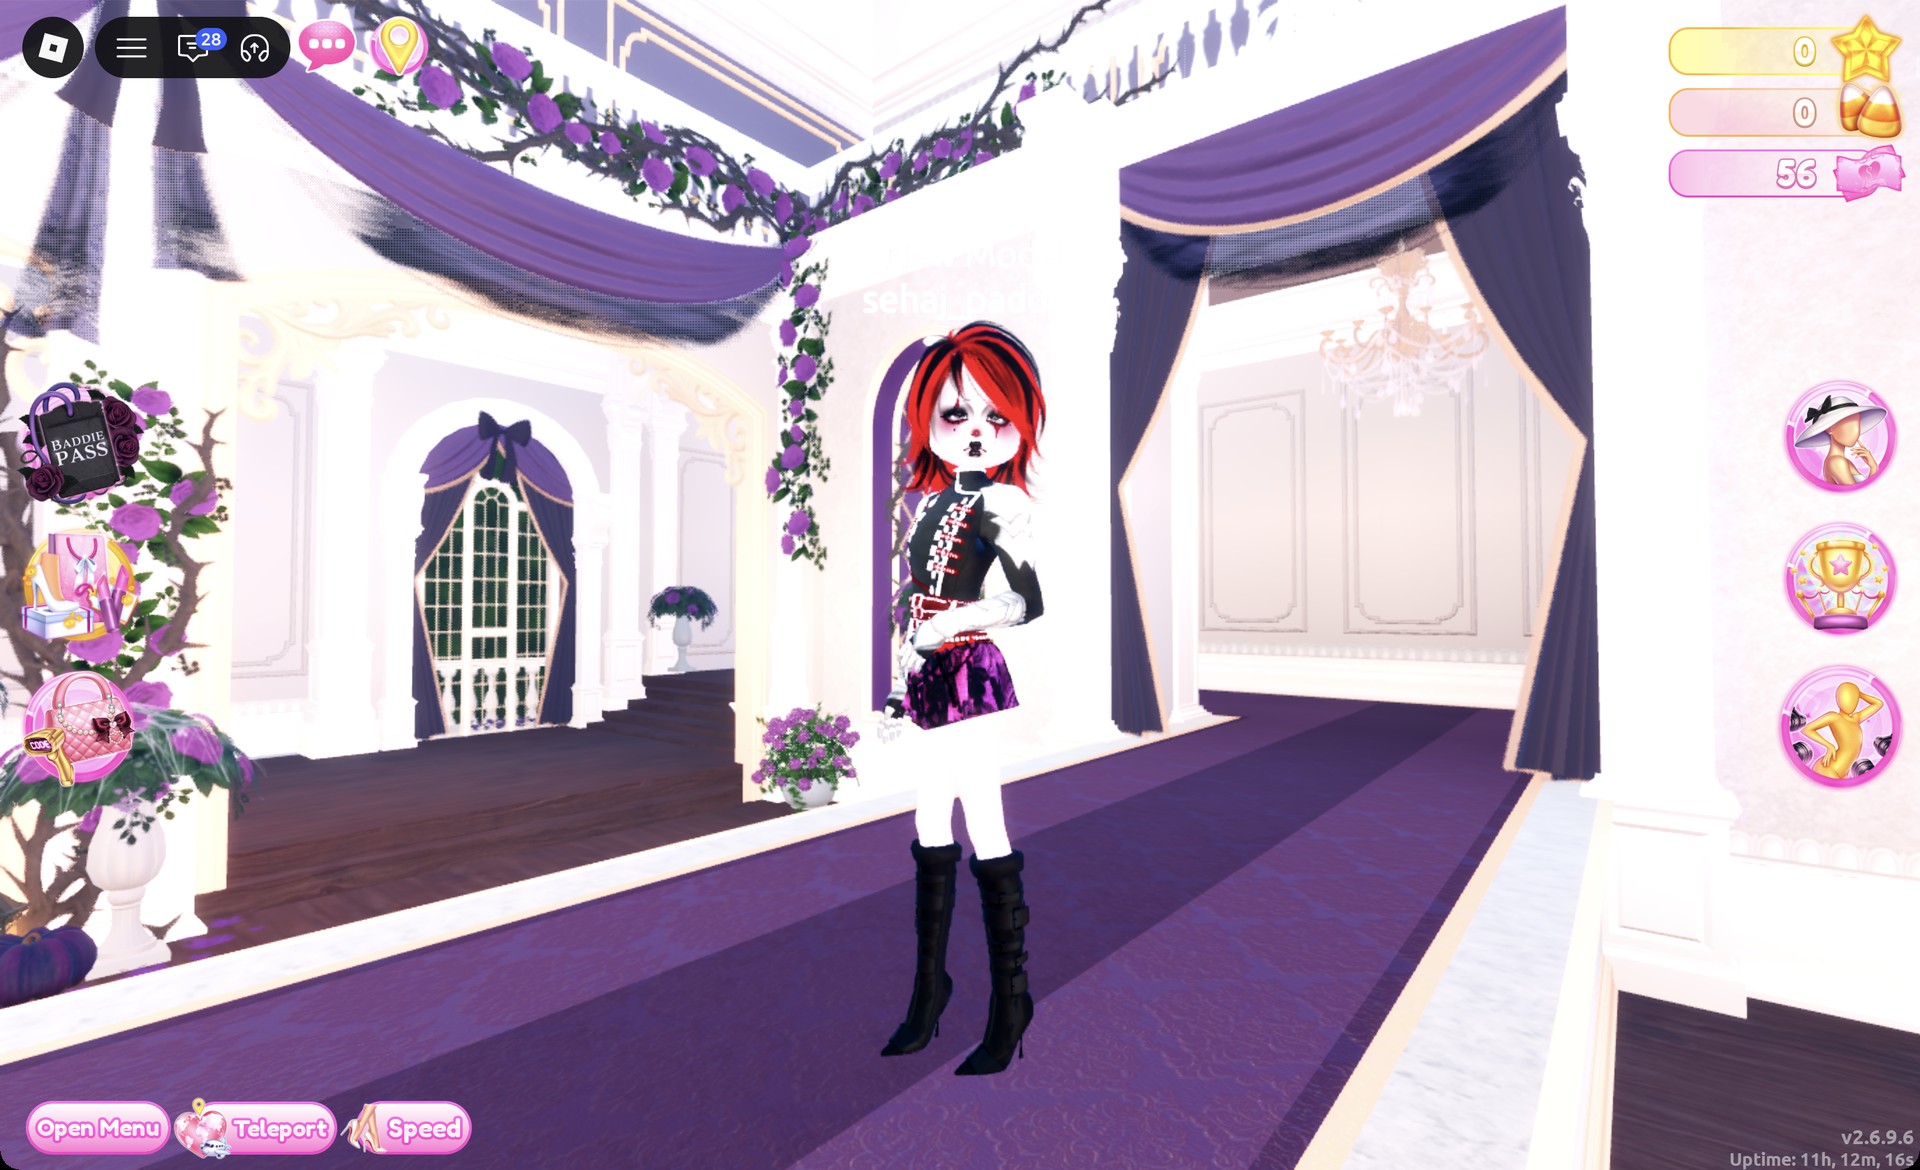
Red and black Visual Kei outfit in the Dazzle pose
The rocker look in the Dazzle pose.

Outfit 2: Black and purple gothic gown

For this look, take the pale pink ball dress from the lower party-dress shelf as its base, rather than the other look’s piece. Keep the clown-style face used for the rocker look.
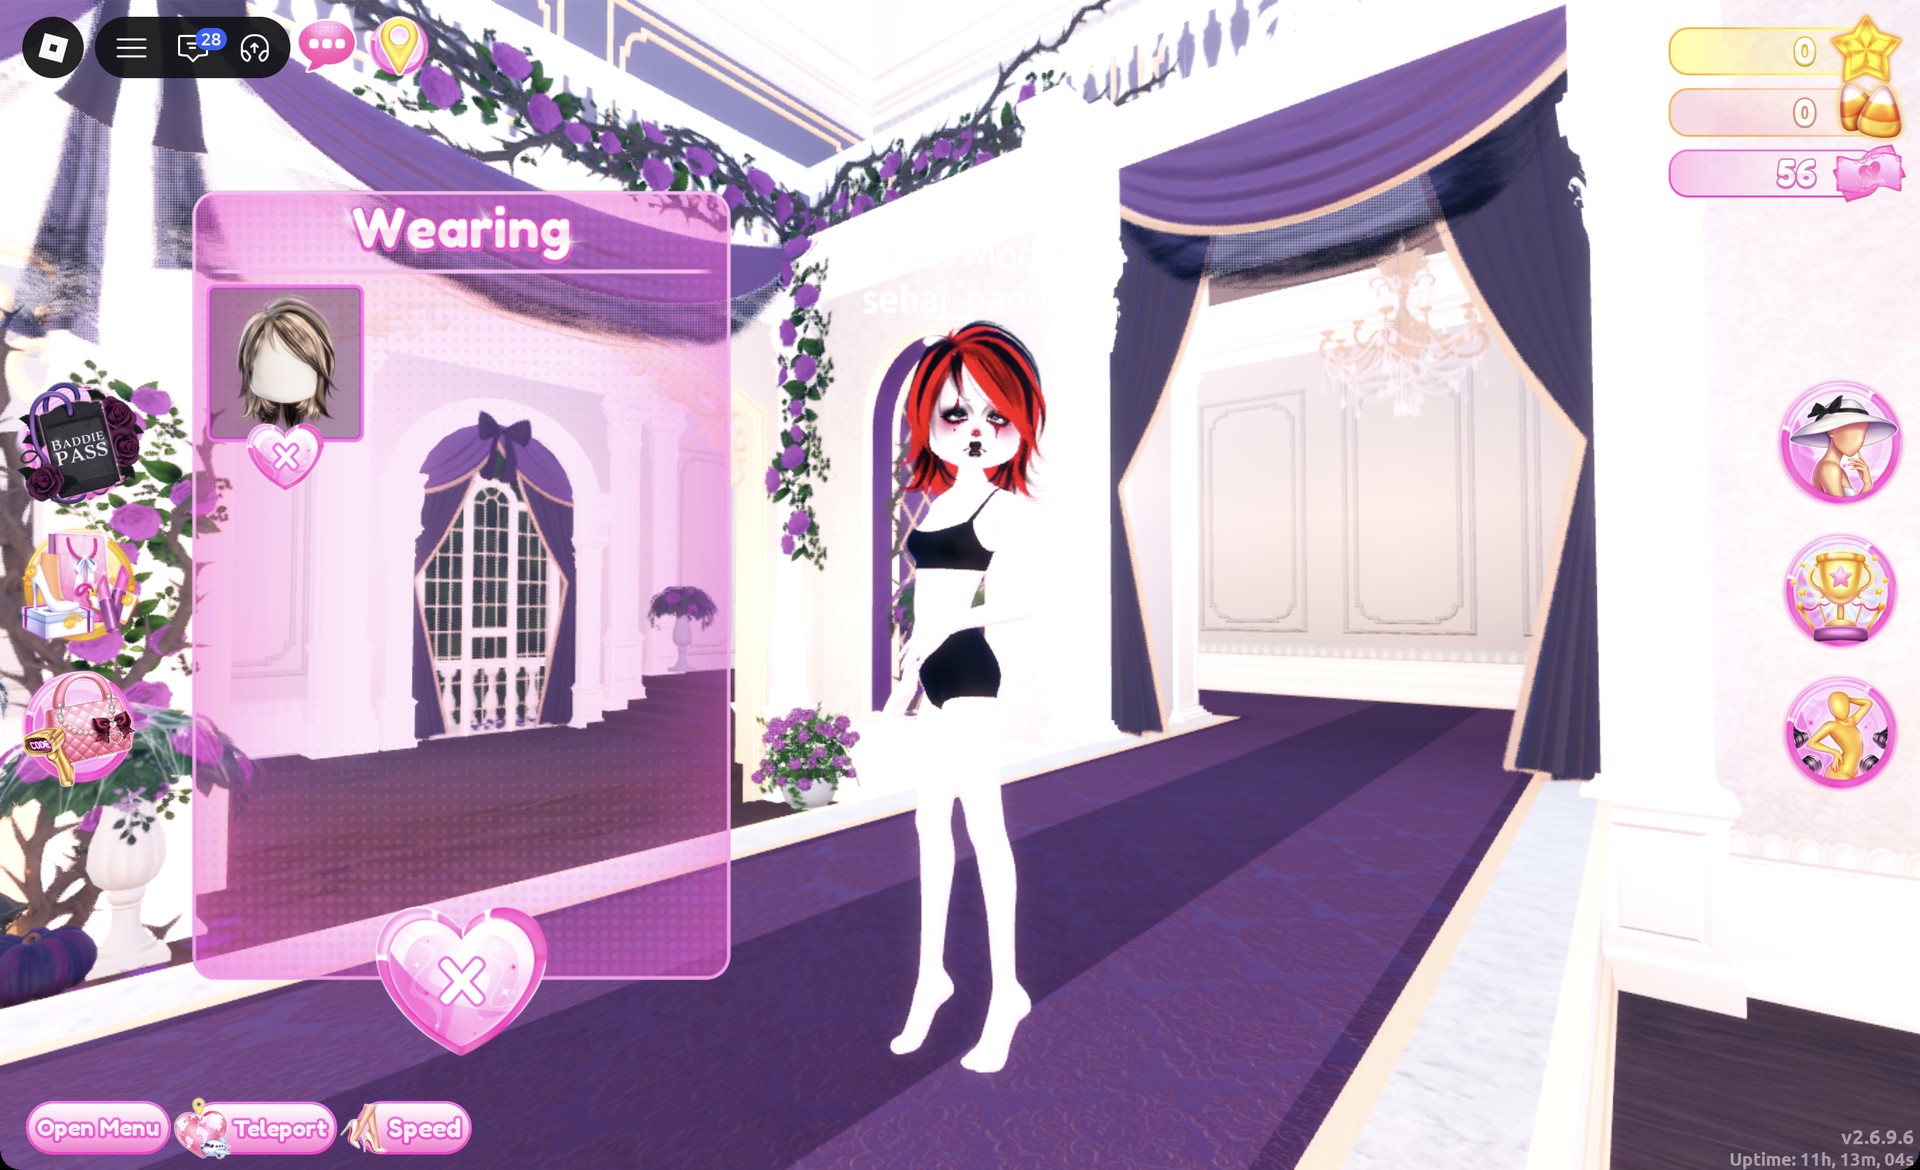
Open the Wearing panel and remove the skirt, jacket and boots. Use the heart X under each picture.
Wearing panel after removing the first look in Dress To Impress
The Wearing panel with only the hair left after removing the skirt, jacket and boots.
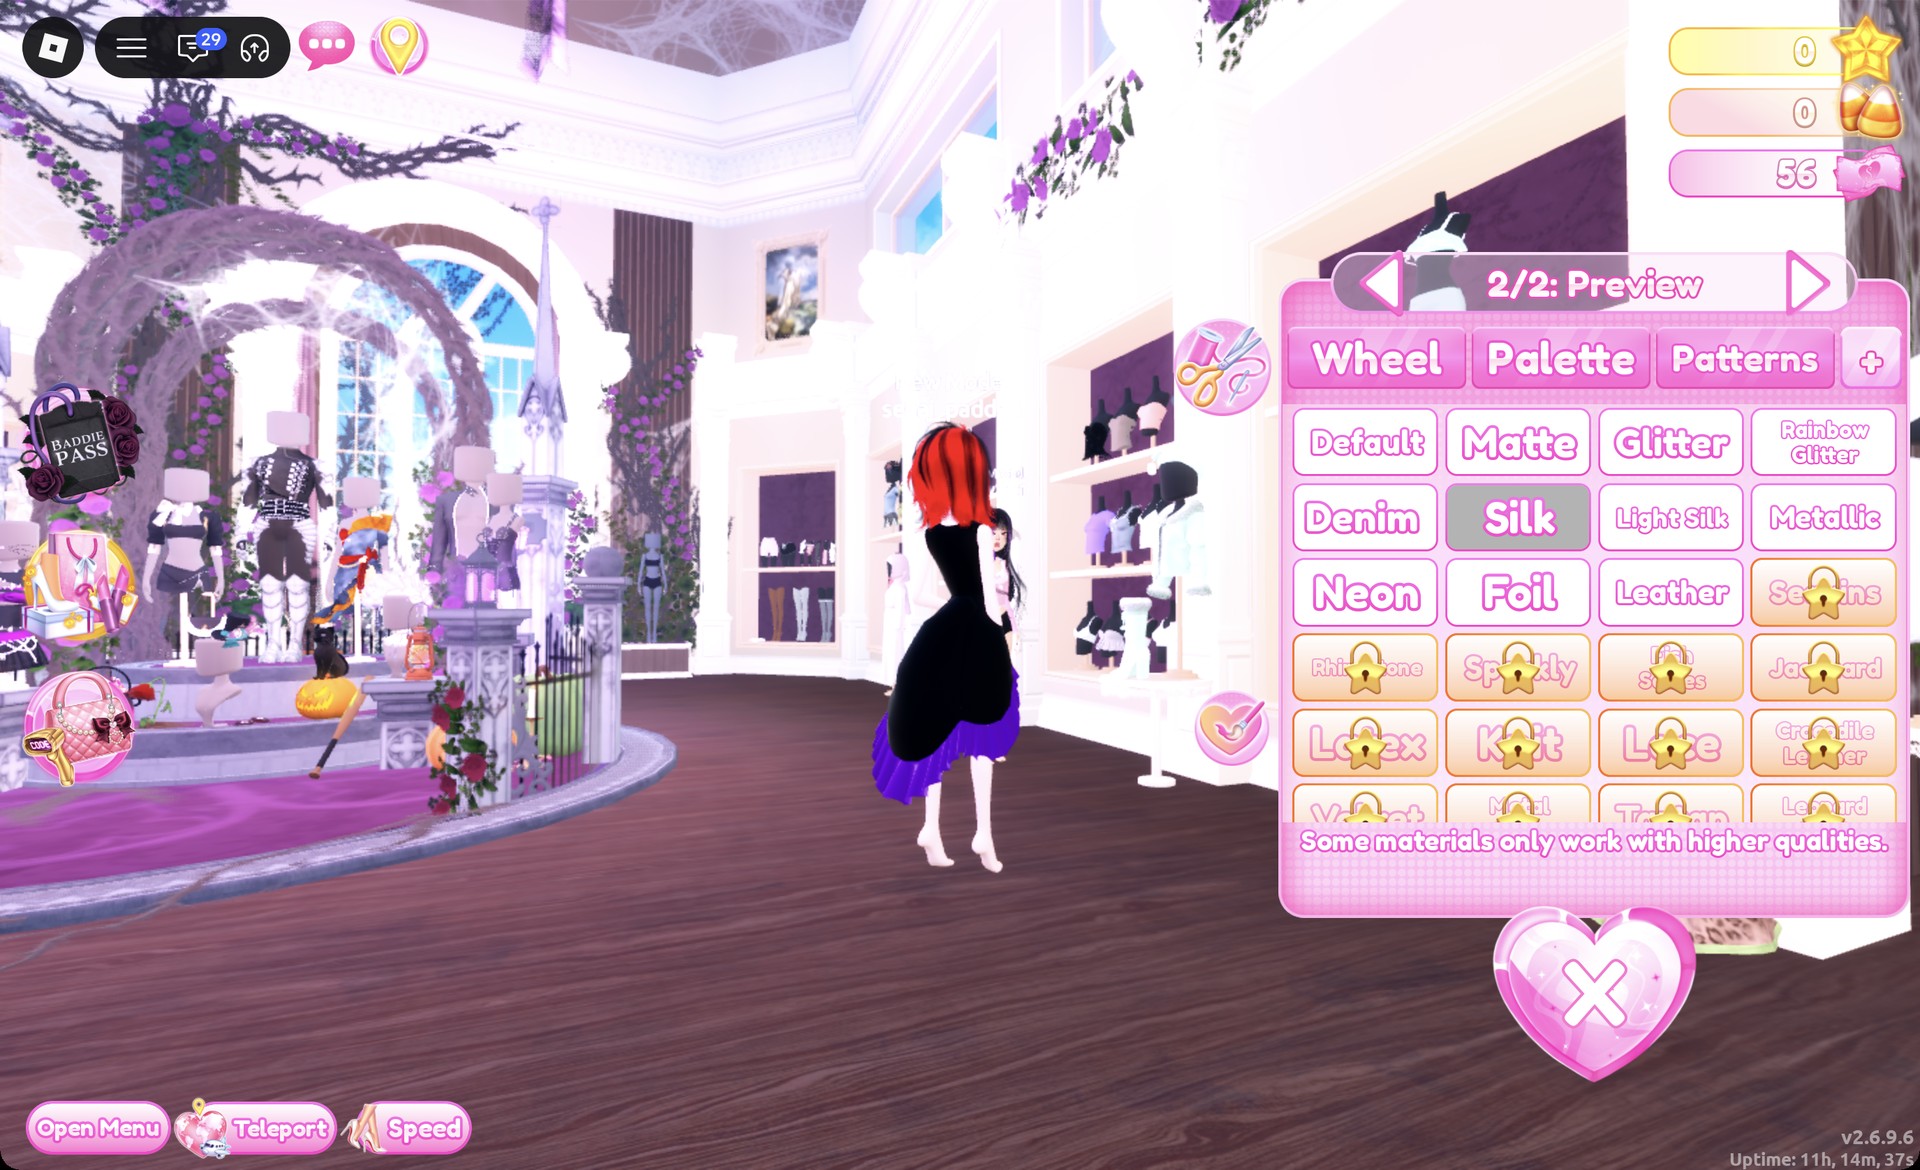
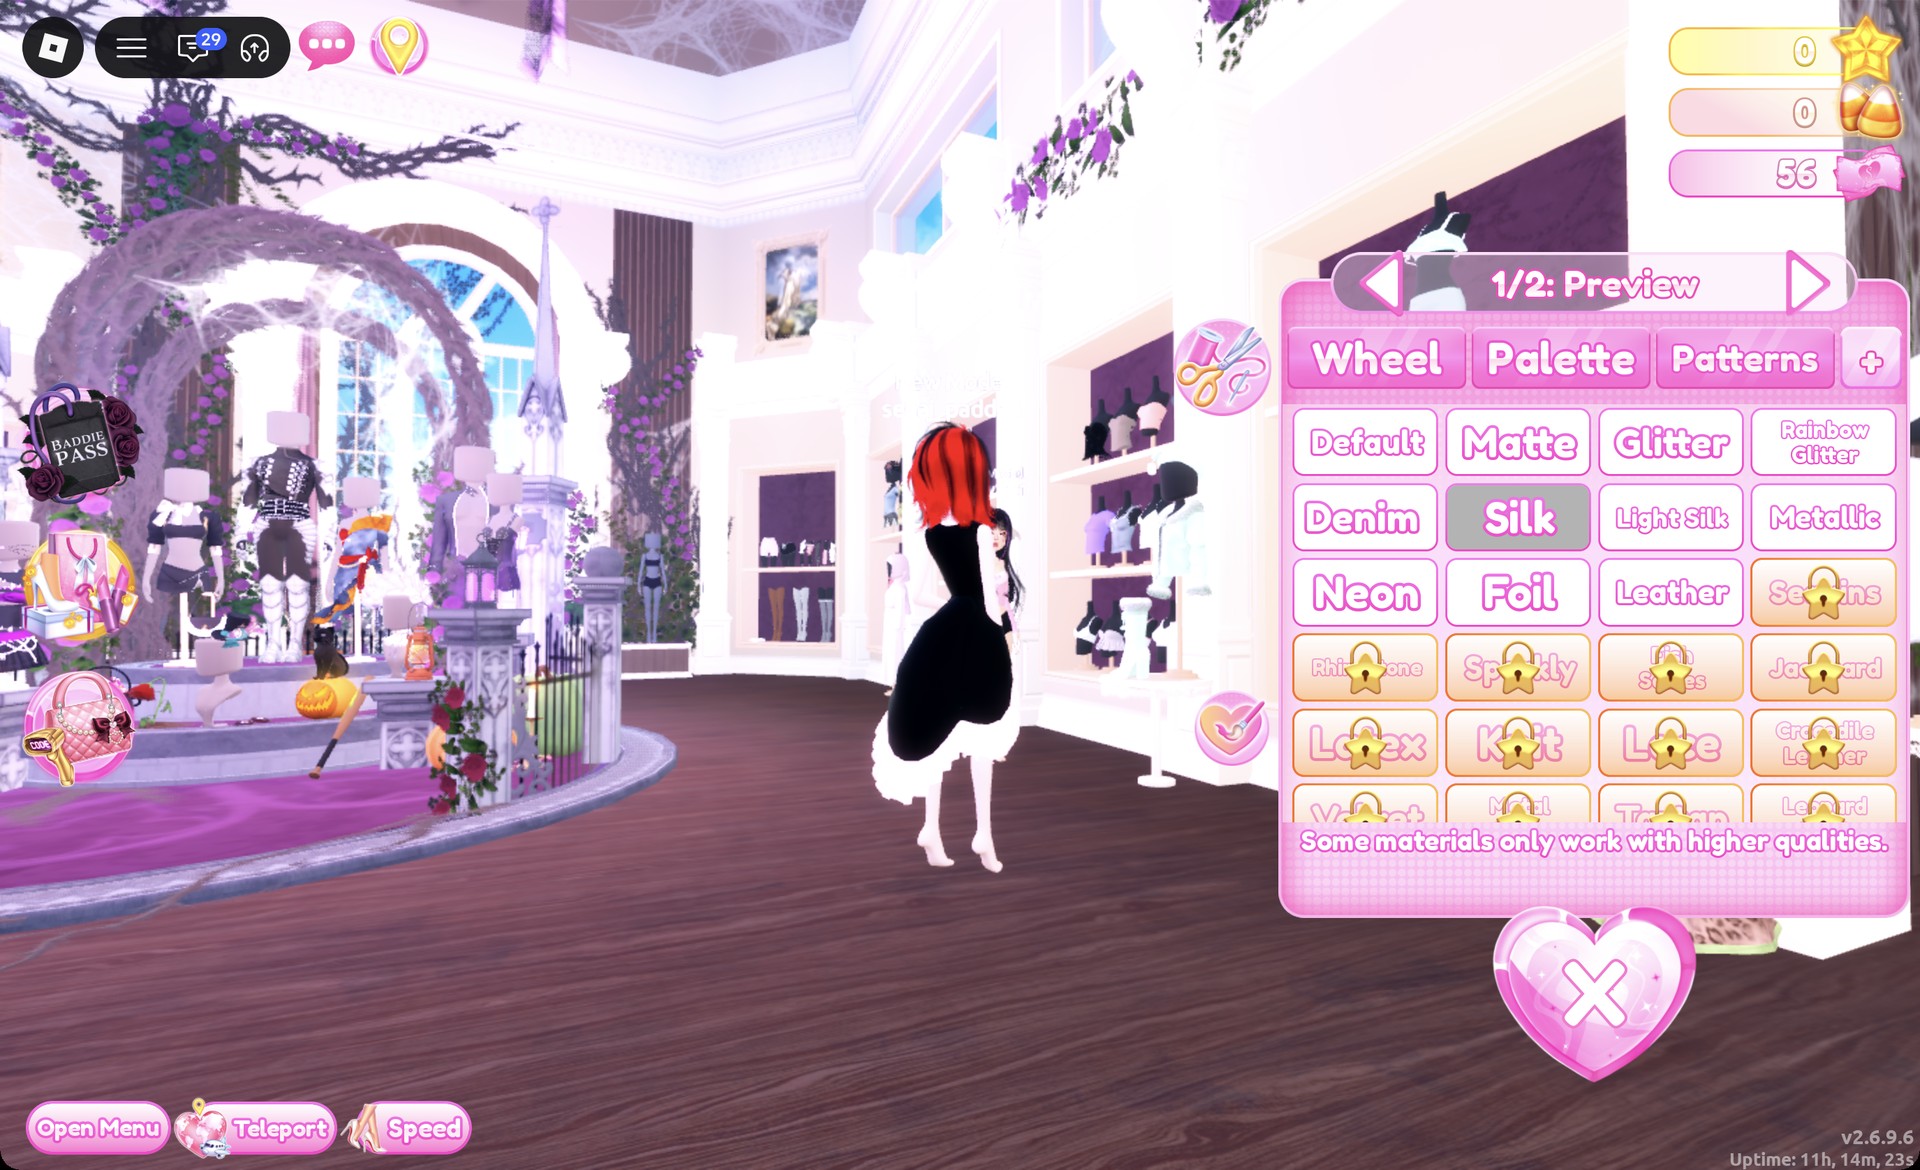
Click the pale pink ball dress to open “1/2: Preview”. Set part 1 to black (row 8, last heart) and choose Silk on the “+” tab for a black skirt.
Ball dress part 1 black with Silk in Dress To Impress
Part 1 of the ball dress in black with Silk on the "+" tab.
Set part 2 to Palette column 3, row 7, a dark purple, again with Silk. The bodice and the ruffle hem turn purple.
Ball dress part 2 dark purple with Silk in Dress To Impress
Part 2 in dark purple Silk: the bodice and the ruffle hem turn purple.
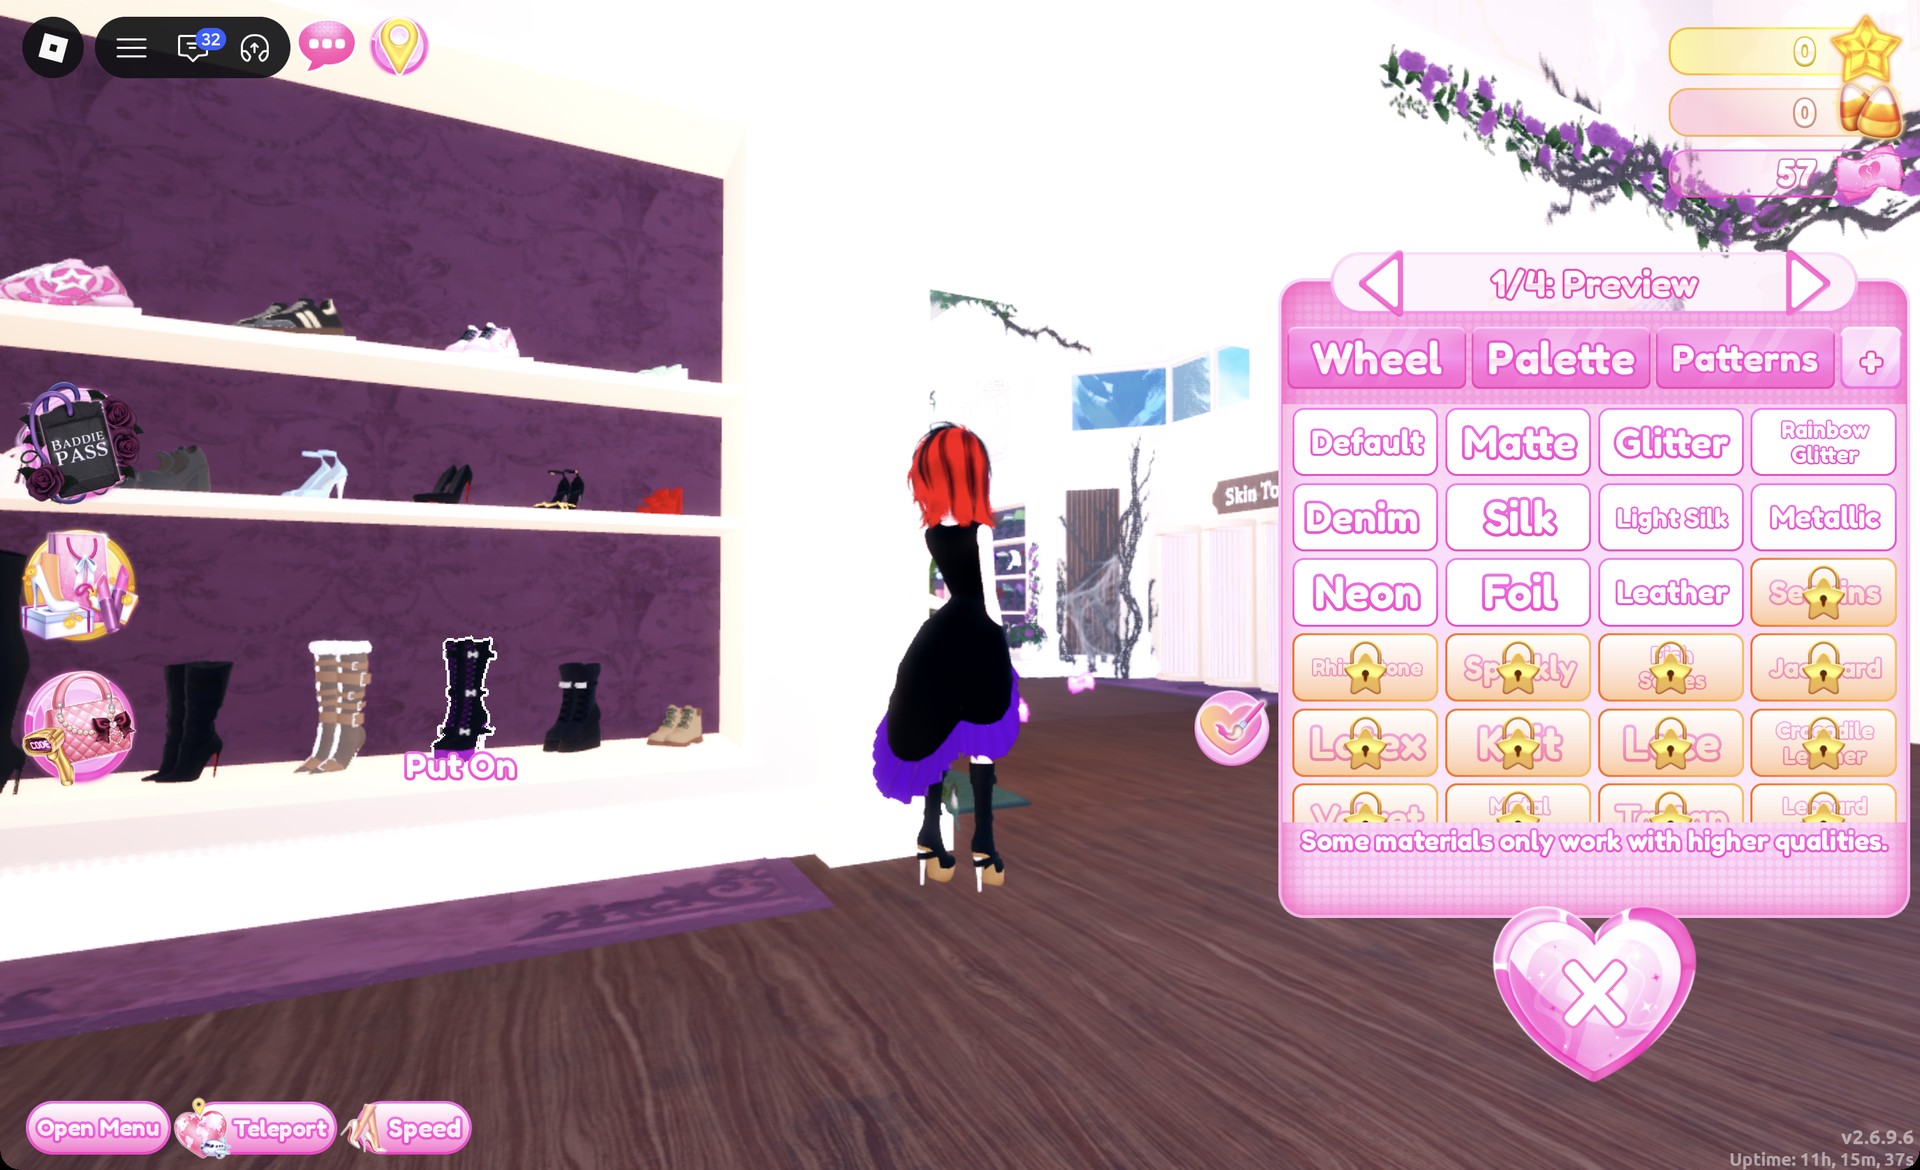
On the shoe shelf’s lowest row, select the black platform boots; small white bows run down the front, and the sole is purple. Leave “1/4: Preview” at its default colors, then press Put On.
Black platform boots with bows on the shoe shelf in Dress To Impress
The black platform boots with white bows, "1/4: Preview", default colors.
At a hair chair, clear the shag cut by clicking the X on its card in Hairstyles.

If you skip removing the old hair, the new hairstyle goes on top of it.
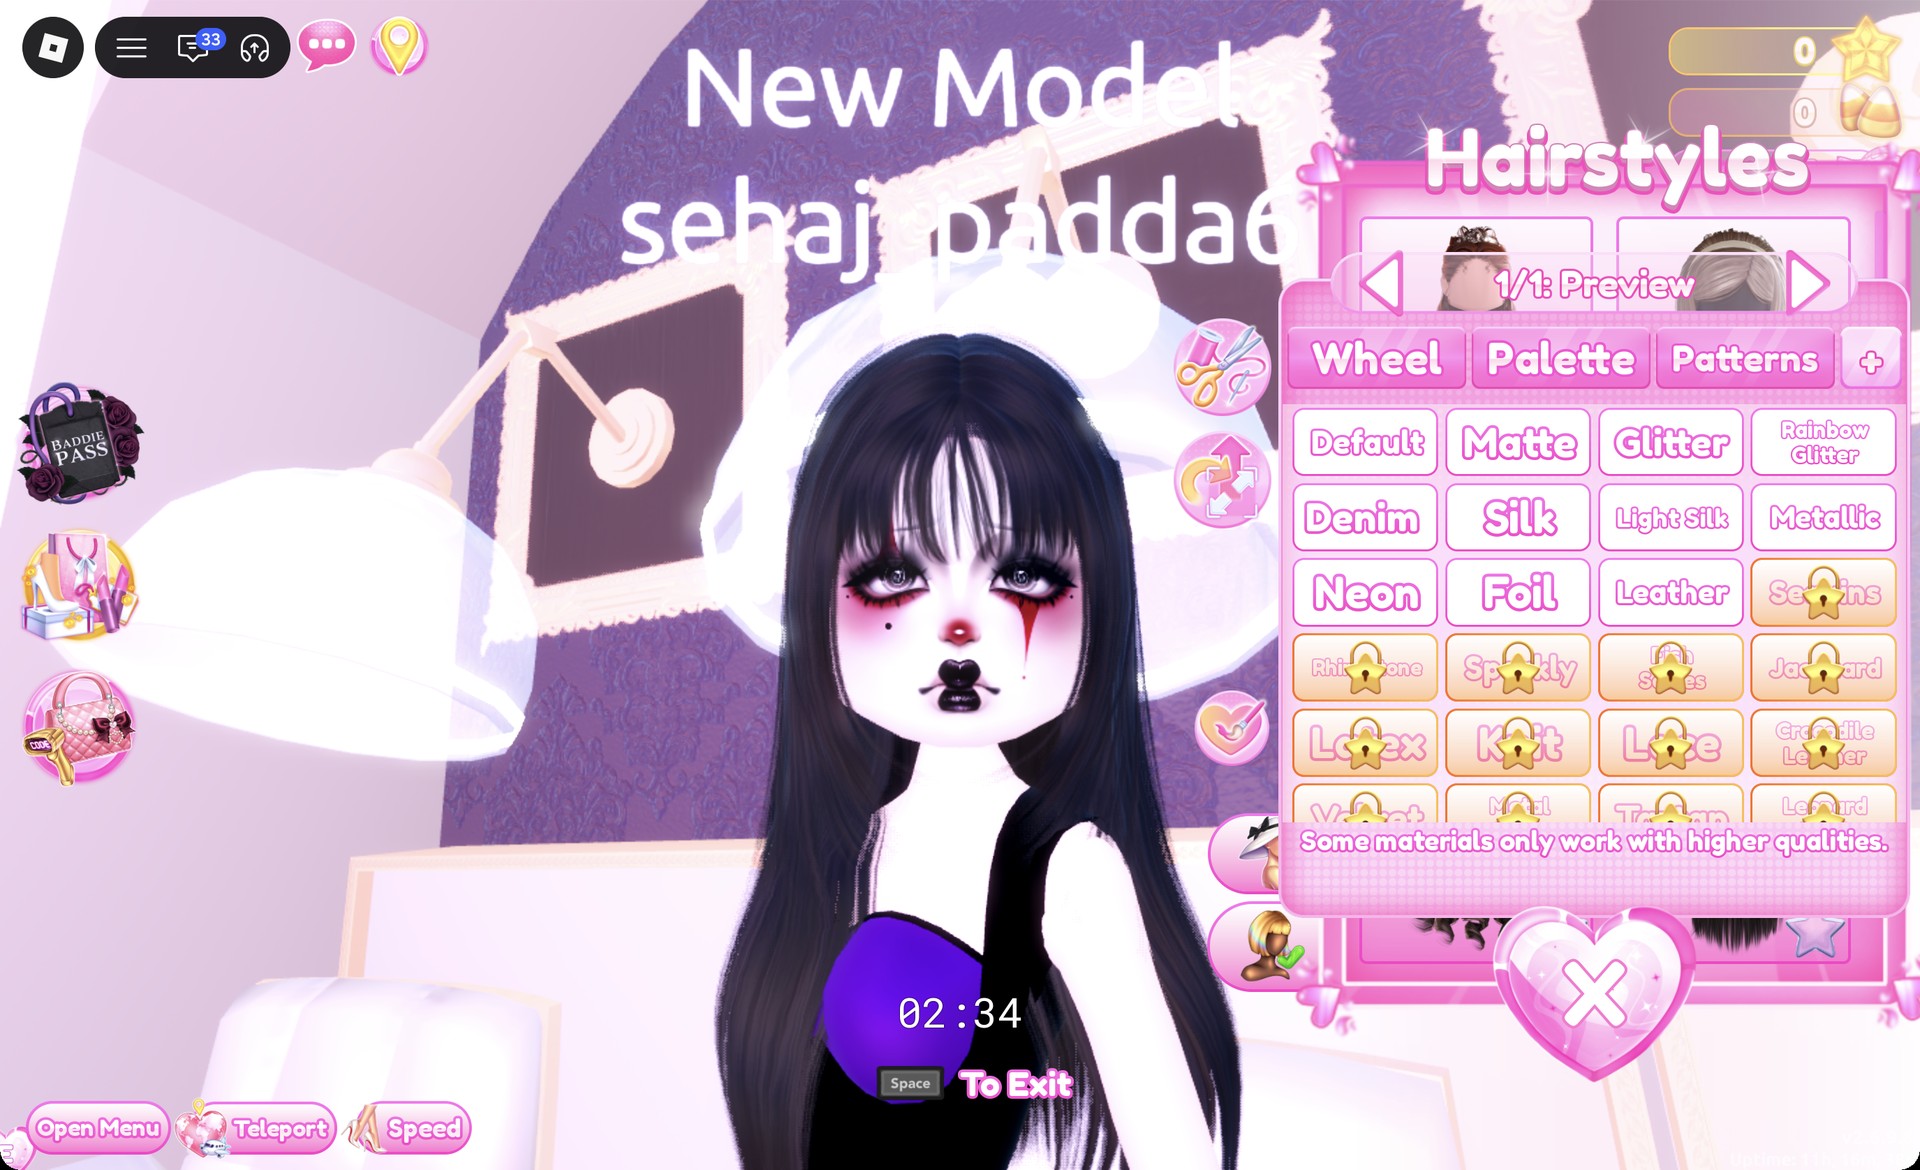
Select Wavy, then choose the card at the far right of row three: a long, sleek black style with bangs covering the forehead fully. Leave the default black in “1/1: Preview”.
Long black hair with bangs from the Wavy tab in Dress To Impress
The Wavy tab hair: long, straight black hair with full bangs.

On the Freeplay Runway, the front view shows the purple bodice over the black Silk skirt, with the platform boots under the high-low hem.
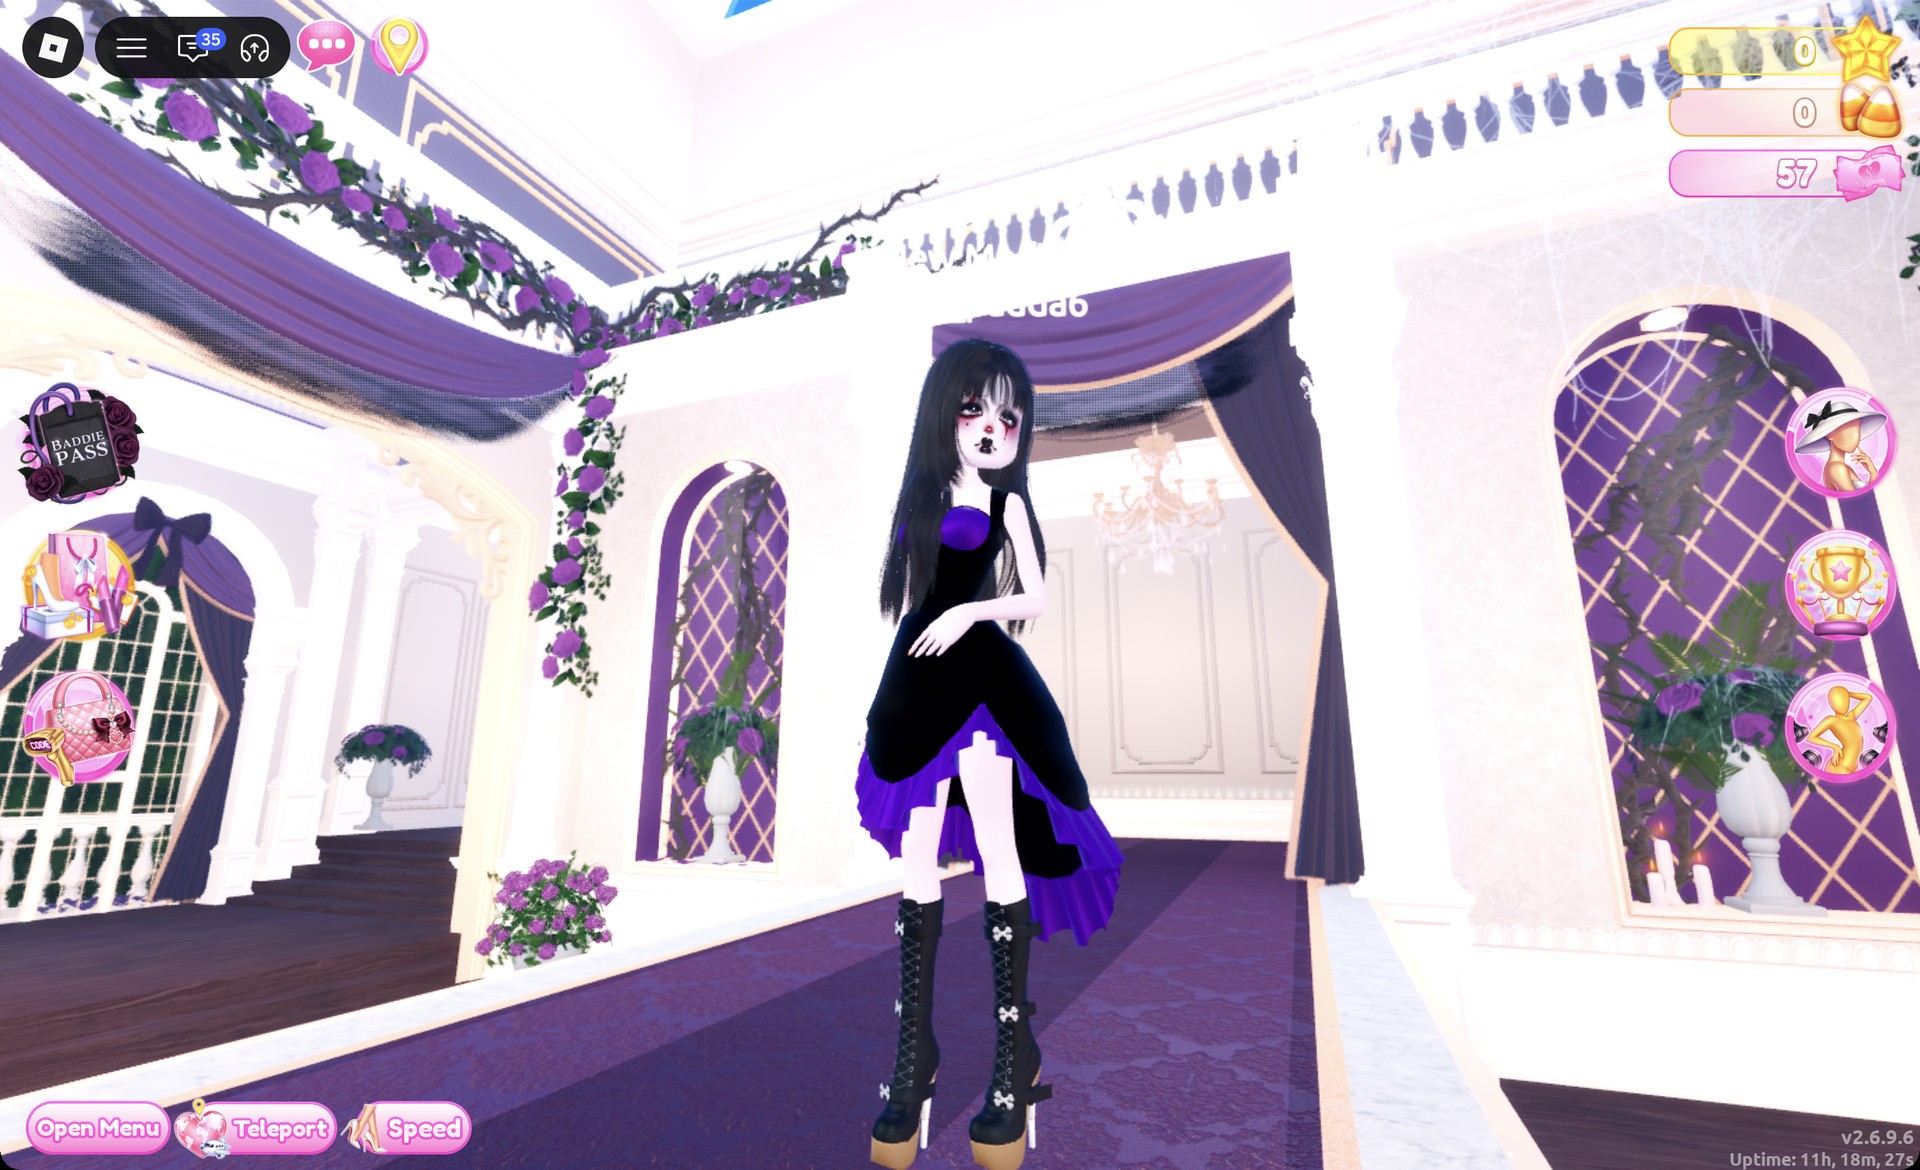
Black and purple gothic gown Visual Kei look front view
The black and purple gothic gown on the Freeplay Runway.

The back view shows the black skirt and its purple hem.
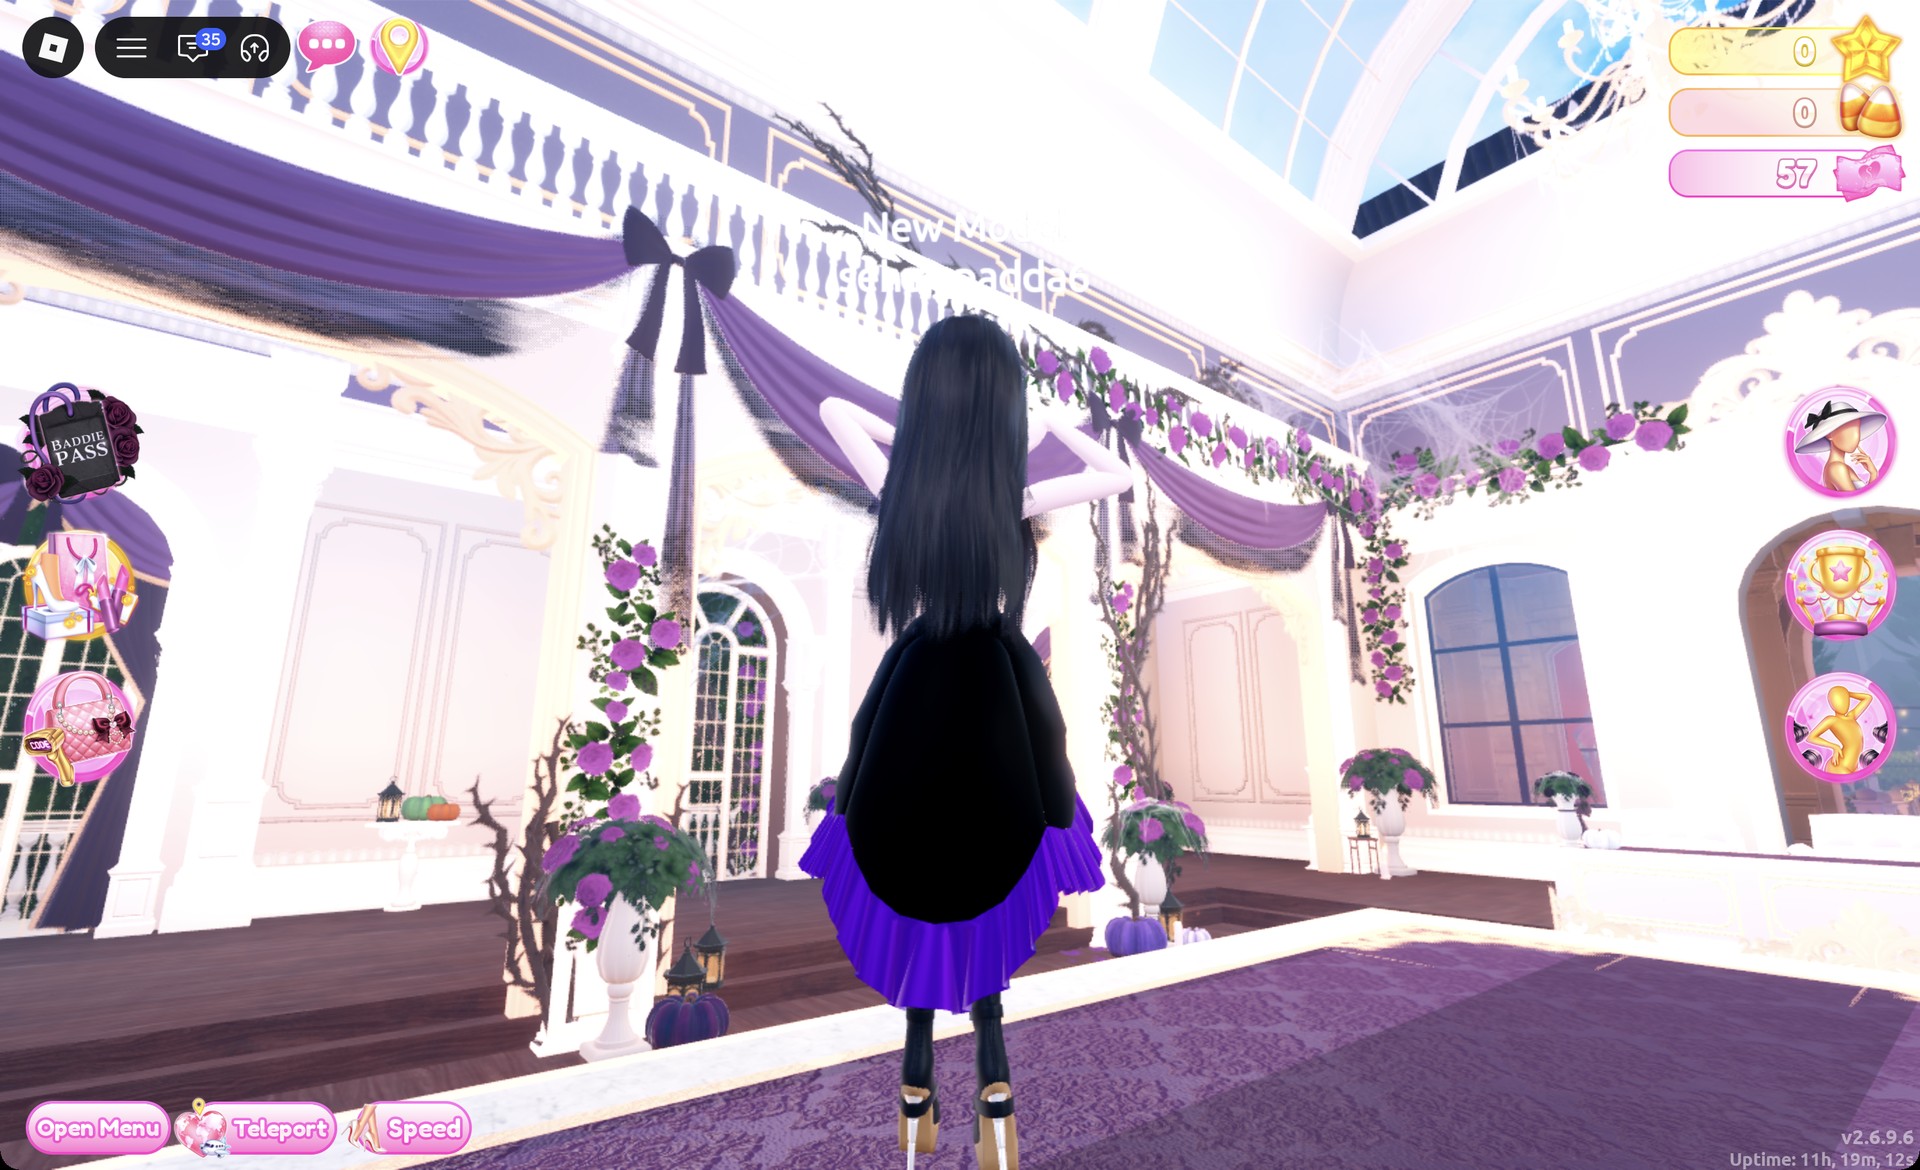
Black and purple gothic gown back view in Dress To Impress
From behind: the black skirt with its purple hem.

The Crystal pose, with both hands raised by the head, fits the gown.
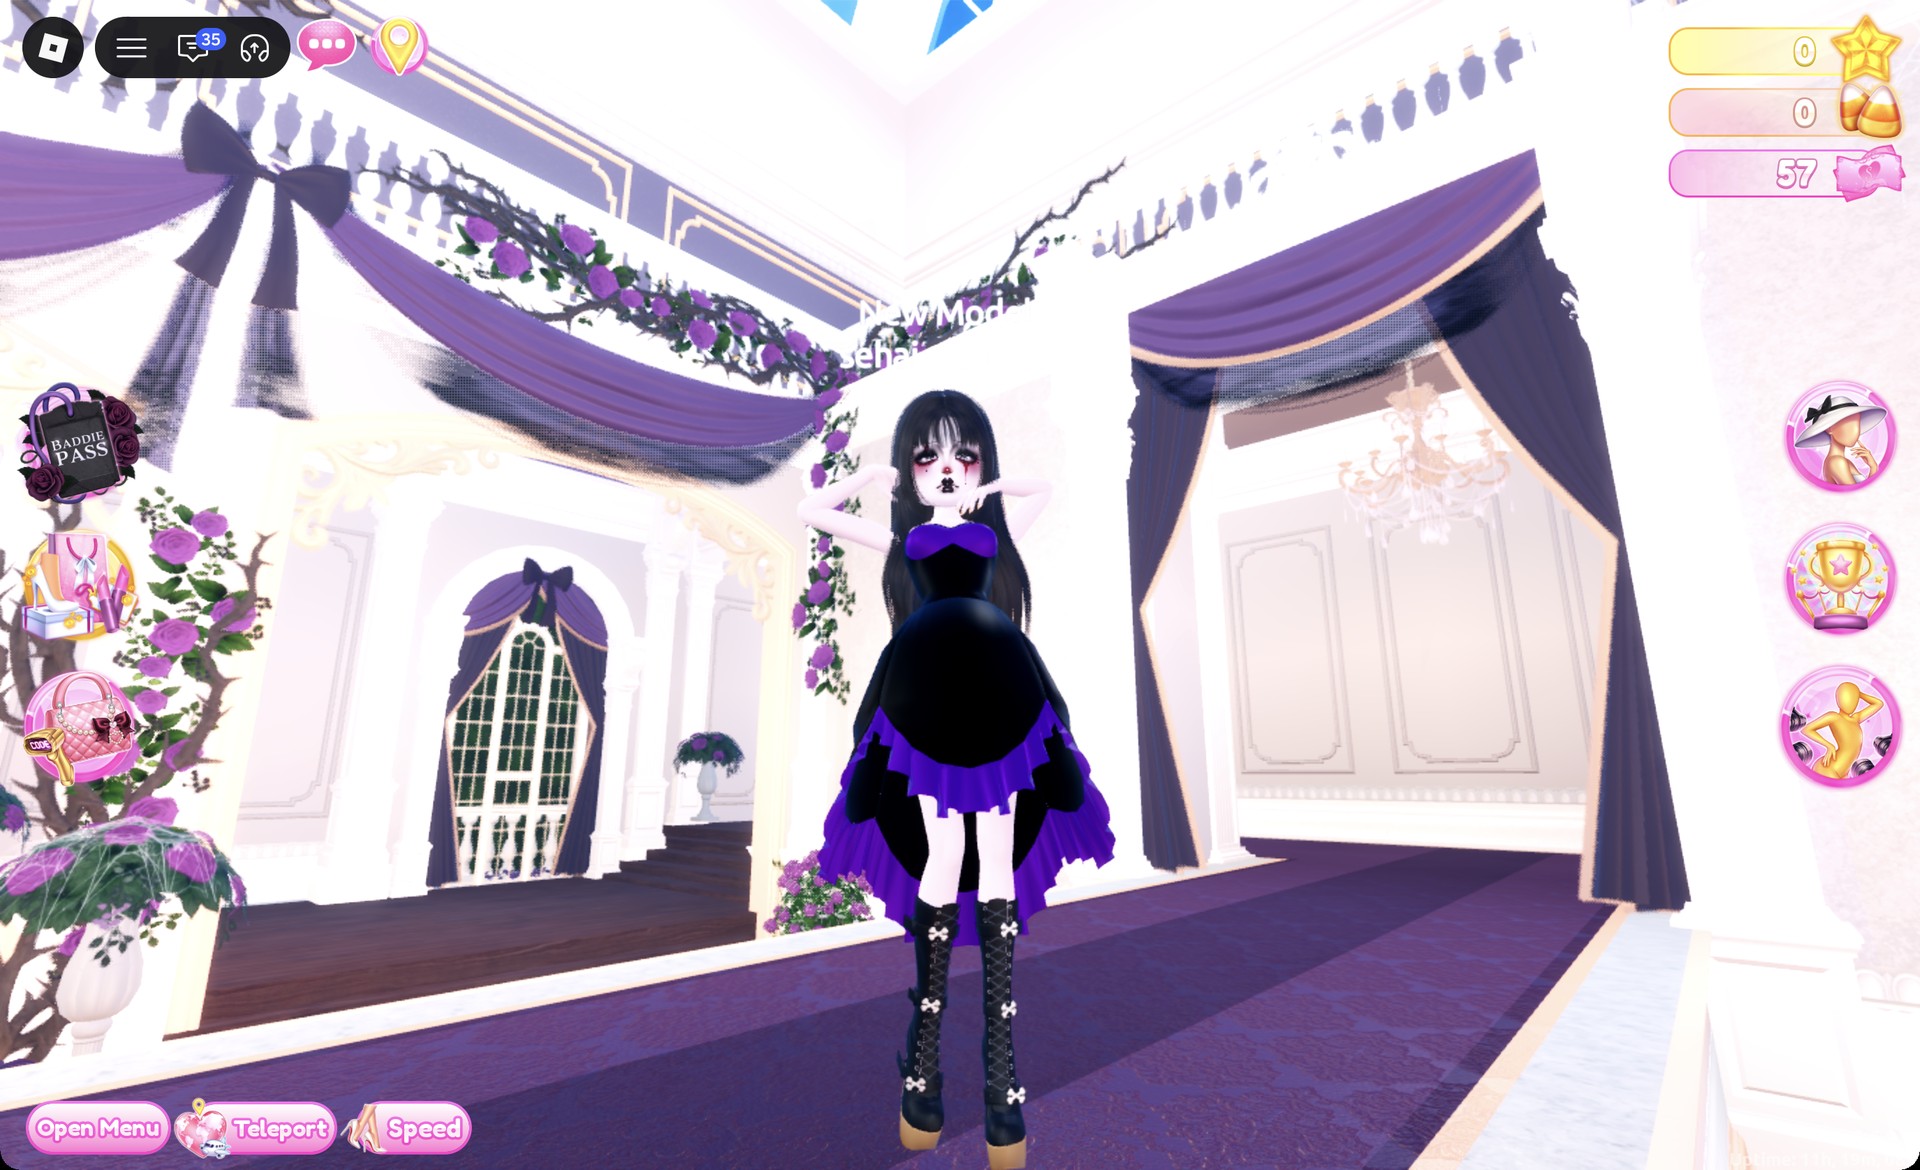
Black and purple Visual Kei gown in the Crystal pose
The gothic gown in the Crystal pose.

Visual Kei in Dress To Impress: FAQ

How do I do Visual Kei in Dress To Impress without VIP?

The free Dressing Room and Lana’s Salon supply every piece for both outfits. No VIP gear is required, and no Robux is needed for either outfit.

What colors are Visual Kei?

Black is the base, with one strong accent such as red or purple. Pale skin and dark eye makeup finish the look.

What hair works for Visual Kei in Dress To Impress?

The choppy shag cut in the Masculine tab (third row, right card) recolored red and black, or the long black hair with full bangs in the Wavy tab (third row, right card). Remove the old hairstyle first with the X on its card.

Which face card looks Visual Kei?

The dark clown-style card, the middle card in the first row of the Feminine tab at the vanity. It has black-rimmed eyes, a red tear line and black heart lips.

How do I get a lace pattern in Dress To Impress?

Open the Patterns tab on the color panel and pick the first tile in the third row. On the dark pleated skirt it reads as purple and black lace.


More dark and edgy theme ideas

These guides reuse some of the same pieces and colors:

Every theme built so far is listed in the Dress To Impress themes guide, and every pose name is in the Dress To Impress poses list.