
Microsoft Teams needs no introduction at this point. If it were 2019, sure. But this has been the year of video conferencing and Workstream Collaboration apps. And Microsoft Teams has safely established itself as one of the MVPs in the WSC ecosystem.
That’s because it’s not just a video conference app. There’s so much more to Microsoft Teams. And schools and offices love it for remote work for exactly this reason. It is the app to collaborate with your teammates in a most efficient manner. But the sheer volume of features in Microsoft Teams can also feel overwhelming sometimes. If only there was something that could help you could navigate it expeditiously.
Whether you’re an age-old or a relatively new Microsoft Teams user, it doesn’t matter; everyone loves a little cheat sheet to boost their productivity, come across as a Pro, and maybe even show-off their proficiency skills. That’s exactly what you can do with this list of tips and tricks for just about everything you can do in Microsoft Teams.
Tips to Increase Productivity
Getting more work done in less time, who doesn’t want that? Certainly not you or your employers! These tips and tricks are sure to improve your focus and take your productivity levels through the roof.
Stay Ahead of your Tasks
Tasks app in Microsoft Teams was the most anticipated app for zealots, but that doesn’t mean that everyone got the memo. If you were on the team that somehow did miss it, you need to get on-board this train right now, because trust us, you’re missing out.
Tasks by Planner and To-Do combines both the functionality of both Microsoft apps – Planner and To-Do – right in Microsoft Teams. So you can track your progress and manage your tasks without having to switch between multiple apps. So, no more choosing between your sanity or schedule.
The Tasks app combines your personal tasks from To-Do and shared tasks from the Planner app right in Microsoft Teams. You can add it as a personal app or even as a tab to collaboratively manage team tasks. The Tasks app is available to everyone with a Microsoft 365 subscription.
👉Master how to use Tasks by Planner and To-Do in Microsoft Teams.
Handle Information like a Wizard with Lists
If you know the right apps in Microsoft Teams, no one can stop you. Microsoft Lists is one such app you need to take advantage of. With Lists, you can keep track of any information, whether personal or collaborative. The Lists app can be helpful if your team has info to track, work to organize, or workflows to manage.
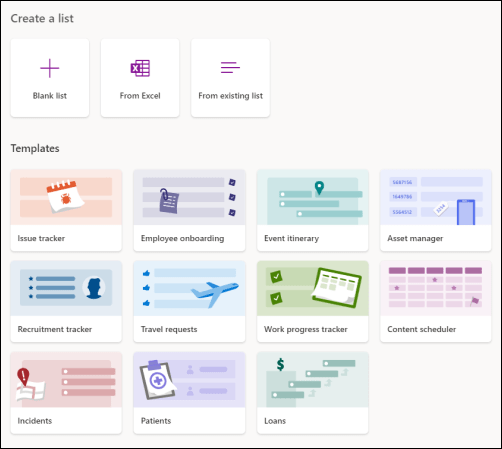
And to speed things up, there are industry and case-specific templates that make it even easier to create these lists. This evolution of SharePoint lists can help you track just about everything – issues, assets, routines, events, inventory, or contacts. To take things up a notch, you can even have conditional formatting so that the objects in your lists automatically appear or disappear when certain conditions are met. Using this app is bound to increase your productivity exponentially.
👉Learn How to Create and Use Lists in Microsoft Teams like a Pro.
Forward Emails Straight to your Channels
Email is one of the most used forms of communication in the corporate world. The amount of correspondence that takes place over emails is massive. But it also means that when your organization uses Microsoft Teams, you’re sometimes caught between two different mediums. And copying all content from your emails to post it to a channel in Microsoft Teams can be so tiring.
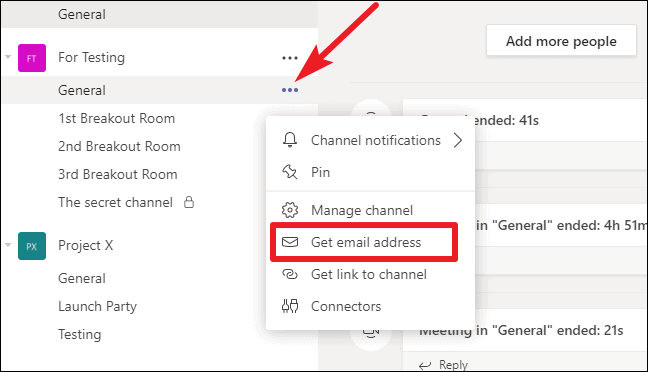
That’s because you’re doing it wrong! Do you know that every channel in Microsoft Teams has a unique email address that you can forward emails to directly? Yes, you heard it right. Any emails you send to that address will appear as posts directly in the channel. How efficient is that!
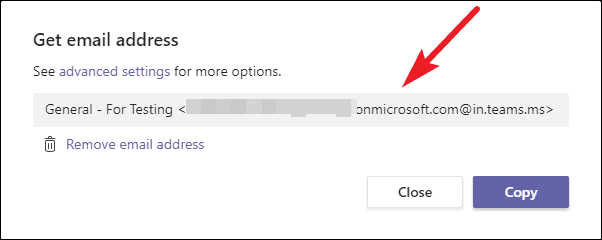
To get the email address for a channel, go to the ‘More Options’ icon (three-dot menu). Then, click on ‘Get email address’ from the menu.
The email address will be generated. Copy it to use it.
Use the Command Bar
Command Bar in Microsoft Teams has to be the most underused feature. But it has the potential to become your most used feature if you know how to use it right. The Command Bar can speed things up immensely.
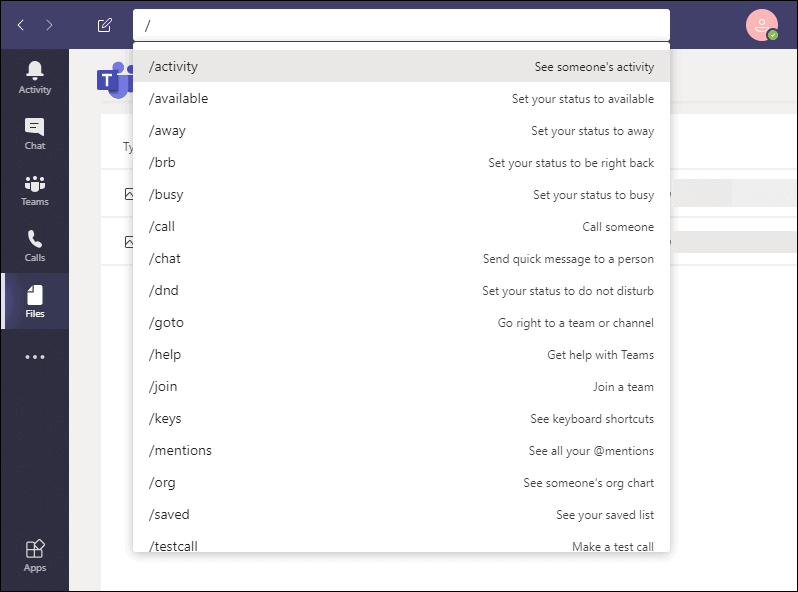
Want to find an old message, start up a chat or a call, go to a channel, see your files? Use the Command Bar to do all this and much more. You don’t even need to remember all the commands to use them. Microsoft Teams provides it to you. All you need to remember if the task you need to do has a command for it so you can do it quickly.
View the detailed guide on how to use Commands in Microsoft Teams to increase your productivity and save time.👆
Breakdown Language Barriers
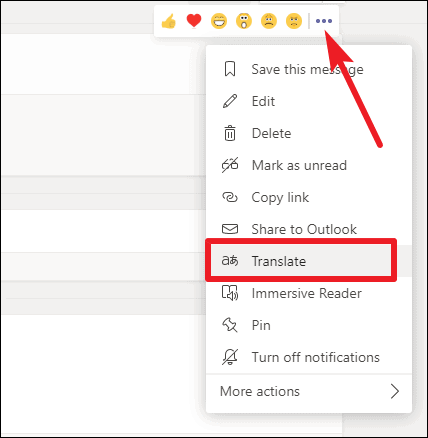
Today, global teams are not a novelty. Instead, more and more teams are scattered throughout the globe in this era. And that calls for a need to be able to understand each other’s language to communicate effectively. With Microsoft Teams, you don’t have to pop over to Google Translate and copy/ paste any messages. Microsoft Teams offers an inherent translator for this exact purpose.
Click the ‘More Options’ icon (three-dot menu) on the message you want to translate. You’ll see the option ‘Translate’ on the menu; click it for a quick translation of the message into your default language.
Bookmark Messages
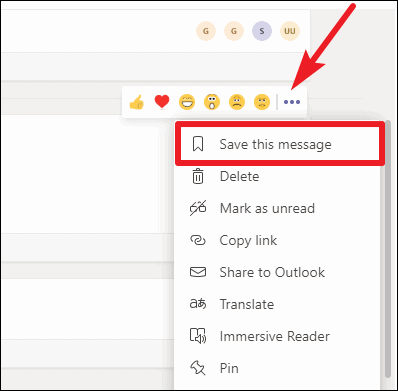
This might seem like a small functionality at first glance, but it can save you so much time. Instead of trying to find old messages using the search bar, you can save any messages and access them from the ‘Saved’ section.
Go to the message and click the ‘More Options’ icon (three-dot menu). Then, click the ‘Save Message’ option.
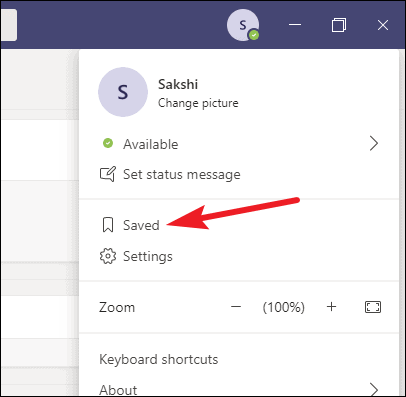
To access your saved message, you can either use the command /saved from the command bar or click your Profile picture on the taskbar and select ‘Saved’ from the menu that appears.
Use Keyboard Shortcuts
If you’re looking to increase your productivity, don’t shy away from using keyboard shortcuts. Keyboard shortcuts can save you so much time, and yet not many people take full advantage of them. Don’t be one of those people. Learn the keyboard shortcuts for the tasks you perform the most and get things done quickly.
🤸♀️Hop over here to find the list of all keyboard shortcuts in Microsoft Teams for Windows, Web, and Mac.
Tips for Better Meetings
Apart from using Microsoft Teams to collaborate with teammates, another thing people use the app most is to hold meetings. And you certainly want to be a Pro at that.
Use Together Mode for an Immersive Meeting Experience
When it feels difficult to engage in a meeting, as you might often find to be the case: online meetings are, after all, not the same as real-world meetings. Microsoft’s Together Mode breaks down barriers and virtual walls, making you feel like you’re in a shared space together.
When there are 5 or more people in the meeting, you can turn on the Together Mode. Go to the meeting toolbar, and click the ‘More options’ icon (three-dot menu). Then, select ‘Together Mode’ from the menu to enable it.
Currently, you can have Together Mode in the auditorium view that makes you feel as if you’re all sitting together in a shared auditorium space.
👉Learn more about Together Mode in Microsoft Teams and how to enable and use it.
Have Group Discussions with Breakout Rooms
Whether you’re teaching a class or hosting office meetings, group discussions are a huge part of the process. And with breakout rooms in Microsoft Teams, you can easily facilitate meeting participants into different groups.
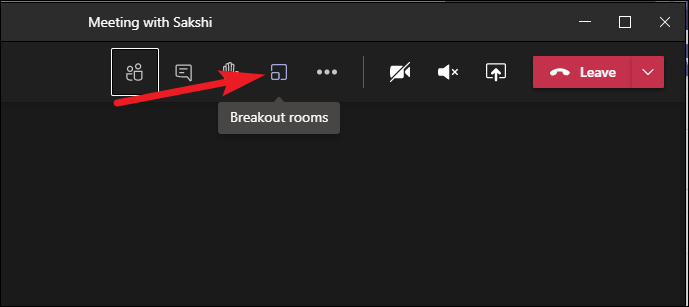
And now, you don’t have to create Breakout Rooms manually in Microsoft Teams anymore. Microsoft has added inherent support for this much-coveted feature in meetings. Meeting Hosts can divide participants into breakout rooms (up to 50) either randomly or manually decide who goes where. Breakout Room functionality is available to both paid and free users.
To create breakout rooms, go to the meeting toolbar at the top of the screen and click the ‘Breakout Room’ icon. Then, divide the participants into the number of rooms you want to.
Use Meeting Notes
This is a very underrated feature that doesn’t get the attention and appreciation it deserves. Meeting Notes in Microsoft Teams can make your meetings more seamless. Whether you want to capture all the important details discussed in the meeting or create an agenda for the things that need to be discussed, Meeting Notes should be your go-to feature.
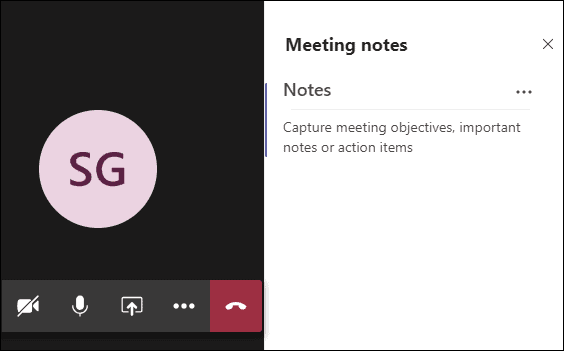
And most importantly, they are available not only during the meeting but also after and before (for scheduled meetings). Trust us, you need to start using them now if you haven’t before.
Hop over to acquaint yourself with all the details about using Meeting Notes in Microsoft Teams.🏃♀️
Preserve the Decorum in a Meeting and Raise Hands instead
Maintaining the decorum in Virtual Meetings can get really hard. And as a result, it has become a meeting etiquette almost everywhere to keep your microphone on mute. But what about when you do need to speak? Unmuting your microphone without being asked to still disrupts the meeting.
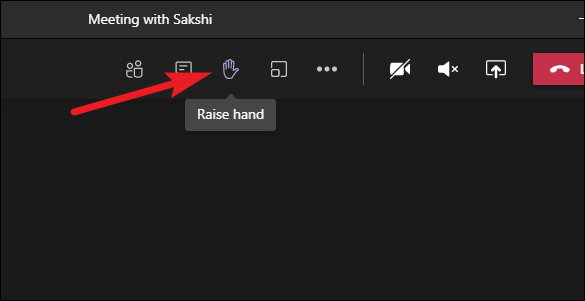
In Microsoft Teams, it doesn’t have to be this uncivil. Use the ‘Raise Hand’ button instead whenever you need to speak something. It indicates to the speaker that you have something on your mind, and they can then ask you to unmute and speak in a way that doesn’t create an interruption. It’s better than actually raising your hand as there is no guarantee that the speaker will happen to look at your video feed but there is a guarantee that they will look at the ‘Raised Hand’ in the participant panel.
Go to the meeting toolbar and click the ‘Raise Hand’ icon to raise your hand.
Transcribe your Meetings
In case you have ever wanted a transcription of your entire meeting but thought it impossible, you couldn’t be more wrong. Microsoft Teams has a rather quick way to get meeting transcriptions, but it only works if your default language is English and when English was spoken in the meeting.
Also, your organization’s policy should allow you to have meeting transcriptions. There’s another catch involved too – transcription is only available for meetings you’ve recorded. You can even edit these transcripts before sharing them.
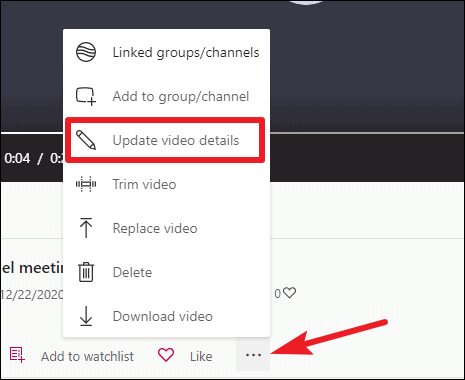
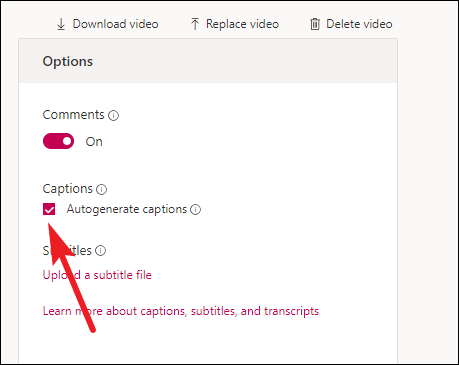
To get a transcription, go to Microsoft Stream to view the recording. Then, click the three-dot menu icon, and select ‘Update Video details’ from the options.
Select language from the ‘Video Language’ drop-down menu.
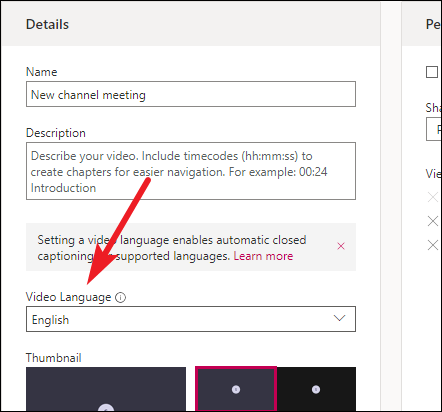
Now, click the checkbox for ‘Auto-generate captions’ to select it and click the ‘Apply’ button to get a transcription.
Have Private Unscheduled Meetings
Unscheduled meetings don’t always have to be in a channel. Or you don’t always have to schedule a meeting if you want to keep it private. You can have impromptu meetings that are completely private and not open to everyone in the channel. And no, we’re not talking about 1:1 calls or group calls from group chats. These private meetings are just like other meetings, where you can have guests from outside your organization, unlike 1:1 or group calls.
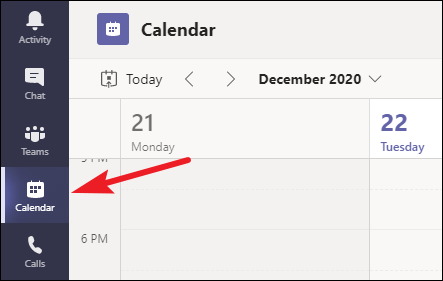
From the navigation menu, go to ‘Calendar’ (for Microsoft 365 users) or ‘Meetings’ (for Microsoft Teams Free users).
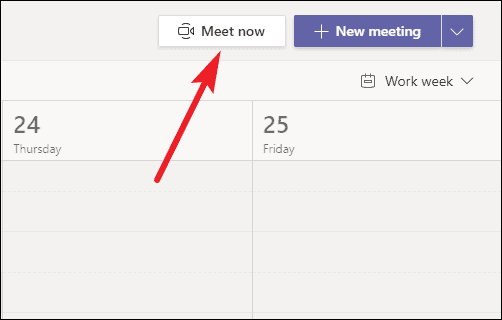
Then, click the ‘Meet Now’ option in the upper right corner. These meetings do not happen in a channel, and your team members cannot know there’s a meeting ongoing, let alone join it without a meeting invite.
Tips for More Engagement
Microsoft Teams is a Workstream Collaboration app. And to collaborate better with your teammates, you need to engage their attention. Use these tips to make your messages and other interaction more engaging, resulting in an overall increase in productivity.
Conduct Polls to Increase Engagement
Polls are a proven way to create better engagement, but seeing as there is no direct feature to create polls in Microsoft Teams, many people think it’s not possible. Well, half the beauty of Microsoft Teams lies in the hundreds of integrated apps it offers!
And two such integrated apps – Forms and Polly – can help you conduct polls in your channels. The only drawback you might find is that you can’t conduct polls in a meeting, but once you get to using these apps, you’ll find it doesn’t matter that much anyway. You can even have collaborative polls where other team members can also contribute to the questions of the poll.
👉Here’s a complete guide to creating polls in Microsoft Teams.
Create Rich Messages using the Formatting Options
Whether it’s about engaging in private chats or channel communications, format your messages to save everyone from the plight of reading plain, boring messages. There are enough of those in the world already. Click on the ‘Format’ icon (A with a paintbrush) below the message box to open the formatting options and italicize, bold, underline, and do much more with your messages.
Use Subjects in Channel Messages
Messages are one of the most important forms of communication in Microsoft Teams. More information is shared through messages than in calls and meetings these days. So, it’s important to invest time in the right ones and make sure that they don’t get lost in the sea of unimportant messages out there.
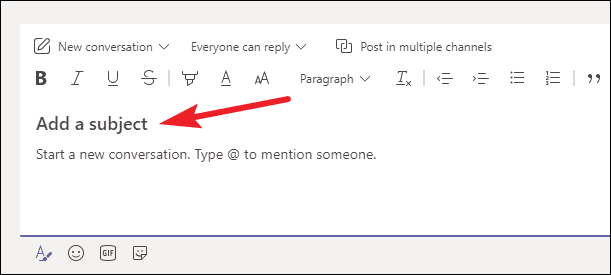
Subject lines are the quickest way to add a little zest to them and make sure they catch the eye of the right person. You can add a subject from the formatting options for messages you want to post in a channel. Obviously, personal chat messages don’t really need Subjects, so you can’t add one to them.
Tips for Better Organization
Keeping things organized without losing your sanity can seem a bit daunting at times. And all of us have wished for things to be easier. Better organization also leads to more productivity. With these tips, you can take your organizational skills up a notch getting a better handle at things and impressing everyone while you’re at it.
Drag and Drop Your Teams to Reorder
Initially, all your teams are ordered in a haphazard manner in the order they were created. In a long list of teams, it can get overwhelming to get to the important teams. But there’s a little known fact in Microsoft Teams that the pros use to get their teams in order and save time.
You can drag-and-drop your teams to arrange them in any order you like. So you can have your most important teams on the top making them quicker to access.
Pin Channels and Hide Teams
Sometimes arranging your teams is just not enough. You might have arranged your important teams at the top, but you keep getting added to new teams, and there goes your whole arrangement to the wolves. Well, it doesn’t have to be this way. There are further ways to organize your teams that’ll save you the headache.
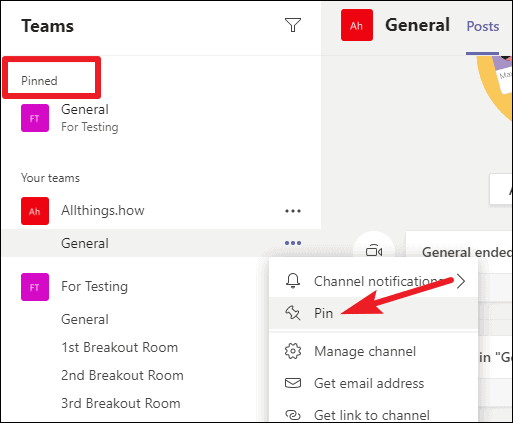
You can pin channels so that they’ll always appear at the top in a separate section. Go to the ‘More Options’ icon (three-dot menu) at the right of the channel and click it. Then, select ‘Pin’ from the menu.
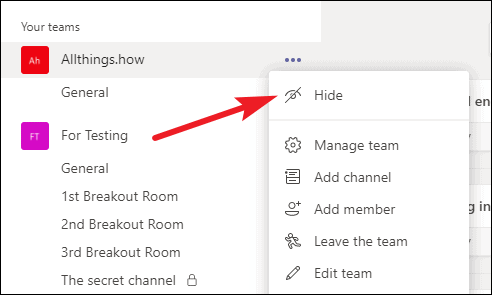
You can also hide any unnecessary teams to declutter your Teams menu. Click the ‘More Options’ icon on the right of the team name and click the option ‘Hide’ from the menu. All your hidden teams can be accessed at any time from the bottom of the navigation menu for teams.
Tips for Smoother Management
Whether you’re the team head or just responsible for hosting a meeting, management doesn’t have to be a pain in the neck. But most of the time, it is. Well, consider these tips a remedy.
Assign Roles in a Meeting
When there are multiple attendees in the meeting, it becomes paramount to be able to control what each attendee can do. For instance, you don’t always want everyone to be able to present and share content in a meeting. There are also times when you want to make someone else a co-host who can do all the things you can do, like admit people from the lobby, and mute other participants, etc.
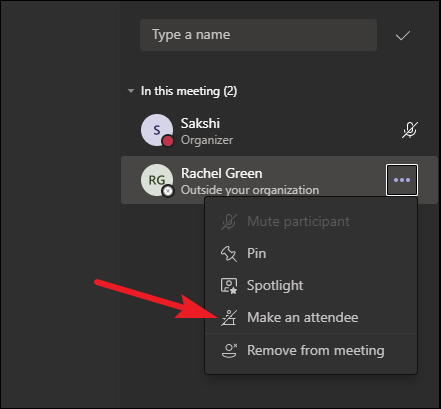
You can now assign roles to people in a Microsoft Teams meeting. People can either be presenters or attendees; presenters have complete control and attendees only get restricted access.
You can assign meeting roles either before a meeting (for scheduled meetings) or during. To assign roles during a meeting, go to the participant panel, and click the ‘More Options’ icon on the right of the participant’s name to access the three-dot menu. Then, click the ‘Make a presenter’ or ‘Make an attendee’ option accordingly.
Save Time and Add Members in Bulk
How many times have you wished while creating your teams that there was an option to add people in bulk? Those of you who have had to create teams with more than 10 people with no Office groups or previous teams to use as a starting point know what a headache it can be.
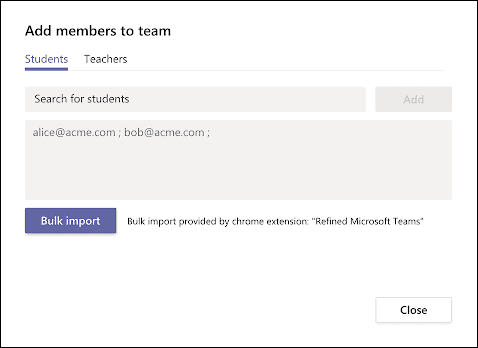
Well, if you use the Microsoft Teams web app, you can skip this pain and add members in bulk. The only catch, it requires the use of a Chrome extension. You also get the added bonus of viewing your teams in a 2-column display with this extension. So, you can view more teams while scrolling less.
👉Learn how to use the ‘Refined Microsoft Teams’ Chrome extension to add members in bulk.
Tips for an Overall Better Experience
These few tips might defy categorization, nonetheless, you need them in your life to make your experience on Microsoft Teams infinitely better.
Don’t Ignore Your Status
Status in Microsoft Teams can be a powerful tool at your disposal. With your status reflecting your true availability state, a lot of miscommunication can be avoided which can arise from not working in the same physical space. So, always use it to let other members of your team know whether you’re available, away, busy, or in a call so they can know what to expect while contacting you.
You can use both ‘User Presence’ and ‘Custom’ statuses to make the most out of this tool. Although most of the time, Microsoft Teams configures your status automatically based on your state (which has known to create trouble for many), you can set your status yourself too. Go to your profile photo on the taskbar, and then select a status from the menu to set it.

Hot Tip: You can even set your status as ‘Out of Office’ for customized periods of time, whether you’re just stepping out for lunch or going on a vacation. Learn how to set this new status option that’s not otherwise available in Microsoft Teams.👆
Escape the trouble your Status can create
Microsoft Teams changes your status automatically and generally it’s a good thing. But for many people who suffer micromanaging at work, it ends up becoming a nuisance when Teams automatically changes their status to ‘Away’ from ‘Available’ within five minutes of inactivity.
If you want to avoid the situation where your supervisor ends up thinking that you’re hardly working instead of working hard, use the Mouse Jiggler app to keep your troubles away by keeping your status the opposite.
Send Urgent Messages
Want to ensure the recipient sees your message? Mark it as urgent, and they’ll be notified every two minutes for twenty minutes straight. That’s ten notifications, and there’s no way they’ll miss that. Now, if that seems like a little bit too much, but the message is still important than a standard message, you can mark it as just important. The recipient won’t be notified as persistently, but they’ll still know that the message is important.
Click the ‘exclamation mark’ below the message box in the personal chat and select the priority from the options before sending the message.
Customize your notifications for a more personalized experience
By default, Microsoft Teams delivers notifications for all new messages, reactions, and mentions. But Teams offers extensive customization options, so you can only get notifications for stuff you wish to be notified for.
Open settings and go to ‘Notifications’ from the navigation menu on the left.
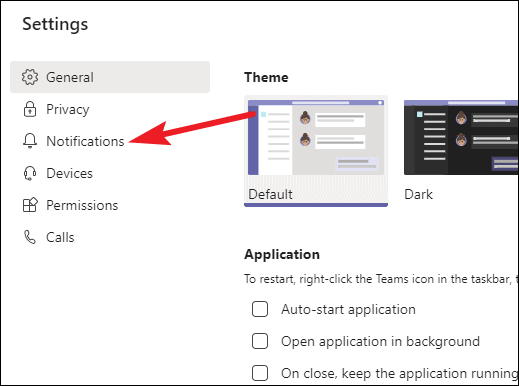
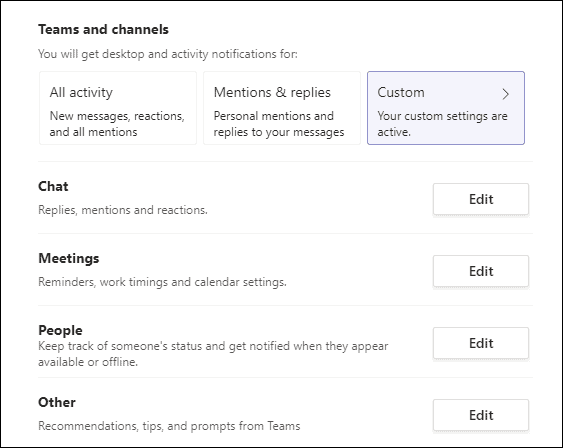
Here, you can modify your notifications to suit your needs for just about everything: Teams and Channels, Chats, Meetings, People, and more.
Use Dark Mode when pulling an All-Nighter
Whether you’re just going to be pulling an all-nighter this once, or you need to work late nights regularly, don’t let it affect your eyes or sleeping patterns. Use the dark mode in Microsoft Teams to spare your eyes from the blinding light of your laptop at night.
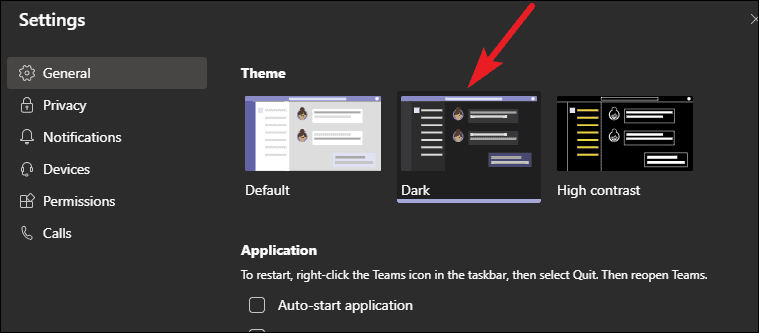
Go to settings from the Microsoft Teams desktop app and change the theme from ‘Default’ to ‘Dark’.
Microsoft Teams has a lot of things to discover that it can get overwhelming at times. These tips can help you take things one at a time, providing a better handle on things. In no time, you’ll be proficient with the ways of Microsoft Teams, not getting lost in the labyrinth.